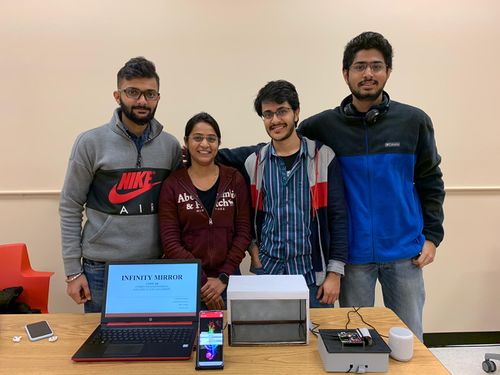
F19: Infinity Mirror
Contents
- 1 Grading Criteria
- 2 Project Title
- 3 Abstract
- 4 Objectives & Introduction
- 5 Team Members & Technical Responsibilities
- 6 Administrative Responsibilities
- 7 Team Deliverables Schedule
- 8 Bill of Materials (General Parts)
- 9 Printed Circuit Board
- 10 Design & Implementation
- 11 Testing & Technical Challenges
- 12 Conclusion
- 13 References
Grading Criteria
- How well is Software & Hardware Design described?
- How well can this report be used to reproduce this project?
- Code Quality
- Overall Report Quality:
- Software Block Diagrams
- Hardware Block Diagrams
- Schematic Quality
- Quality of technical challenges and solutions adopted.
Project Title
Abstract
This section should be a couple lines to describe what your project does.
Objectives & Introduction
Show list of your objectives. This section includes the high level details of your project. You can write about the various sensors or peripherals you used to get your project completed.
Team Members & Technical Responsibilities
- Git Project Link: [1]
- Audio Encoder/Decoder
- ESP8266 Communication Bridge
- Interfacing of LED Matrix
- Interfacing of Gesture Sensors & SD Card
- Android & Web Application
- LCD Interfacing & UI Designing
- Hardware PCB Integration
- Testing
Administrative Responsibilities
| Administrative Roles | ||||
|---|---|---|---|---|
|
Aakash Chitroda | |||
|
Niket Naidu | |||
|
Vidushi Jain | |||
|
Vidushi Jain | |||
|
Ganesh Ram | |||
Team Deliverables Schedule
| WEEK |
START DATE |
END DATE |
TASK DETAILS |
STATUS |
|---|---|---|---|---|
| 1 | 15 Oct 2019 | 21 Oct 2019 |
|
In Progress Completed In Progress Completed |
| 2 | 22 Oct 2019 | 28 Oct 2019 |
|
In Progress Completed In Progress |
| 3 | Nov 2019 | Nov 2019 |
|
|
| 4 | Nov 2019 | Nov 2019 |
|
|
| 5 | Nov 2019 | Nov 2019 |
|
|
| 6 | Nov 2019 | Nov 2019 |
|
|
| 8 | Dec 2019 | Dec 2019 |
|
|
| 9 | Dec 2019 | Dec 2019 |
|
|
| 10 | Dec 2019 | Dec 2019 |
|
|
| 11 | 18 Dec 2019 |
|
Bill of Materials (General Parts)
| PART NAME |
PART MODEL & SOURCE |
QUANTITY |
COST PER UNIT (USD) |
|---|---|---|---|
|
|
|
|
|
|
| |
|
|
| |
|
|
| |
|
|
| |
|
|
|
|
|
|
|
|
|
|
|
Printed Circuit Board
Design & Implementation
The design section can go over your hardware and software design. Organize this section using sub-sections that go over your design and implementation.
Hardware Design
Discuss your hardware design here. Show detailed schematics, and the interface here.
Hardware Interface
In this section, you can describe how your hardware communicates, such as which BUSes used. You can discuss your driver implementation here, such that the Software Design section is isolated to talk about high level workings rather than inner working of your project.
Software Design
Show your software design. For example, if you are designing an MP3 Player, show the tasks that you are using, and what they are doing at a high level. Do not show the details of the code. For example, do not show exact code, but you may show psuedocode and fragments of code. Keep in mind that you are showing DESIGN of your software, not the inner workings of it.
Implementation
This section includes implementation, but again, not the details, just the high level. For example, you can list the steps it takes to communicate over a sensor, or the steps needed to write a page of memory onto SPI Flash. You can include sub-sections for each of your component implementation.
Testing & Technical Challenges
Describe the challenges of your project. What advise would you give yourself or someone else if your project can be started from scratch again? Make a smooth transition to testing section and described what it took to test your project.
Include sub-sections that list out a problem and solution, such as:
Bug/issue name
Discuss the issue and resolution.
Conclusion
Conclude your project here. You can recap your testing and problems. You should address the "so what" part here to indicate what you ultimately learnt from this project. How has this project increased your knowledge?
Project Video
Upload a video of your project and post the link here.
Project Source Code
References
Acknowledgement
Any acknowledgement that you may wish to provide can be included here.
References Used
List any references used in project.
Appendix
You can list the references you used.
