Difference between revisions of "S13: 2D Plotter"
Matthias s13 (talk | contribs) (→Objectives & Introduction) |
Matthias s13 (talk | contribs) (→Project Title) |
||
| Line 11: | Line 11: | ||
</font> | </font> | ||
| − | == | + | == 2D Plotter == |
<h2 style="background-color:tan; font-family:arial; font-size:36px; text-align:center; color:grey;"><b><i>2D Plotter</i></b><br /><br /> | <h2 style="background-color:tan; font-family:arial; font-size:36px; text-align:center; color:grey;"><b><i>2D Plotter</i></b><br /><br /> | ||
Revision as of 00:26, 18 May 2013
Contents
Grading Criteria
- How well is Software & Hardware Design described?
- How well can this report be used to reproduce this project?
- Code Quality
- Overall Report Quality:
- Software Block Diagrams
- Hardware Block Diagrams
- Schematic Quality
- Quality of technical challenges and solutions adopted.
2D Plotter
2D Plotter

Abstract
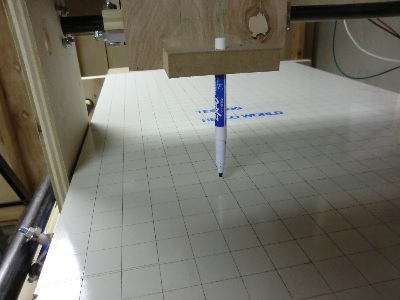
The 2D Plotter is a printing device. The printing device draws in two dimensions in a limited square space. Our project intends to draw a square from a computer-aided design file. Although more is possible, the 2D plotter will only draw a square.
Objectives & Introduction
The purpose is to build a 2D Plotter that would draw a simple design that would lay the ground work for a future 3D printing device that would have extended functionality to create more complex designs.
The Objectives of this project are as follows:
1. To have the SJSUONE board run the stepper-motors through GPIOs to create movement in the x and y direction.
2. To build a wooden enclosing to house the SJSUONE board and stepper-motors.
3. To extend the wooden enclosing to include a platform for printing, which would include rails in the x and y direction, a print top for printing, wood to move the pen and the attached pen itself.
4. Program the SJSUONE board to read and write a simple Computer-Aided-Design file from an SD card, issue some error or initialization signals and output the design on the print top.
Team Members & Responsibilities
- Matthias Reimann & William Nguyen
- Hardware Development
- Sergey Tsybanov & William Nguyen
- Driver Development
- Matthias Reimann & Sergey Tsybanov
- FreeRTOS Software Design
Schedule
| Week | Planned Tasks | Actual Tasks |
|---|---|---|
| 1 |
|
|
| 2 |
|
|
| 3 |
|
|
| 4 |
|
|
| 5 |
|
|
Parts List & Cost
| Parts | Cost |
|---|---|
| 2012 SJ One Board | $65 |
| 3 x Nema 17 Stepper Motors | $33.20 |
| 4 x Steel shapes, round | $14.76 |
| 3 x Stepper Motor Controller | $12.39 |
| Power supply | $10 |
| New wood (various sizes) | $8.94 |
| Breadboard | $7 |
| 6 x Hollow metal tubes | $4.74 |
| 4 to 16 decoder | $3 |
| Old wood | $0 |
| Screws | $0 |
| Old printer gears | $0 |
| Old printer belts | $0 |
| Wires | $0 |
| Glue | $0 |
| Total: | $159.13 |
Design & Implementation
The design section can go over your hardware and software design. Organize this section using sub-sections that go over your design and implementation.
Hardware Design
Discuss your hardware design here. Show detailed schematics, and the interface here.
Hardware Interface
In this section, you can describe how your hardware communicates, such as which BUSes used. You can discuss your driver implementation here, such that the Software Design section is isolated to talk about high level workings rather than inner working of your project.
Software Design
Show your software design. For example, if you are designing an MP3 Player, show the tasks that you are using, and what they are doing at a high level. Do not show the details of the code. For example, do not show exact code, but you may show psuedocode and fragments of code. Keep in mind that you are showing DESIGN of your software, not the inner workings of it.
Implementation
This section includes implementation, but again, not the details, just the high level. For example, you can list the steps it takes to communicate over a sensor, or the steps needed to write a page of memory onto SPI Flash. You can include sub-sections for each of your component implementation.
Testing & Technical Challenges
Describe the challenges of your project. What advise would you give yourself or someone else if your project can be started from scratch again? Make a smooth transition to testing section and described what it took to test your project.
Include sub-sections that list out a problem and solution, such as:
Wifi Connection Issues
Many wifi connection issues were encountered. To solve this problem, a dedicated task was created to re-connect to wifi if the connection was ever lost.
Conclusion
Conclude your project here. You can recap your testing and problems. You should address the "so what" part here to indicate what you ultimately learnt from this project. How has this project increased your knowledge?
Project Video
Upload a video of your project and post the link here.
Project Source Code
Send me your zipped source code and I will upload this to SourceForge and link it for you.
References
Acknowledgement
None. Preet Kang and Dr. Ozemek did not really help us. They just graded us. If only they spent more time helping us rather than grading us. Just saying.
References Used
3D printing. (2013). Retrieved from http://en.wikipedia.org/wiki/3D_printing
Benchoff, B. (2012). Print huge stuff with the Makerbot Replicator. Retrieved from http://hackaday.com/2012/01/09/print-huge-stuff-with-the-makerbot-replicator/
Chace, Z. (2013). 3-D Printing Is (Kind Of) A Big Deal. Retrieved from http://www.npr.org/blogs/money/2013/01/04/168627298/3-d-printing-is-kind-of-a-big-deal
Deckard, C. (1986). Method and apparatus for producing parts by selective sintering. United States. 4863538. Austin, Texas: Board of Regents, The University of Texas System
Evans, Brian. (2012). The Sciene and Art of 3D Printing. New York, NY: Springer Science + Business Media.
Eveleth, R. (2012). Our three-dimensional future: how 3D printing will shape the global economy. Retrieved from http://www.smartplanet.com/blog/report/our-three-dimensional-future-how-3d-printing-will-shape-the-global-economy/559
Kelly, James F. and Hood-Daniel, P. (2011). Printing in Plastic: Build Your Own 3D Printer. New York, NY: Springer Science + Business Media.
Hartmann, K. et al. (1994). Robot-Assisted Shape Deposition Manufacturing. San Diego, CA: Proceedings of the 1994 IEEE International Conference on Robotics and Automation
Hotz, R. (2012). Printing Evolves: An Inkjet for Living Tissue. Retrieved from http://online.wsj.com/article/SB10000872396390443816804578002101200151098.html
RepRap. (2013). Retrieved from http://www.reprap.org/wiki/Main_Page
RepRap Options. (2013). Retrieved from http://reprap.org/wiki/RepRap_Options
Appendix
You can list the references you used.