Difference between revisions of "F12: Evil Watchdog"
Waymond f12 (talk | contribs) (→Schedule) |
Waymond f12 (talk | contribs) (→References) |
||
| Line 245: | Line 245: | ||
==References== | ==References== | ||
| + | === Thanks To === | ||
| + | * Dr. Haluk Özemek | ||
| + | * Preet Kang, TA | ||
Revision as of 08:35, 30 November 2012
Contents
Abstract
The Evil Watchdog takes the responsibilities of a pet guarding a house. It will roam around a predefined environment, avoid obstacles, and sound an alarm whenever foreign motion is detected.
Introduction
The objective of this project is to design a vehicle to imitate a guard dog. The following items will be incorporated to accomplish this goal :
- Motor driven chassis
- Vehicle will move in a random path detecting motion
- Vehicle will sound an alarm when motion is detected
Technology used
- Motion sensor
- Distance sensor
Team Members and Roles & Responsibilities
- Waymond Chen: Front motor control and distance sensor programming
- Hung Vuong: Distance and motion sensor programming
- Erik Montoya: Backside motor control and programming
Schedule
| Starting | Ending | Planned Activities | Actual |
|---|---|---|---|
| Oct 26, 2012 | Nov 1, 2012 |
|
|
| Nov 2, 2012 | Nov 8, 2012 |
|
|
| Nov 9, 2012 | Nov 15, 2012 |
|
|
| Nov 16, 2012 | Nov 22, 2012 |
|
|
| Nov 23, 2012 | Nov 29, 2012 |
|
|
| Nov 30, 2012 | Dec 6, 2012 |
|
|
| Dec 7, 2012 | Dec 13, 2012 |
|
Parts List and Costs
The following table will be updated as parts arrive.
| Item | Source | Cost Ea. | Qty. | Total |
|---|---|---|---|---|
| Alarm | RadioShack | $3.69 | x1 | $3.69 |
| ARM7 NXP LPC2148 Microcontroller | SJValley Engineering | $60.00 | x1 | $60.00 |
| Batteries - AA | Costco | $1.33 | x5 | $6.65 |
| Chassis, Motors, and Wheels | Fry's Electronics | $15.34 | x1 | $15.34 |
| Distance Sensors (3)* | SJValley Engineering | $25.00 | x3 | $75.00 |
| LEDs | HSC Electronics | $0.35 | x2 | $0.70 |
| Motion Sensor* | Preet Kang | |||
| Motor Controllers (2)* | SJValley Engineering | $35.00 | x2 | $70.00 |
| Voltage Regulator - LM7805CV | HSC Electronics | $1.99 | x1 | $1.99 |
*generously provided by Dr. Ozemek and Preet Kang
Design and Implementation
Hardware Design
Frame and Inner Placement
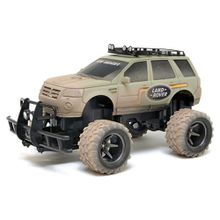
For convenience, a New Bright toy RC car was purchased and disassembled. The motors and wheels were already pre-mounted onto the chassis, allowing electronic parts to control the car. On the chassis, slots above the wheel wells were large enough to house motor controllers while the center of the chassis provided enough room to include a small breadboard and the microcontroller. All wires were shortened to the shortest length possible to reduce clutter.Sensor Placement
The sensors, which guided car control, were strategically mounted in front and above the car. This increased visibility of the sensors. Three distance sensors were used to detect obstacles: a left-, a center-, and a right-side sensor was used to determine steering of the vehicle. A front-mounted sensor would seek motion as the car was stopped. Should motion be seen, the piezo buzzer sitting at the front of the car would promptly be sounded.
Power Supply
The battery box beneath the car provided additional convenience. It housed five 1.5-volt AA batteries that supplied up to 7.5 volts in series. This power supply provided enough power to run all of the components of this project. Whenever existing batteries began to run low on power, new batteries could be swapped into place easily. The following list describes the power requirements of each part used:
| Part | Voltage Range | Source |
|---|---|---|
| Distance Sensors (Parallel) | +5V | Microcontroller Pin |
| LPC2148 Microcontroller | +7V to +20V | Battery Pack |
| Motion Sensors | +5V to +12V | Battery Pack |
| Motor Controllers | +7V to +30V | Battery Pack |
| Piezo Buzzer | +3V to +6V | Microcontroller Pin |
Hardware Implementation
Software Design
Software Implementation
Testing and Technical Challenges
Conclusion
References
Thanks To
- Dr. Haluk Özemek
- Preet Kang, TA

