BusMaster
Contents
BusMaster
While working on your project understanding what is happening on the CAN bus is extremely important. While there are many ways to monitor this data flow (logging, debug statements, etc.), one of the most useful methods allows you to monitor this traffic in real time. BusMaster is a CAN tracing tool which logs and displays all information on the CAN bus in an extremely easy to use GUI. This page will show you what is needed in order to set up BusMaster and how to use some of the program's basic functionality.
Step 1: Downloading Necessary Files


Step 2: Installing
- Install VS2013, MinGW, BusMaster, and PCAN Drivers with all default values.


Step 3: Setting up BusMaster
- Open BusMaster
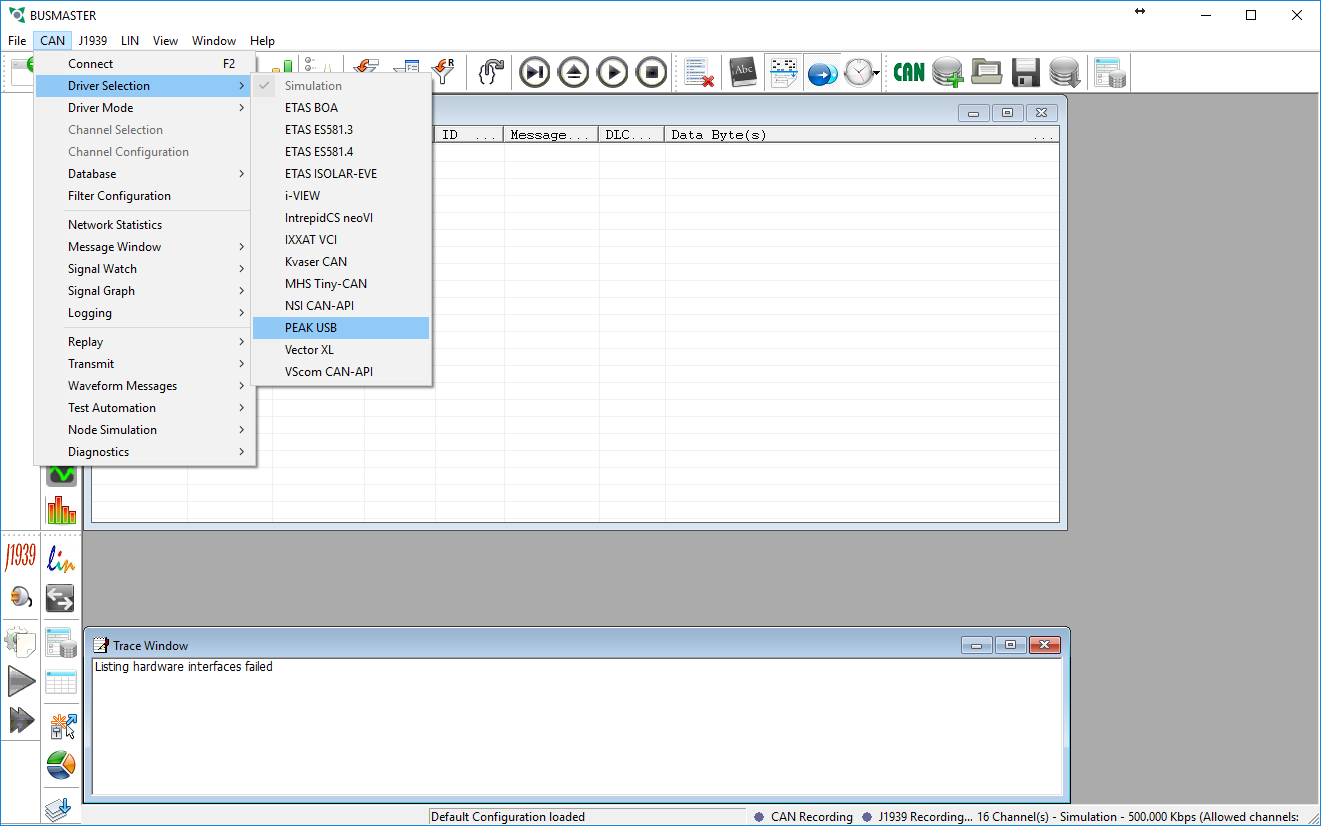
- Under the CAN menu go to Driver Selection and select PEAK USB
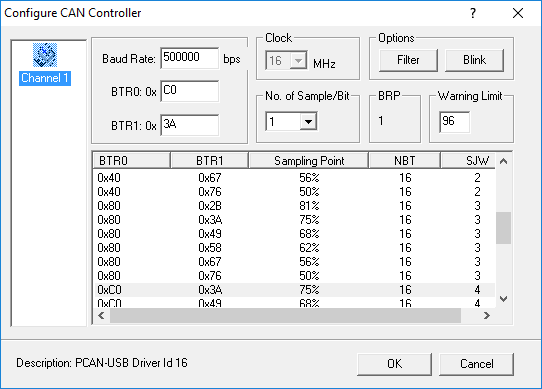
- Under the CAN menu go to Channel Configuration and change the Baud Rate to match your CAN bus and click OK.
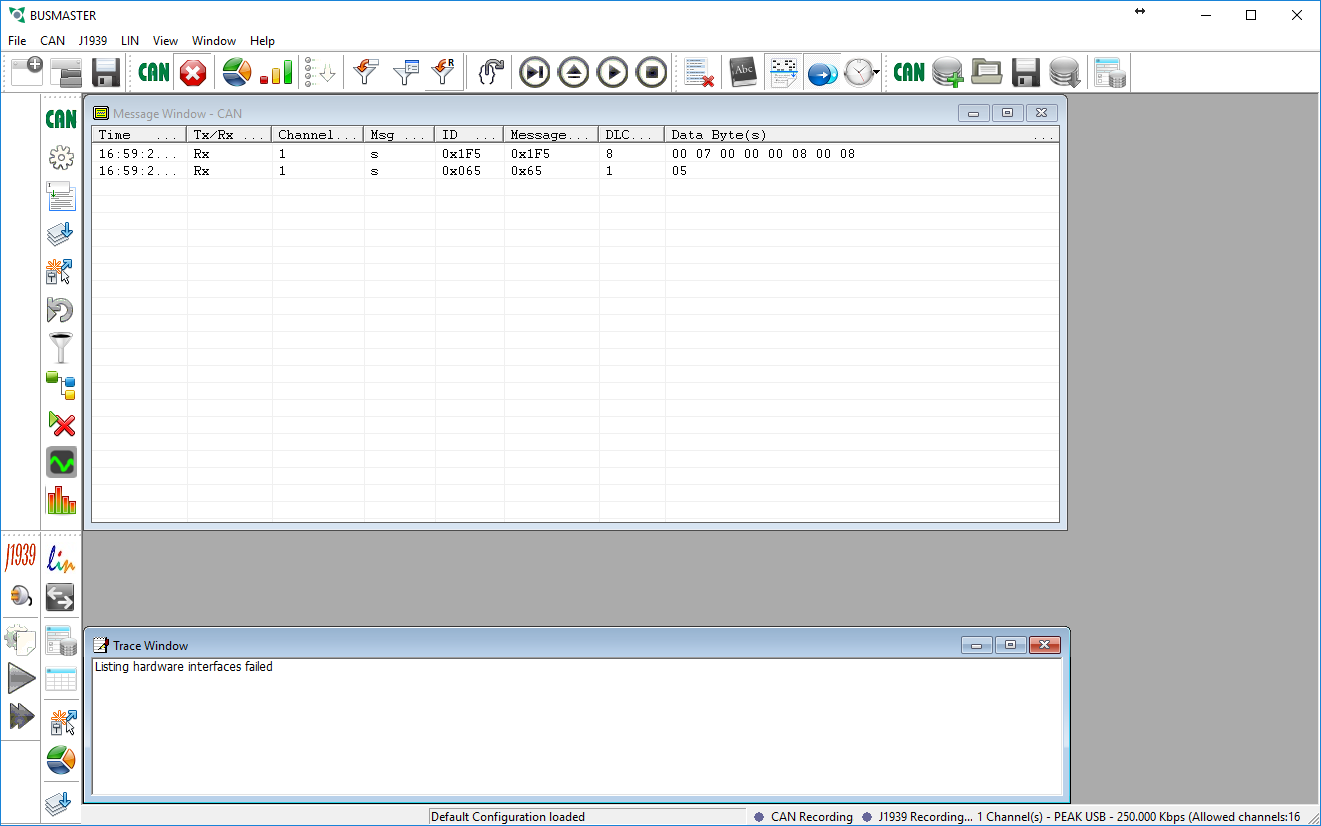
- Under the CAN menu click Connect
- If everything went correctly you should now start receiving any messages that are being sent on the CAN bus.


Now that we are receiving messages the next step is to get them to decode properly. That way we can see the physical values of the messages instead of the hex values of the raw data frames. To do this we need to attach a database file to this configuration. Since the DBC file format is proprietary BusMaster uses a similar file type called DBF instead. However, BusMaster comes with a function that will allow us to convert DBC files to DBF files. Please follow the instructions below to convert your file and attach it to this instance.
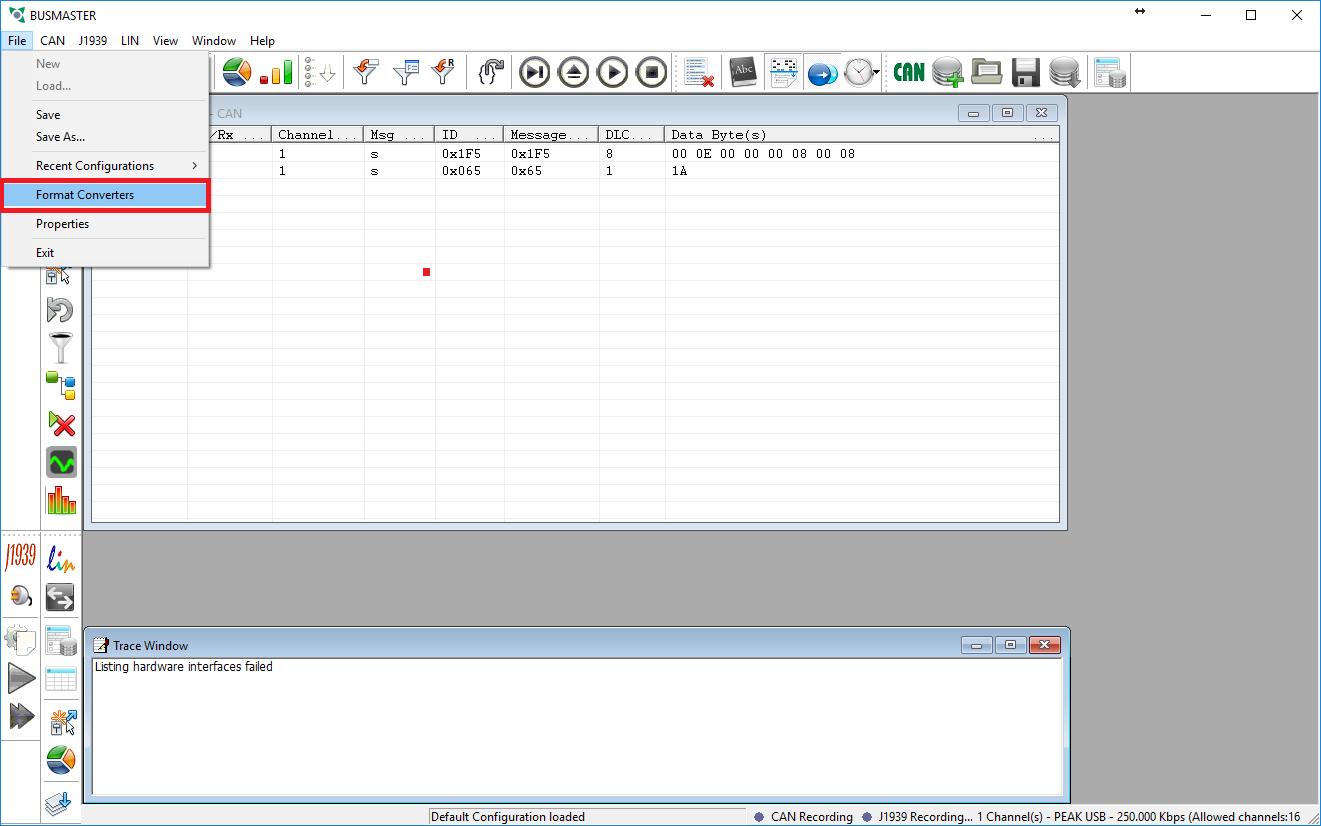
- Under the File menu go to Format Converters
- Select the Other Converters tab and then choose DBC to DBF in the drop down menu
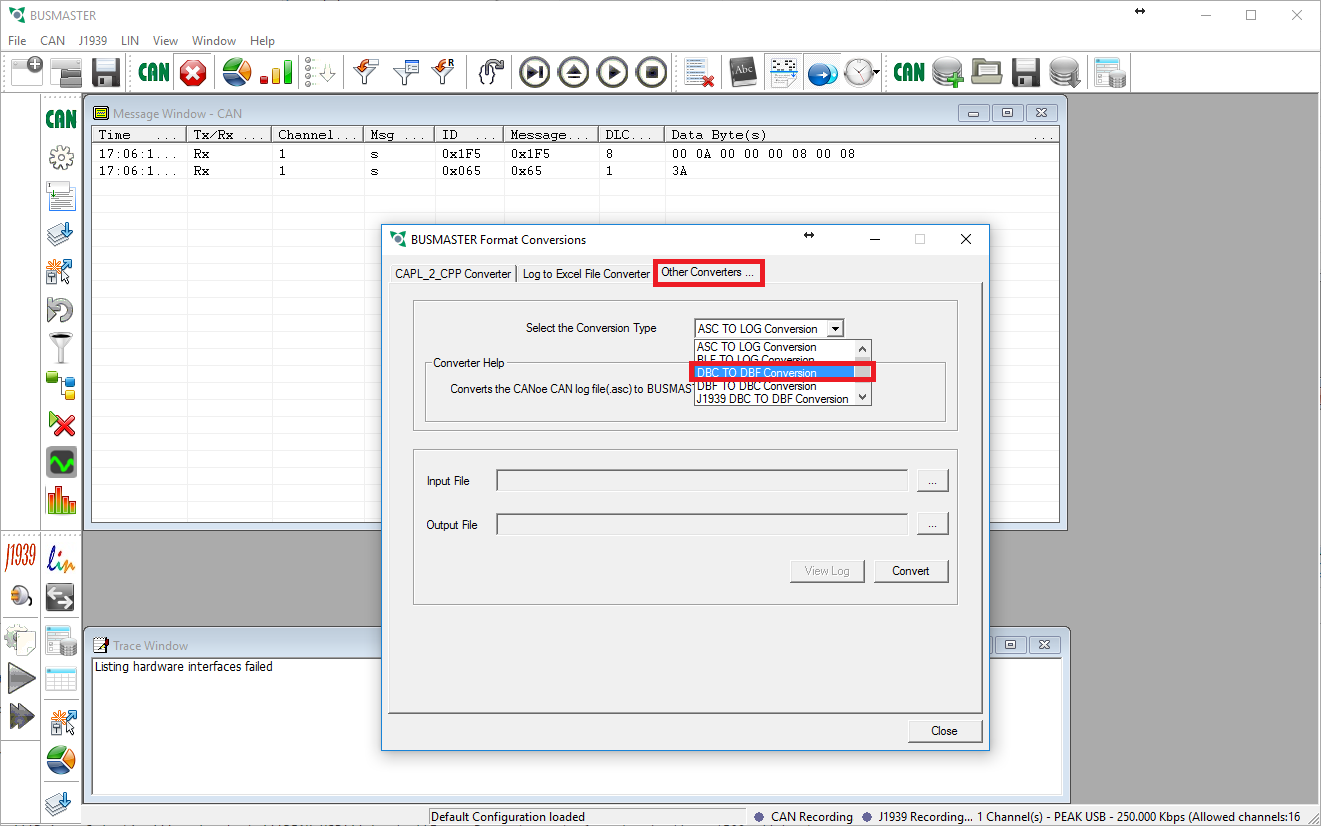
- Choose your DBC file as the Input File. The Output File's name and location will be the same as your DBC file except with the extension of .DBF. Close the dialog box when the conversion is complete
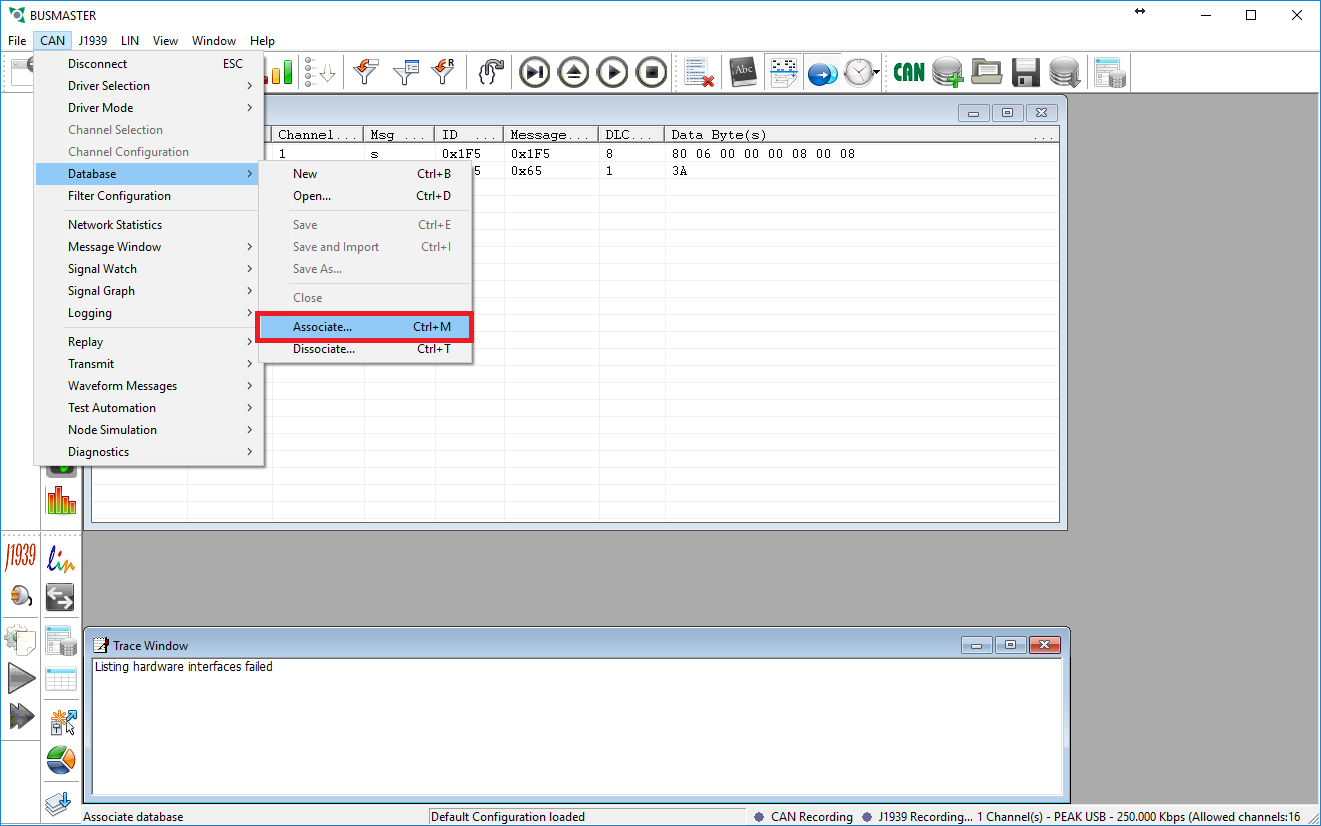
- Under the CAN menu go to Database then select Associate and choose the newly converted DBF file.
- The Message Window should now show the correct names for the messages on the bus. The next step is to interpret the signals in the messages so that we can see what the physical values are.
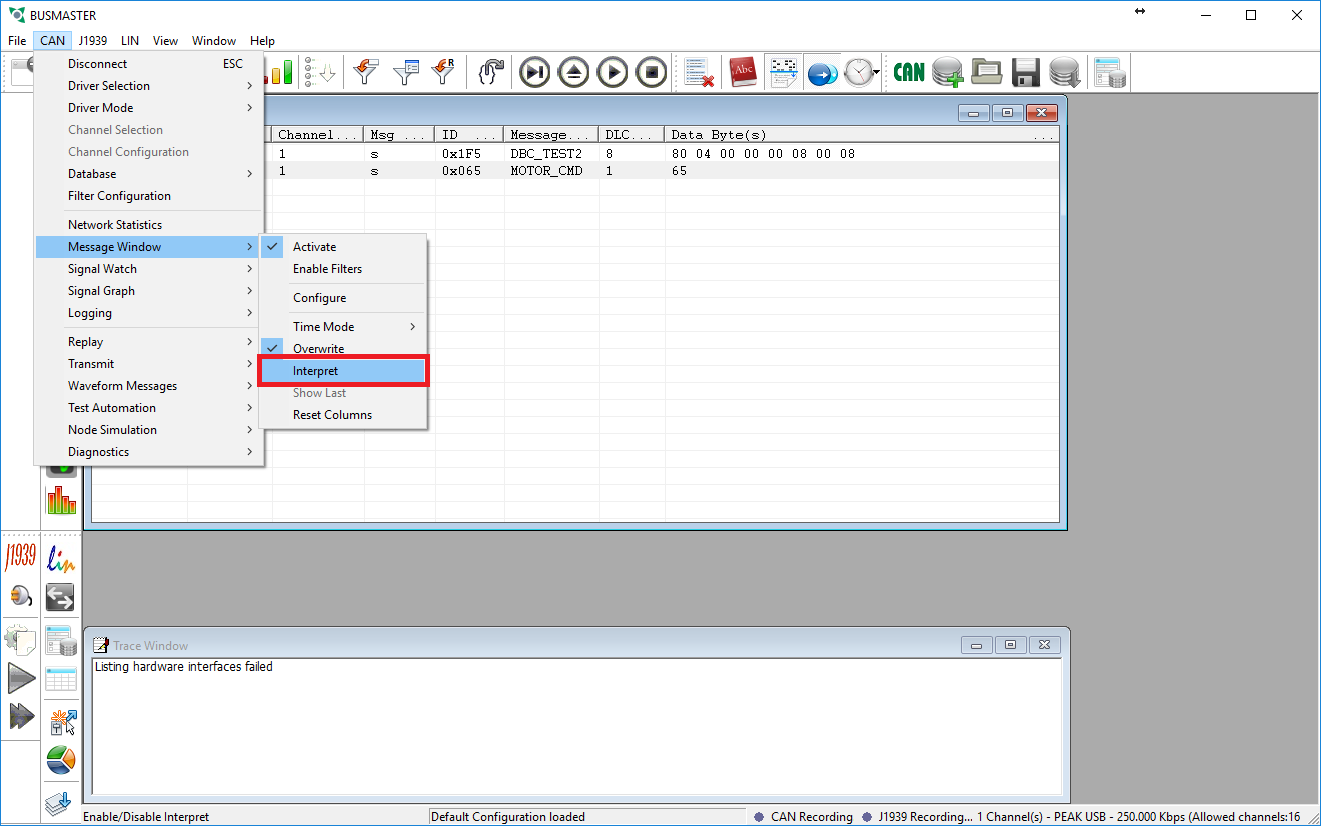
- After enabling the interpret function you will see a small + box next to the messages. If you click this box the messages will expand and show you the individual signal values.
- Now would be a good time to save you configuration in case your settings get reset so that you do not have to reconfigure BusMaster.


