F21: Treasure Dive
Contents
Grading Criteria
- How well is Software & Hardware Design described?
- How well can this report be used to reproduce this project?
- Code Quality
- Overall Report Quality:
- Software Block Diagrams
- Hardware Block Diagrams
- Schematic Quality
- Quality of technical challenges and solutions adopted.
Game Screen Capture
 Game Controller
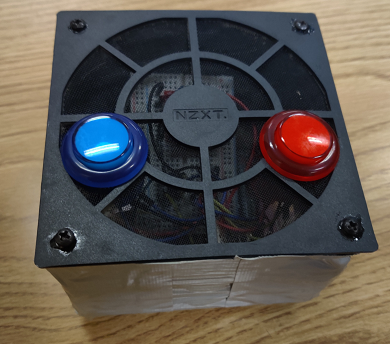
Treasure Dive
Abstract
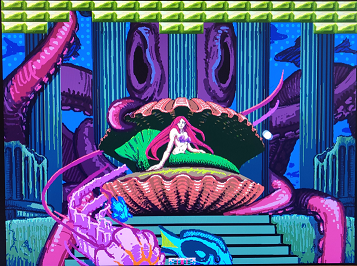
Treasure Dive is a modern one player game inspired by the popular arcade game Breakout, which was released by Atari in 1976. The ancients rambled about an unconfirmed tale of a shipwreck that saw no survivors. As an adventurous and skilled free diver, you are seeking treasure buried deep in an ocean abyss. You dove down all the way to the seafloor and found the buried treasure but need to make it back to the surface to see another day! The player uses a wireless controller to control an on-screen paddle to break bricks on the top of the screen. When enough bricks are broken, a passage is revealed, allowing you to get closer to the surface.
Objectives & Introduction
The objective of this project is to interface an LPC4088 to a VGA monitor by leveraging the LCD controller and use an accelerometer as the sensor for the player to control the paddle. Two Zigbees RF modules will be integrated for wireless communication between the controller and LPC4088 board via UART protocol. Digital audio output will be enabled by developing an I2S driver and porting an audio tracker library. The General Purpose Direct Memory Access (GPDMA) controller memory-to-memory function will be utilized to decrease memory write times when updating the video buffer. The DMA controller's memory-to-peripheral function will help reduce the frequent I2S interrupts when loading digital audio contents. An SD card peripheral driver to facilitate memory exchange between an SD card will also be implemented.
Team Members & Responsibilities
- Brian Ho
- Wiki project schedule planning
- Interfacing the accelerometer
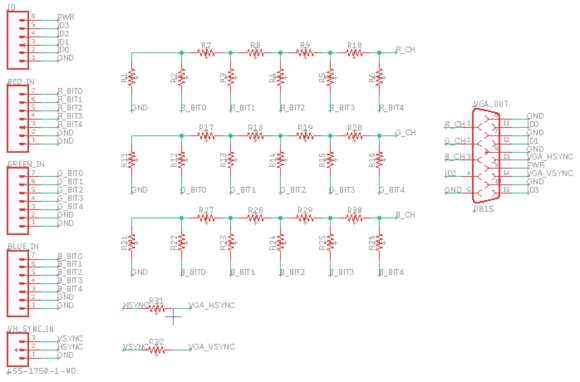
- Digital to Analog Conversion resistor ladder design used to interface digital LCD controller signal with analog VGA port signal
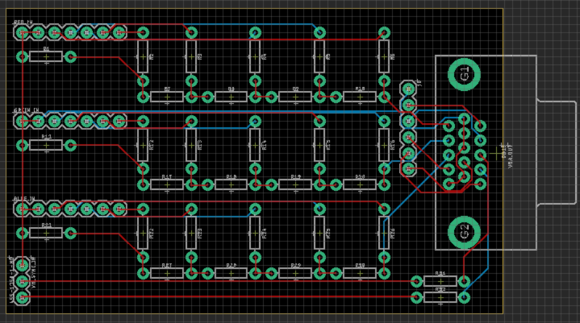
- PCB planning and acquisition
- Procurement of controller hardware
- Wireless communication via Zigbees RF modules and UART protocol
- Wireless controller logic and integration
- Ball movement and wall/brick collision logic
- Hardware/software development and integration
- Final testing and integration
- Billy Lai
- Wiki project schedule planning
- Increased CPU clock rate from 96 MHz to 120 MHz
- Initial memory write timing and measurements to estimate memory write capacity
- DMA driver memory-to-memory implementation for transferring graphics data to video buffer
- I2S with DMA memory-to-peripheral implementation to reduce memory-write interrupts when I2S Tx FIFO level is low
- Paddle movement and paddle collision logic, testing and integration
- Software development and integration
- Final testing and integration
- Jasdip Sekhon
- Wiki project schedule planning
- PCB design and planning
- File loading method algorithm for storing loaded files in memory
- Audio track and audio effects selection for gameplay audio
- Palette manipulation for gameplay
- Software development and integration
- Final testing and integration
- Isaac Wahhab
- Wiki project schedule planning
- DAC resistor ladder design and integration
- Hardware procurement (LPC4088 board, Zigbees, VGA monitor, etc)
- VGA driving through LCD controller
- Audio tracker library port
- Digital audio output using I2S
- Palette scrolling feature implementation
- Graphics rendering
- Vertical scrolling implementation for the video buffer
- Sprite testing and implementation for the ball
- SD card peripheral driver for reading assets from SD card
- Art assets acquisition
- Hardware/software development and integration
- Gameplay logic design
- Gameplay audio and level design
- Final testing and integration
Schedule
| Week# | Start Date | End Date | Task | Status |
|---|---|---|---|---|
| 1 |
|
|
|
|
| 2 |
|
|
|
|
| 3 |
|
|
|
|
| 4 |
|
|
|
|
| 5 |
|
|
|
|
| 6 |
|
|
|
|
| 7 |
|
|
|
|
| 8 |
|
|
|
|
| 9 |
|
|
|
|
| 10 |
|
|
|
|
| 11 |
|
|
|
|
| 12 |
|
|
|
|
Bill Of Materials
| Item# | Part Description | Part Model & Vendor | Quantity | Cost |
|---|---|---|---|---|
| 1 | Microcontroller Board | LPC4088-32 Developer's Kit | 1 | $300.00 |
| 2 | Microcontroller Board | SJ2 Board | 1 | $50.00 |
| 3 | Bluetooth Module | Digi XBee-S1 | 2 | N/A |
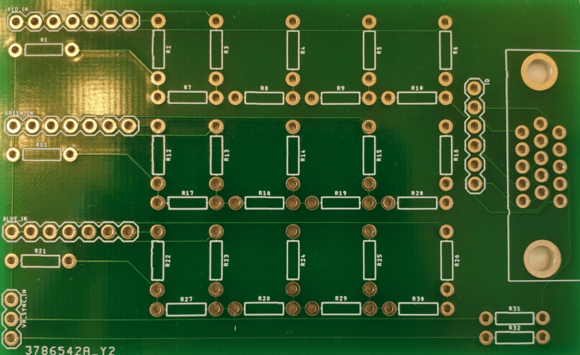
| 4 | DAC PCB | JLCPCB (Set of 5) | 1 | $15.00 |
| 4 | Monitor | Asus TFT Monitor | 1 | N/A |
| 5 | Mini Breadboard | ELEGOO Mini Breadboard | 1 | $13.99 |
| 6 | Arcade buttons | EG STARTS LED Arcade Buttons | 2 | $11.99 |
| 7 | VGA cable | N/A | 1 | N/A |
| 7 | SD card | N/A | 1 | N/A |
Design & Implementation
Hardware Design
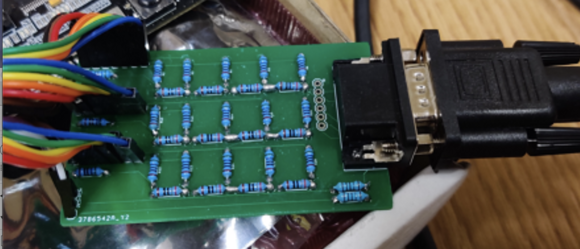
We designed our PCB using Autodesk EAGLE based on the tutorial on PCB design during class lecture. We ordered our PCB to be manufactured from JLCPCB. The PCB consists of a R-2R resistor ladder DAC for the purpose of converting the digital signal from the microcontroller to analog to display graphics on the VGA monitor. Five bits are passed to each of the red, green, and blue channels of the VGA in addition to other signals, such as Horizontal sync (HSYNC) and Vertical sync (VSYNC).
Hardware Interface
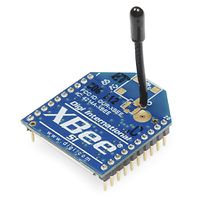
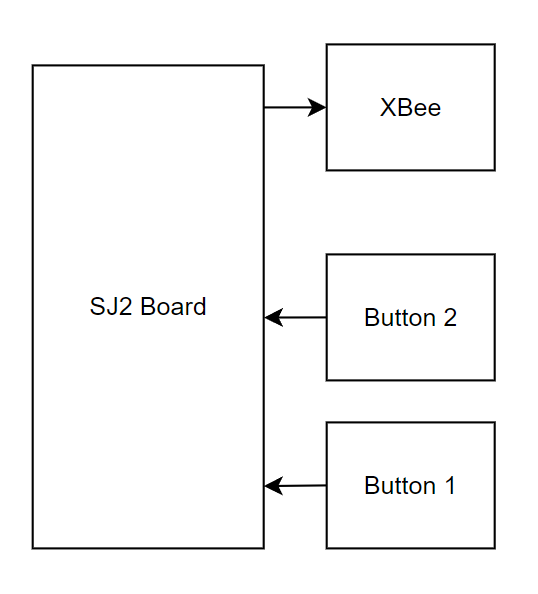
Two Digi XBee devices were used to communicate between the SJ2-Board controller and the LPC4088 board to control the paddle on the game. The XBee devices were programmed using the XTCU programming application provided by Digi International. The SJ2-Board used one XBee as a transmitted and the LPC4088 used another as a receiver. The two modules communicated using UART frames and a single byte represented any change of movement or button presses sent by the controller.
| XCTU | Transmitter | Receiver |
|---|---|---|
| CH | C | C |
| ID | 6969 | 6969 |
| CE | Coordinator | Endpoint |
| Baud Rate | 9600 | 9600 |
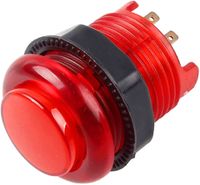
Two LED buttons were used to interface with the controller as inputs. They were both set up using GPIO.
Software Design
Show your software design. For example, if you are designing an MP3 Player, show the tasks that you are using, and what they are doing at a high level. Do not show the details of the code. For example, do not show exact code, but you may show psuedocode and fragments of code. Keep in mind that you are showing DESIGN of your software, not the inner workings of it.
Controller
There is an internal accelerometer on the SJ2 board that is utilized as the movement controls for the paddle movement. The y-axis value of the magnitude is polled 17 times in 17 milliseconds and is divided by 17 to get an average reading per that time frame. The maximum tilt value that can be read by the controller is set to 700 out of the total 1000 (highest possible value). The current tilt value is divided by 31 to get a total of 32 possible readings to represent 5 bits of magnitude.
The controller sends one byte of data to the console whenever there is any change in magnitude on the accelerometer or button changes. The byte contains all the information needed to control the paddle on the screen. The first two bits on the byte represent 0 if there is no button input and 1 if there is a button input. The third bit represents whether the controller is tilted left or right with 0 being left and 1 being right. The last five bits represent the controller accelerometer's magnitude.
Implementation
This section includes implementation, but again, not the details, just the high level. For example, you can list the steps it takes to communicate over a sensor, or the steps needed to write a page of memory onto SPI Flash. You can include sub-sections for each of your component implementation.
Ball Logic
The ball is controlled by the buttons and the controller accelerometer values. When the button is pressed, the ball is initially sent with a random velocity. The velocity is determined by a substate timer and is initially set as one of 6 possible values.
Testing & Technical Challenges
Describe the challenges of your project. What advise would you give yourself or someone else if your project can be started from scratch again? Make a smooth transition to testing section and described what it took to test your project.
Include sub-sections that list out a problem and solution, such as:
<Bug/issue name>
Discuss the issue and resolution.
Conclusion
Conclude your project here. You can recap your testing and problems. You should address the "so what" part here to indicate what you ultimately learnt from this project. How has this project increased your knowledge?
Project Video
Upload a video of your project and post the link here.
Project Source Code
References
Acknowledgement
Any acknowledgement that you may wish to provide can be included here.
References Used
Appendix
You can list the references you used.
