S18: Rahee
Contents
Grading Criteria
- How well is Software & Hardware Design described?
- How well can this report be used to reproduce this project?
- Code Quality
- Overall Report Quality:
- Software Block Diagrams
- Hardware Block Diagrams
- Schematic Quality
- Quality of technical challenges and solutions adopted.
Rahee
Abstract
Bikes are being widely adopted as a either a leisure sport or as a mode of transportation. In 2015, in USA alone 14.5 million bikes were sold. The world is following as well. Even with such a high number of users, there has been a dearth of smart accessories for bikes to enhance the experience of owning them. Moreover, it will not break news if anyone reports a bike theft. The adoption of bikes as a mode of transportation is on a constant rise, but no single accessory addresses these issues. To make a bike smarter and to address the issues which have so far been omnipresent in the bike industry, we propose Rahee- a solution towards making bike riding safe and bikes secure. The smartness of this device lies in its ability to connect to your phone via Bluetooth. This battery-operated device can be mounted on the handlebar of any bike. It will be capable of doing five different things that will help make the bike smart – navigation, smart headlight, display notifications about incoming calls and texts, an anti-theft alarm and a fitness tracker. The most important feature of this device is the navigation and its anti-theft capability(which actually works). It will also connect with the GPS or Google Maps on the smartphone and will receive and indicate information about how we need to reach a destination point.
Objectives & Introduction
Rahee aims at enhancing the overall experience of using a bike.
The main objectives of this project are as follows:
- Develop an all-purpose bike accessory with features like Navigation assistance, Automatic headlamp and Anti-theft Alarm
- Provide a smarter and safer device as compared to conventional bike accessories
- Provide a basic Android application for the user to interact with the device
Team Members & Responsibilities
- Tanmay Shinde
- Automatic Headlamp Driver
- PCB Designing
- Ankith Shetty
- LED Indicator Display Driver
- Siddharth Chawla
- Android App
- PCB Designing
- Akshay Ghodke
- Driver and circuit for Speaker
- Anti theft feature
- Ashish Lele
- Bluetooth Communication Bridge
- Product enclosure design
Schedule
| Week# | Date | Task | Description | Challenges | Status |
|---|---|---|---|---|---|
| 1 | 4/3/18 | Project Discussion- | Involved detailed discussion of the project. Tasks were identified, allocation was decided according to the difficulty of the task.
Components choice was defined. The key parameters in the decision were power consumption, lumens(in case of LEDs) and form factor. |
NA | Completed |
| 2 | 4/10/18 | Component List/ Ordering | Vendors were selected based on the quality of documentation and support available. | NA | Completed |
| 3 | 4/17/18 | Basic Android App | To prepare a basic layout of the app, which describes how the data will flow among different activities and also what data will be communicated to the MCU. This helped in narrowing down the scope of development and enabled the respective developers with better understanding of the design. | NA | Completed |
| 4 | 4/24/18 | Embedding Navigation in LED Matrix | The heart of the accessory lies in its navigation and driving the LED using this data. The Led Matrix employs the use of PWM in order to drive various segments of it. e.g. a right turn in the app will illuminate the right half of the matrix. | PWM posed a serious challenge when driving multiple pixels at once. This led to change our initial design philosophy from PWM to GPIO. | Completed |
| 5 | 4/24/18 | Developing Anti-theft device | The Anti-theft device feature makes use of the accelerometer built-in the SJOne board. It also employs the use of a mp3 decoder and a speaker. | Calibrating the accelerometer and synhronizing the different tasks(Playing Sound) which it will trigger, yielded a small challenge. | Completed |
| 6 | 05/10/18 | Automating the Headlamp | The Headlamp uses the Light sensor which is placed in the enclosure. It will illuminate based on the lighting conditions of the environment and will have a blinking feature. | The current dropper by a factor of 30 when PWM port was driving the headlamp. | Completed |
| 7 | 5/1/18 | Finalize PCB Design | EAGLE software was used to draw schematic and board diagrams for every module of our project before integrating it on a single chip | Finalizing among various designs and choosing the optimum form factor was a challenge. | Design completed |
| 8 | 5/8/18 | Integration | This task involved integrating all the modules together and maintain synchronization between them. | None | In Progress |
| 9 | 5/15/18 | Testing | TBA |
Parts List & Cost
| ProductID | Product | Vendor | Quantity | Cost |
|---|---|---|---|---|
| SJONE | LPC 1758 | PreetPal Kang | 3 | $240.00 |
| 07040-PW750-N | Luxeon White Rubel LEDs | LED Supply | 2 | $7.98 |
| 10048 | Carclo Lens- Plain Tight Spot LED Optic | LED Supply | 2 | $3.18 |
| B0130LMJ4K | Generic MP3 Decoder | Amazon | 1 | $8.00 |
| 2748 | Analog Light Sensor Breakout | Adafruit | 2 | $2.50 |
| 2862 | NeoPixel Ring - 24 x 5050 RGBW LEDs | Adafruit | 1 | $20.50 |
| 10732 | Carclo Lens Holder | LED SUPPLY | 5 | $0.23 |
Design & Implementation
The design section can go over your hardware and software design. Organize this section using sub-sections that go over your design and implementation.
Hardware Design
The hardware employs the use of multiple sensors in order to interact with the environments. The sensors are used to control the two essential feature of this accessory- automatic headlamp and anti theft device.
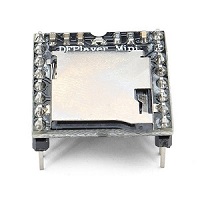
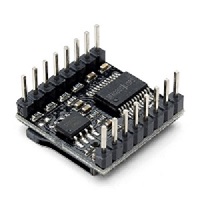
DFP player Mini Module
The DFPlayer Mini is a MP3 module with a simplified output, which can be directly connected to a speaker. This module can be used as a stand alone module with attached battery, speaker and push buttons or also can be used with any Micro-controller with RX/TX capabilities.A variety of control modes, I/O control mode, serial mode, AD button control mode can be interfaced with DFP player MP3 decoder.
ALS-PT19 Analog Light Sensor Breakout
[ It is a analog signal with a 2.5-5.5 V DC input signal which is proportionate to the brightness of the incoming light.This sensor contains both Infrared and full spectrum diodes.There is built in ADC in ALS-PT19 micro-controller chip.It uses 0.4mA sensing the power actively in power down mode.
Product Enclosure
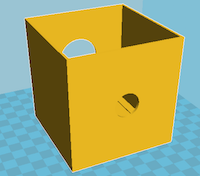
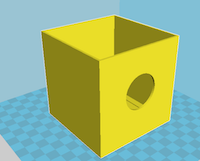
As Rahee is a device which should be mounted on a bike, we needed to put together all components in a single enclosure. Hence, we decided to 3D print a box-like enclosure which could be easily mounted on top of the handlebar of a bike. The enclosure includes the headlamp at the front, the anti-theft alarm speaker at the rear and slots for light sensors at the bottom. The LED ring for navigation is mounted at the top of the enclosure. The device can be easily installed or removed from the bike using a velcro strap.
Hardware Interface
In this section, you can describe how your hardware communicates, such as which BUSes used. You can discuss your driver implementation here, such that the Software Design section is isolated to talk about high level workings rather than inner working of your project.
Software Design
Show your software design. For example, if you are designing an MP3 Player, show the tasks that you are using, and what they are doing at a high level. Do not show the details of the code. For example, do not show exact code, but you may show psuedocode and fragments of code. Keep in mind that you are showing DESIGN of your software, not the inner workings of it.
Implementation
This section includes implementation, but again, not the details, just the high level. For example, you can list the steps it takes to communicate over a sensor, or the steps needed to write a page of memory onto SPI Flash. You can include sub-sections for each of your component implementation.
Testing & Technical Challenges
Describe the challenges of your project. What advise would you give yourself or someone else if your project can be started from scratch again? Make a smooth transition to testing section and described what it took to test your project.
Include sub-sections that list out a problem and solution, such as:
<Bug/issue name>
Discuss the issue and resolution.
Conclusion
Conclude your project here. You can recap your testing and problems. You should address the "so what" part here to indicate what you ultimately learnt from this project. How has this project increased your knowledge?
Project Video
Upload a video of your project and post the link here.


