Embedded System Tutorial SPI
This article is under construction.
SPI BUS
SPI stands for Serial Peripheral Bus. It is a high-speed, full-duplex bus that uses minimum of 3 wires to exchange data. The popularity of this bus rose when SD cards (and its variants ie: micro-sd) officially supported this bus according to the SD specifications. Furthermore, unlike UART in which you can only have one transmitter and a receiver, SPI bus can have one master and multiple slave decides.
SPI Bus Signals
|
The CS signal selects one slave, and the slave takes over the MISO pin. If a slave is not selected, then it shall leave the MISO pin in hi-z state. If multiple slaves have their CS signal asserted, they will try to take control of the MISO pin and damage their MISO pins. For example, if one slave drives the signal high (connect to 3.3v) and the other drives it low (connect to ground), then short-circuit will occur damaging this pin.
The SCK signal can reach speed of 24Mhz and beyond, however, SD cards are usually limited to 24Mhz according to the specifications. Furthermore, any signal over 24Mhz on a PCB requires special design consideration to make sure it will not deteriorate, thus 24Mhz is the usual maximum. Furthermore, you need a CPU twice as fast as the speed you wish to run to support it. For example, to run at 24Mhz SPI, we need 48Mhz CPU or higher. Because each wire is driven directly (rather than open-collector), higher speeds can be attained compared to 400Khz I2C bus.
Hardware
Suppose that you wanted to interface a single SPI bus to three SD cards, the following will need to be done :
- Connect all MOSI, MISO, and SCK lines together
- Connect individual CS lines of three SD cards to SPI master (your processor)
It is also recommended to provide a weak pull-up resistor on each of the SPI wires otherwise some devices like an SD card may not work. 50K resistor should work, however, lower resistor value can acheive higher SPI speeds.
Software Driver
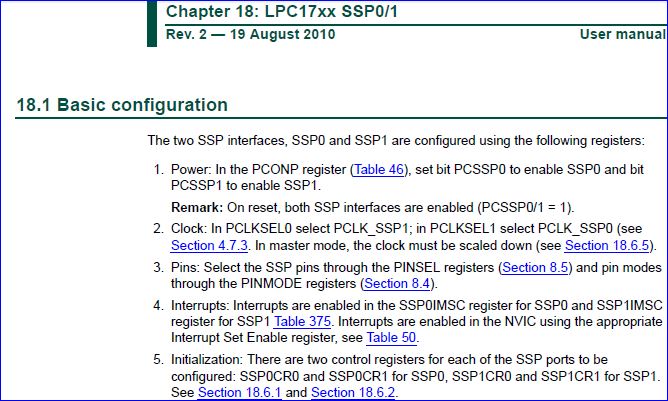
Unlike UART, the SPI driver is incredibly easy. The SPI is labeled as SSP on LPC17xx datasheet due to historic reasons, and this chapter in the datasheet shows the software setup very well. After the SPI is initialized on the hardware pins, the next steps is to write an spi function that will exchange a byte. Note that if the master wants to receive data, it must send a data byte out to get a data byte back. The moment we write to the DR (data register) of the SPI peripheral, the MOSI will begin to send out the data. At the same time, the MISO will capture the data byte back to the same DR register. In other words, SPI bus is a forced full-duplex bus.
void spi1_Init()
{
    LPC_SC->PCONP |= (1 << 10);     // SPI1 Power Enable
    LPC_SC->PCLKSEL0 &= ~(3 << 20); // Clear clock Bits
    LPC_SC->PCLKSEL0 |=  (1 << 20); // CLK / 1

    // Select MISO, MOSI, and SCK pin-select functionality
    LPC_PINCON->PINSEL0 &= ~( (3 << 14) | (3 << 16) | (3 << 18) );
    LPC_PINCON->PINSEL0 |=  ( (2 << 14) | (2 << 16) | (2 << 18) );

    LPC_SSP1->CR0 = 7;          // 8-bit mode
    LPC_SSP1->CR1 = (1 << 1);   // Enable SSP as Master
    LPC_SSP1->CPSR = 8;         // SCK speed = CPU / 8
}

char spi1_ExchangeByte(char out)
{
    LPC_SSP1->DR = out;
    while(LPC_SSP1->SR & (1 << 4)); // Wait until SSP is busy
    return LPC_SSP1->DR;
} |
Multitasking Warnings
If your software runs multiple tasks, and these tasks can access SPI, care needs to be taken because if two CS signals are asserted at the same time, hardware damage will occur. This leads to the topic of using a mutex (semaphore) under FreeRTOS and you can read the FreeRTOS tutorial to learn more.

