Basic Git Tutorial
Git uses the concept of branches where multiple people could work on different parts of a project at the same time. Eventually they could merge all their work together to create a complete project. They could also work on it some more should their be a need for bug fixes, updates, etc. Developers can pick and choose what features they want to add or remove and can see a log of the work done and changes made by their peers.
In this tutorial, I will be focusing on the command line for Git and not the GUI. I will also be focusing on Git Lab because that is our class’s main focus. This tutorial is not comprehensive but it will give a very basic overview of Git commands. There are many different kinds of commands, but only a few need to be used.
Anything within “< >” is an option.
Getting Started
Download the Git program here. https://git-scm.com/downloads
You will now be able use it via command line, or with the GUI. It is suggested that you use the command line, as there are more features. To use the Windows command line, go to the start menu -> type “cmd” -> enter. It is highly suggested that you use ConEmu in place of the default Windows command prompt. There are more options for Git and is easier to work with. Download it here: http://www.fosshub.com/ConEmu.html.
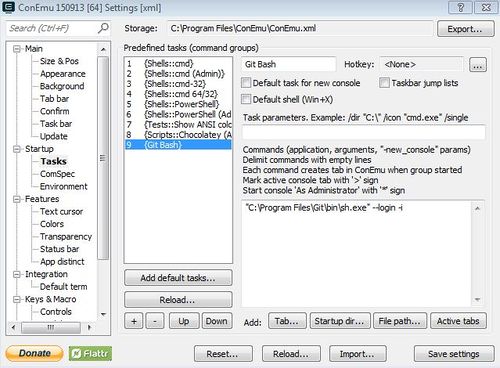
If Git does not work on ConEmu, then make sure the options matches the one in the picture. Access options by “windows key + alt + p”. Go to Startup -> tasks and then press the ‘+’ button. Now name it “Git Bash” and then type in the bottom box and make sure it looks like the picture shown below:
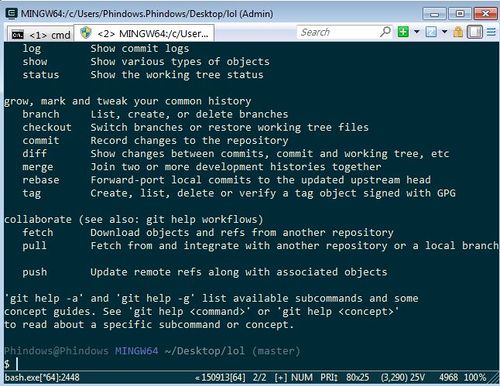
Do not touch the parameter box. Press Save. You will now be able to access Git in a new cmd window. Press the drop down menu button near the green ‘+’ button. Press the {Git Bash} option. You are now ready to use Git. Your terminal should look something like this:
Setting up SSH key
Go to www.gitlab.com -> Profile settings -> Add SSH Key -> Now open up terminal and type in:
| Command | Description |
|---|---|
|
ssh-keygen -t rsa -C "youremail@email.com" cat ~/.ssh/id_rsa.pub |
Generates the key Shows your key |
After concatenating the key, copy and paste the SSH key into the “Key” box. If you are on windows and can’t copy paste type in: clip < ~/.ssh/id_rsa.pub
Your SSH Key is now set up.
Setting a new Git Repository
If you are working on an existing remote repository, then this part is unnecessary. However, if you are working on something, and there is no Git repository, then you must set up a new project on the Git website.
Setting up a new project is simple on Git Lab. Simply go to www.gitlab.com and then click on the green button that says “Add Project”. Type in your project name in the “Project path” box. Add any descriptions about your project. Although it is optional, it is highly suggested you briefly describe your project. Press Create Project once done.
Your project path will now look something like this “https://gitlab.com/username/projectname”. From here, anyone can grab your project via SSH or HTTPS.
SSH path example: git@gitlab.com:username/projectname.git
HTTPS path example: https://gitlab.com/username/projectname.git
See the example on how to upload your local repository to the server.
Setting it up on Eclipse
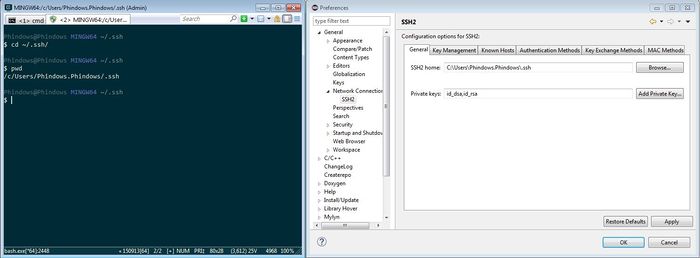
Currently, many people, myself included, are having issues with SSH in Eclipse, but I will go ahead and give instructions on how to set it up. Get your .ssh directory by typing in ConEmu "cd ~/.ssh" -> "pwd". Take that directory and go into the Eclipse's preferences. Go to General -> Network Connections -> SSH2 -> Input your .ssh directory and then Add private key (id_rsa, id_rsa.pub).
More instructions can be found on using Gitlab with Eclipse here: http://www.socialledge.com/sjsu/index.php?title=Eclipse_%26_Gitlab_Tutorial
Commands
INIT
The first thing you want to do before you init is to add a project in the Git website see “Setting up a new Git repository” section. If you have a folder with code that is not on Git, and you wish to put it on the Git server, then you need to initialize Git into your folder. This creates a .git folder, and the current directory is now a Git repository. The .git folder contains Git information such as branches. Initializing your folder is local to your computer and is not yet uploaded onto the server.
| Command | Description |
|---|---|
|
git init git init <directory> |
Initialize current directory Initialize selected directory |
CLONE
If you see a repository that you want to work on, you can “clone” it into a directory and start working on it. Cloning it will download the entire repository as well as a .git folder. Note that clone is different from “pull”. This will be explained later. Just use this command once at the beginning of the project unless you want multiple folders.
| Command | Description |
|---|---|
|
git clone <repo> git clone <repo> <directory> |
Downloads entire repository to current directory Downloads entire repository to selected directory |
Workflow
Introduction
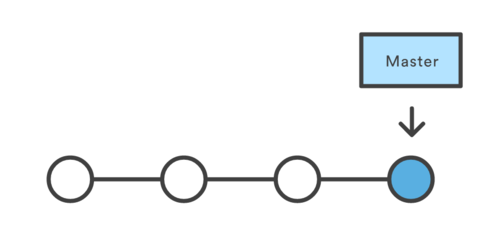
In Git there is the notion of a "Master" code base which contains the work of all contributing members in a project.
There are two basic workflows that you may follow when using Git for version control.
- 1. Committing directly to the "Master" branch.
- 2. Creating branches from the "Master" branch and merging them back in when ready.
This section of the guide will walk you through these two workflow strategies.
Working off the "Master" Branch
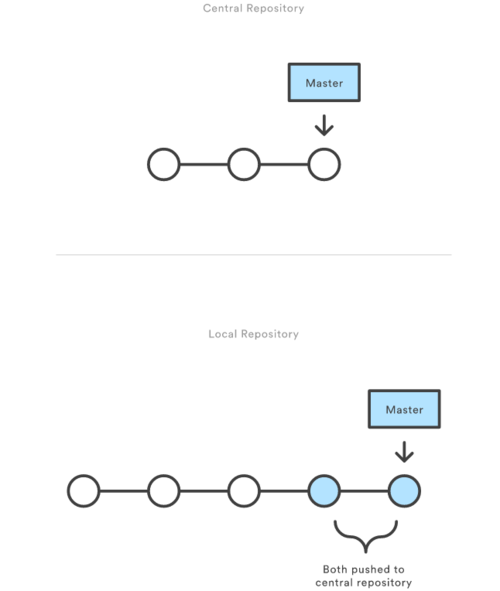
Working directly off the "Master" branch can be advantageous to smaller groups who rarely (if ever) work on the same portions of the code at a time.
The basic workflow for this method is as follows:
- 1. "Pull" from Master branch to ensure the local copy contains the latest version of code.
- 2. Make necessary changes to code.
- 3. Commit your changes.
- 4. "Push" your changes to the remote repository.
In git commands this would look like:
# Make sure you are on master branch
git checkout master
# Make sure you have the latest code
git pull origin master
# Make your changes to your code
# Add files you may have changed to your commit
git add <file1> <file2> ...
# Commit your changes
git commit -m "<commit message here>"
# Push your changes
git push origin HEAD
As you can see, this workflow is quite simplistic. There are; however, some key disadvantages to this workflow. If group members begin to modify the same files at the same time then they will face merge conflicts when attempting to push their code to the remote repository. Merge conflicts occur when code that is committed conflicts with changes that were made to the target branch while you were making your own changes. For example:
- 1. Developer A pulls the Master branch
- 2. Developer B pulls the Master branch
- 3. Developer B makes changes to file A and pushes the code back into the remote Master branch
- 4. Developer A makes changes to file A and pushes the code back into the remote Master branch
Developer A will experience a merge conflict since he/she is modifying a file that has already changed in the remote repo.
Working with feature branches
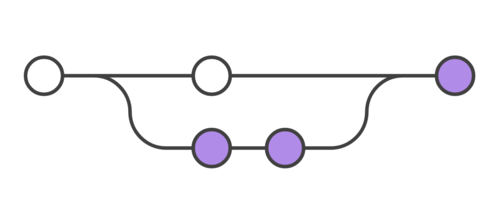
The second workflow takes advantage of the branching system in git. To protect your Master branch from code which may break your build or introduce bugs we can create what is called a "feature branch." These branches contain your development code and isolates it from the main code until you are ready to merge them together.
The workflow is as follows:
- 1. Do a "git fetch" to obtain the latest version of your source branch
- 2. Checkout a new branch
- 3. Perform your work on your new branch (be sure to make regular commits to avoid losing any of your work.)
- 4. Merge the two branches
Here is the general workflow in git commands:
# Checkout your "source" branch (the branch you want to base your code off of)
git checkout master
# Obtain the latest code
git pull origin master
# Create a new branch from your source branch
git checkout -b <new branch name>
# Make your code changes and commit them regularly
git add <file1> <file2> ...
git commit -m "<commit message>"
# Push your changes
git push origin HEADWhen you are ready to merge your branch back into the source branch there are two routes you may take:
- 1. Merge your feature branch directly into the source branch.
- 2. Open a pull request for peer code review prior to merging you branch.
To merge your feature branch into the source use the following workflow:
- 1. Checkout the source branch
- 2. Ensure your source branch contains the most updated code from the remote repo
- 3. Merge your feature branch into the source branch
- 4. Push the newly merged source branch back to the remote repo
The git commands for this workflow looks like this:
# Ensure the remote branch has the latest code from your feature branch
git push origin <feature branch>
# Checkout the source branch (assuming your source was 'master')
git checkout master
# Ensure your source branch is up-to-date
git pull origin master
# Merge your feature branch INTO the source branch
git pull origin <feature branch>
# Push your changes to the remote repo
git push origin HEAD
Commands
Basic Commands
In the above workflow examples we saw some of the basic commands that you will use in your development workflow. In this section we will explore some of these commands in more detail.
ADD
# This command adds untracked or modified files to be committed. If you do not add changed files to your commit then git will not track that file and save its changes.
git add <file1> <file2> ....
RESET
# Reset has a number of different uses and is incredibly versatile.
# If you accidentally add a file to be committed and have not used the 'git commit' command you can remove it from the commit using this command
git reset HEAD <file1> <file2> ...

# If you would like to revert to a previous commit, but save all the work you may use this command:
git log

# Choose the proper git hash to revert to
git reset --soft <git hash>

# The following command is EXTREMELY powerful, and you should only use it if you are sure about what you are doing.
# If you would like to revert to a previous commit, but LOSE all your work you may use this command:
git log

# Choose the proper git hash
git reset --hard <git hash>
COMMIT
# Committing your work is essential to saving your work and is the heart of git
# First add all files you would like to add to your commit using the 'git add' command listed above

# Using the '-m' option will allow you to enter the commit message in a single command
git commit -m "<commit message>"

# Using the commit command without any operators will allow you to enter a much more detailed commit message through the vim editor
git commit
When using the 'vim' editor there are some basic things you will need to know about.
- There is a 'command' mode and an 'insert' mode
- Command mode is where you can use commands such as save and exit or search text
- Insert mode allows you to do text editing
- Vim always starts in command mode
- To enter insert mode press the 'i' button on your keyboard
- Enter your commit message
- To exit you must return to command mode by pressing the 'ESCAPE' button
- To exit you may use the following commands:
- :q - Exit without saving if no changes were made
- :q! - Exit without saving even if changes were made
- :x - Save and exit
- To exit you may use the following commands:
A good resource on how to use VIM
PUSH
# After creating your commit you will want to 'push' your changes to the remote server.
# If you do not push your changes then they will not be saved to the server and any data loss will result in loss of work.
git push origin HEAD
FETCH
# Your local repo will not know about commits or branches that happen on the remote server until you update your local machine
git fetch
MERGE
# You can merge a target branch into a source branch to bring in all of the code into your source branch
# Checkout the branch you want to merge code INTO
git checkout <branch name>
# Pull the code from the target branch into your current branch
git merge <target branch name>
PULL
# Pull can be a good way to update your current local branch to where the remote branch is.
# For example if you had checked out the master branch some time ago, but others have pushed new commits to the
# remote branch you will need to update your local branch.

# The pull command is actually a combination of the two commands above 'fetch' and 'pull'
# It will fetch first to obtain information on all of the new remote changes then merge those changes
# into your local copy
git pull
CHECKOUT
# The checkout command allows you to switch to a different branch as well as create new branches.

# To switch to a different branch you may do the following:
git checkout <branch name>

# If the branch does not exist in your local repo you will need to run the 'git fetch'
# command in order to switch to it.

# If the branch does not exist AT ALL you may create a new branch using the following command:
git checkout -b <new branch name>
Advanced Commands
REBASE
# Rebasing is an EXTREMELY powerful tool which essentially rewrites history. Rebase will allow you to squash commits
# together and even change the source branch which you originally branched off from.

# When using rebase you can squash any number of commits so you must be careful with how many commits you are squashing.
# First use 'git log' to see what commits you would like to squash
git log

# Say you want to squash two commits. You may use
git rebase -i HEAD~2

# In the vim editor that pops up you may choose different options for each commit.
# Remember that the commits will be applied in order from the top down.
FORCE PUSH
# After rebasing you will need to push your changes to the remote repo. Normally git will see that your history no longer
# matches with that of the server's. It will then prevent you from pushing. It is possible to get around this through the
# use of 'force pushing'

# You must be VERY careful when force pushing since you are rewriting history for EVERYONE. If anyone has a local copy of
# the branch you are force pushing to, they will run into issues if they try to push their own version of the branch to
# the server.

git push -f origin HEAD