S21: exFAT
Contents
exFAT
INSERT WONDERFUL PICTURE OF CAR HERE
Abstract
As the capstone project for this class, we designed, prototyped, implemented, and tested an autonomous RC car. Our RC car platform of choice was built by Traxxas as it has a great reputation for building durable RC chassis. On this chassis, we mounted ultrasonic sensors to detect objects surrounding the car and allow it to steer clear of them, a GPS and compass unit that can output important GPS coordinates and heading, a bluetooth module that communicated these location and orientation data to the SJ2 boards, a pair of optical encoders that can detect the car's speed and direction of acceleration, and an LCD screen that provides some important real-time metrics for our debugging purposes. In addition to this debugging method, we also used the provided PCAN dongle to observe CANBus readings and confirm that we were seeing expected values transmitted. Finally, our development of the project was test-driven, using unit tests to confirm the functionality of some code prior to its usage on the car. The rest of this report will detail more specifics about the methodology behind the development of each module.
Introduction
The project was divided into 5 modules:
- Sensor
- Motor
- Geo Controller
- Driver/LCD Controller
- Web application
Team Members & Responsibilities
<Team Picture>
Gitlab Project Link - [1]
- Sensors
- Motor
- Geographical (GPS & compass)
- Driver/Master Controller & LCD
- All of us
- Communication Bridge Controller
- Web Application
Schedule
| Week | Start Date | End Date | Task | Person in Charge (PIC) | Status |
|---|---|---|---|---|---|
| 1 | Feb 27, 2021 | March 5, 2021 | First team meetup to discuss the direction of the project, reviewed past projects and report our findings/concerns | All | Complete |
| 2 | March 6, 2021 | March 13, 2021 | Divide the tasks & responsibilities among the team | All | Complete |
| 3 | March 14, 2021 | March 21, 2021 | Finalize / Buy Parts | All | Complete |
| 3 | March 14, 2021 | March 21, 2021 | Delegate Tasks | All | Complete |
| 3 | March 14, 2021 | March 21, 2021 | Get Data from Ultrasonic Sensor | Eishan, David | Complete |
| 3 | March 14, 2021 | March 21, 2021 | Get Data from Infrared Sensor | Eishan, David | Complete |
| 3 | March 14, 2021 | March 21, 2021 | Initial Draft for common DBC file for sensor readings | Eishan, David | Complete |
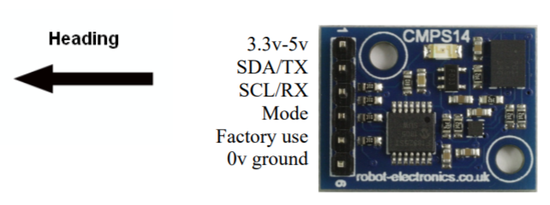
| 3 | March 14, 2021 | March 21, 2021 | Get Data from GPS & CMPS14 | Suryanto, Ka | Complete |
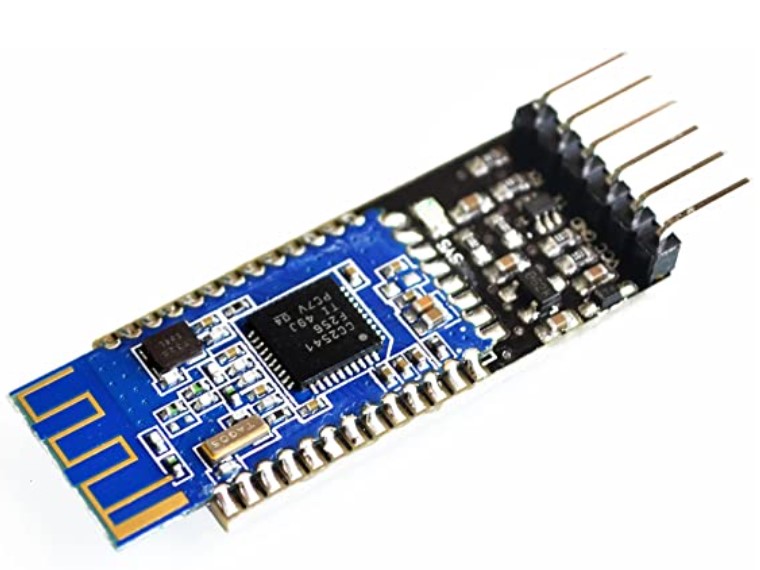
| 3 | March 14, 2021 | March 21, 2021 | Develop Bluetooth Driver (UART + customized line buffer) | Tyler | Complete |
| 4 | March 21, 2021 | March 28, 2021 | Initial UI Setup for Mobile App | Tyler | Complete |
| 4 | March 21, 2021 | March 28, 2021 | Bluetooth "Hello World" | Tyler | Complete |
| 4 | March 21, 2021 | March 28, 2021 | Build Driver Controller To Control Motor | Suryanto, Ka | Complete |
| 4 | March 21, 2021 | March 28, 2021 | Disassembly RC Car and Evaluation of Components | Manas | Complete |
| 4 | March 21, 2021 | March 28, 2021 | Complete Motor Drive Development with basic PID control. | Manas | Complete |
| 5 | March 21, 2021 | March 28, 2021 | Implement Bluetooth on Motor for wireless debugging | Manas | Complete |
| 5 | March 28, 2021 | April 04, 2021 | Master Controller Integration | All | Complete |
| 5 | March 28, 2021 | April 04, 2021 | Send Heading / Bearing / Distance info over CANBus to the Driver Node | Suryanto, Ka | Complete |
| 5 | March 28, 2021 | April 04, 2021 | Display Compass, GPS, Steering angle, and Acceleration info on the LCD screen. | Manas, Suryanto | Complete |
| 5 | March 28, 2021 | April 04, 2021 | Research and implement power solution for powering SJ2 boards w/ peripherals | Eishan, Tyler | Complete |
| 5 | March 28, 2021 | April 04, 2021 | Design and Order PCB. | Eishan, Ka, Suryanto | Complete |
| 6 | April 04, 2021 | April 11, 2021 | Map PWM Duty Cycles to real speed (KmPH) readings. | Manas | Complete |
| 6 | April 04, 2021 | April 11, 2021 | Design, 3D print, and assemble LED ring. | Tyler | Complete |
| 6 | April 04, 2021 | April 11, 2021 | Complete required elements of mobile application | Tyler | Complete |
| 6 | April 04, 2021 | April 11, 2021 | Deploy webpage to web server | Tyler | Complete |
| 6 | April 04, 2021 | April 11, 2021 | MIA handling for GPS module | Suryanto, Ka | Complete |
| 6 | April 04, 2021 | April 11, 2021 | Test LED ring which shows the compass info | Suryanto, Ka | Complete |
| 7 | April 11, 2021 | April 18, 2021 | Create Collision Avoidance Algorithm Module | Suryanto, Ka | Complete |
| 7 | April 11, 2021 | April 18, 2021 | Create Pathing from GPS Data | Suryanto, Ka | Complete |
| 7 | April 11, 2021 | April 18, 2021 | Hardware Integration Test and First Field Test | All | Complete |
| 7 | April 11, 2021 | April 18, 2021 | Optimize Obstacle Detection Based On First Field Test Result (if needed) | Suryanto, Ka | Complete |
| 8 | April 18, 2021 | April 25, 2021 | Design and Print Mounting Components | Tyler | Complete |
| 9 | April 25, 2021 | May 02, 2021 | PCAN / BusMaster Configuration on car. | All | Complete |
| 10 | May 02, 2021 | May 09, 2021 | CANBus Integration | All | Complete |
| 11 | May 09, 2021 | May 16, 2021 | MIA Integration | All | Complete |
| 12 | May 16, 2021 | May 23, 2021 | Big Integration and Live Field Test (Split into 2) | All | In Progress |
| 12 | May 16, 2021 | May 23, 2021 | System Debug & fine tuning | All | In Progress |
| 13 | May 23, 2021 | May 28, 2021 | Demo Prep | All | In Progress |
| 13 | May 23, 2021 | May 28, 2021 | Wiki Report | All | In Progress |
Parts List & Cost
| Item # | Part Description | Vendor | Quantity | Total Cost |
|---|---|---|---|---|
| 1 | GPS Breakout board | Adafruit | 1 | $39.75 |
| 2 | GPS Antenna | Amazon | 1 | $8.43 |
| 3 | CMPS14 | RobotShop | 1 | $35.31 |
| 4 | HC05 | Amazon | 1 | $13.59 |
| 5 | CAN Transceiver (Waveshare) | RobotShop | 5 | $21.45 |
| 6 | Infrared sensor(s) | Amazon | 1 | $10.89 |
| 7 | Ultrasonic sensor(s) | Amazon | 3 | $81.78 |
| 8 | SJTwo Evaluation Board | Amazon | 6 | $330 |
| 9 | Traxxas Rustler | Traxxas | 1 | $169.99 |
| 10 | Traxxas Battery + Charger | Traxxas | 1 | $59.99 |
| 11 | High Capacity Battery | Traxxas | 1 | $69.99 |
| 12 | RPM sensor | Traxxas | 1 | $12.00 |
| 13 | Optical Wheel Encoder | Amazon | 1 | $6.99 |
| 14 | LED ring 8 LEDs (Cat shape) | DIY | 1 | N/A |
| 15 | PLA Filament | Amazon | 1 | $18.99 |
| 16 | Ribbon Cable set | Amazon | 1 | $10.99 |
Printed Circuit Board
CAN Communication
Hardware Design
DBC File
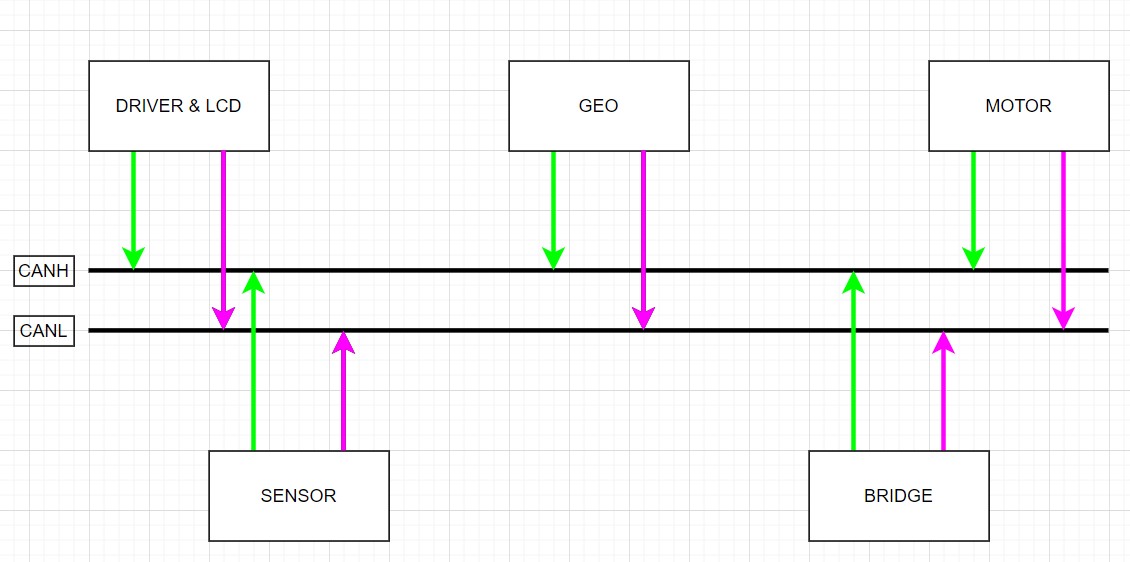
In our DBC file, we have 6 nodes, DRIVER, SENSOR, BRIDGE, GEO CONTROLLER, COMPASS, and MOTOR. Each of them represents a message sends from one node to another via the CAN bus.
1. The DRIVER sends the throttle and wheel angle command to the MOTOR so it knows when to speed up, speed down and turn.
2. The SENSOR sends the information about how far away is each of the Ultrasonic sensors away from the obstacles
3. The BRIDGE sends the GPS destination to the GEO Controller
4. The GEO CONTROLLER sends the current location of the car back to the BRIDGE
5. The COMPASS CONTROLLER sends the heading, bearing, and the distance from the destination to the DRIVER
6. The MOTOR sends the PWM and current speed information to the DEBUG node.
Gitlab link to the dbc file
VERSION "1.0.0"

BU_: DRIVER SENSOR BRIDGE GEO_CONTROLLER COMPASS MOTOR

BO_ 100 DRIVER: 3 DRIVER
SG_ DRIVER_throttle : 0|16@1- (0.1,-11) [-11.1|11.1] "kph" MOTOR
SG_ DRIVER_wheel_angle: 16|8@1- (1,-4) [-4|4] "degree" MOTOR

BO_ 200 SENSOR: 5 SENSOR
 SG_ SENSOR_sonar_front_left : 0|10@1+ (1,0) [0|0] "cm" DRIVER
 SG_ SENSOR_sonar_front_mid : 10|10@1+ (1,0) [0|0] "cm" DRIVER
 SG_ SENSOR_sonar_front_right : 20|10@1+ (1,0) [0|0] "cm" DRIVER
 SG_ SENSOR_infrared_back_mid : 30|10@1+ (1,0) [0|0] "cm" DRIVER

BO_ 205 GPS_DESTINATION: 7 BRIDGE
 SG_ LATITUDE_DEGREE : 0|8@1- (1, -90) [-90|90] "degree" GEO_CONTROLLER
 SG_ LONGITUDE_DEGREE : 8|9@1- (1, -180) [-180|180] "degree" GEO_CONTROLLER
 SG_ LATITUDE_MINUTE : 17|6@1+ (1, 0) [0|60] "minute" GEO_CONTROLLER
 SG_ LONGITUDE_MINUTE : 23|6@1+ (1, 0) [0|60] "minute" GEO_CONTROLLER
 SG_ LATITUDE_SECOND : 29|13@1+ (0.01, 0) [0|60] "second" GEO_CONTROLLER
 SG_ LONGITUDE_SECOND : 42|13@1+ (0.01, 0) [0|60] "second" GEO_CONTROLLER

BO_ 206 GPS_CURRENT_LOCATION: 7 GEO_CONTROLLER
 SG_ LATITUDE_DEGREE : 0|8@1- (1, -90) [-90|90] "degree" BRIDGE
 SG_ LONGITUDE_DEGREE : 8|9@1- (1, -180) [-180|180] "degree" BRIDGE
 SG_ LATITUDE_MINUTE : 17|6@1+ (1, 0) [0|60] "minute" BRIDGE
 SG_ LONGITUDE_MINUTE : 23|6@1+ (1, 0) [0|60] "minute" BRIDGE
 SG_ LATITUDE_SECOND : 29|13@1+ (0.01, 0) [0|60] "second" BRIDGE
 SG_ LONGITUDE_SECOND : 42|13@1+ (0.01, 0) [0|60] "second" BRIDGE

BO_ 210 COMPASS_HEADING_DISTANCE: 8 COMPASS
 SG_ HEADING : 0|12@1+ (0.1, 0) [0|359.9] "degrees" DRIVER
 SG_ BEARING : 12|12@1+ (0.1, 0) [0|359.9] "degrees" DRIVER
 SG_ DISTANCE : 24|12@1+ (0.01, 0) [0|0] "meters" DRIVER

BO_ 220 MOTOR_DEBUG: 8 MOTOR
 SG_ MOTOR_PWM : 0|32@1+ (0.01, 0) [10|20] "duty cycle" DEBUG
 SG_ CURRENT_SPEED : 32|32@1- (0.1,-11) [-11.1|11.1] "kph" DEBUG
Sensor & Bridge Controller
Hardware Design
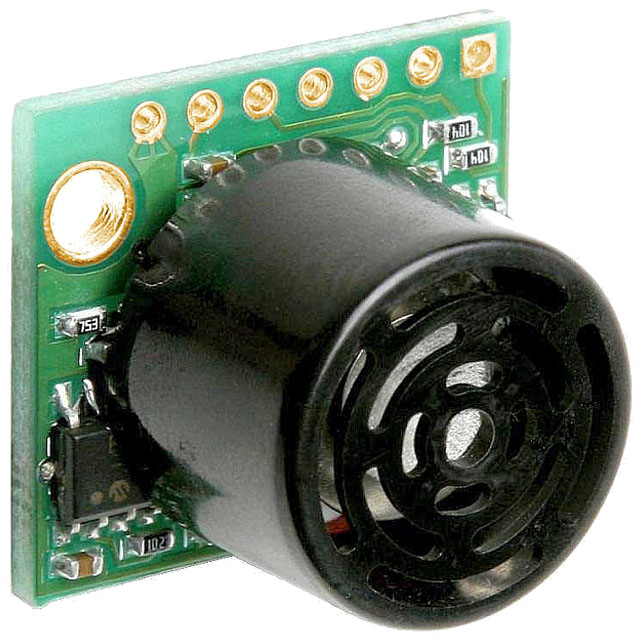
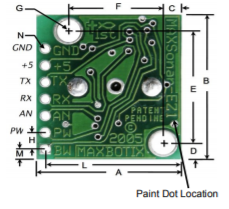
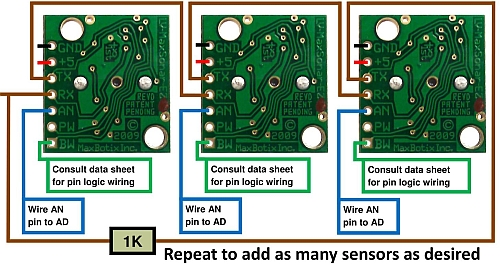
For this project, we initially planned on using combination of ultrasonic sensors and a single infrared sensor. The idea was that we could utilize different kinds of sensors and use the SJ2's ADC to sample all of them. We also discussed the prospect of using a Lidar system, but it's extremely impractical for a few reasons:
   1. It's cost-prohibitive due to the nature of Lidar systems.
   2. Lidar is unreliable, especially since bright daylight can affect its readings.
   3. The scale of this project doesn't warrant use of Lidar, as it's unnecessarily complicated and may overwhelm the SJ2.
After ruling out the use of Lidar, we decided to go with a 3+1 approach of 3 ultrasonic sensors in the front and a single infrared sensor in the rear of the car. While prototyping this idea, we discovered the range of the infrared sensor was quite limited. Out of sheer luck, we had a spare ultrasonic sensor that was ordered for the sake of a replacement in case the existing sensors broke during testing and debugging. We replaced the infrared sensor with the ultrasonic sensor and attached it to the rear of the car.
Software Design
<List the code modules that are being called periodically.>
Technical Challenges
   1. Using UART for the sensors
       a. constantly getting garbage readings
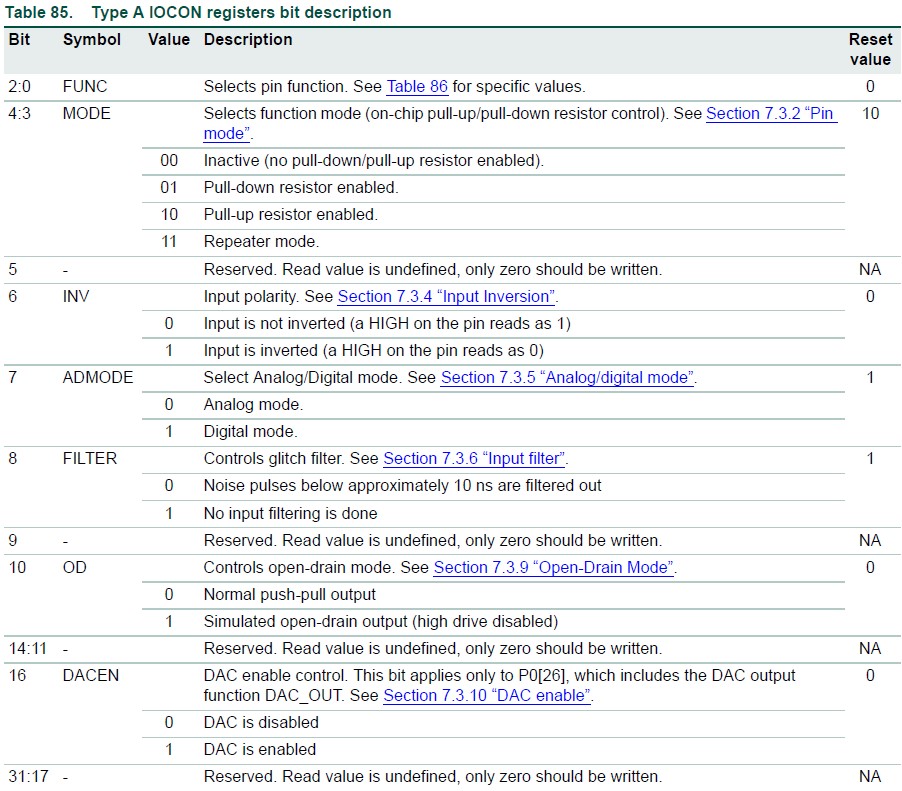
   2. Using the DAC as an ADC
       a. setting up the pin's function mode to 00 for inactive resistors (i.e no pull-up or pull-down)
       b. setting up bit 7 to 0 for enabling analog mode
   3. Crashes using burst mode for the ADC
   4. Sensor interference/cross-talk
       a. software filtering
       b. sensors were angled away from each other
       c. Cones on the sensors to better direct and isolate the ultrasonic waves
       d. played with the sample timing for each sensor
       e. triggering each sensors individually
       f. final solution: continuous loop
Motor Controller
Hardware Design
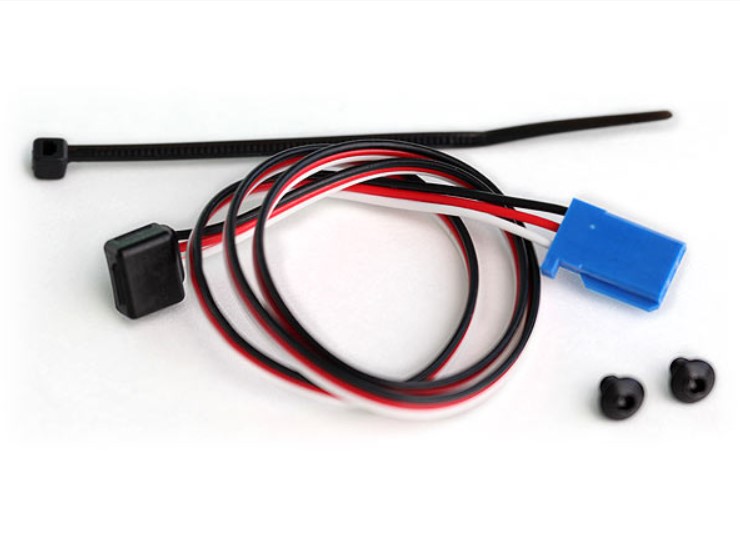
The hardware portion of the motor controller required the most precision. Because we needed to detect wheel RPM to calculate the speed of the car, we resorted initially to using a Hall Effect sensor and bracket sold by Traxxas. After conducting advanced field testing with this setup, we found out that the magnet's position on the bracket that attached it to the drive gear affected the readings output by the Hall Effect sensor. Sometimes, if the magnet was in the perfect position to trigger the Hall Effect sensor, the car would detect it was moving, though it was stationary. To get the car moving, we usually had to bump it forwards to move the magnet's position; as expected however, this solution is not robust since in the sensor's normal use case, the user would be using a wirelessly transmitting remote to control the car's movement.
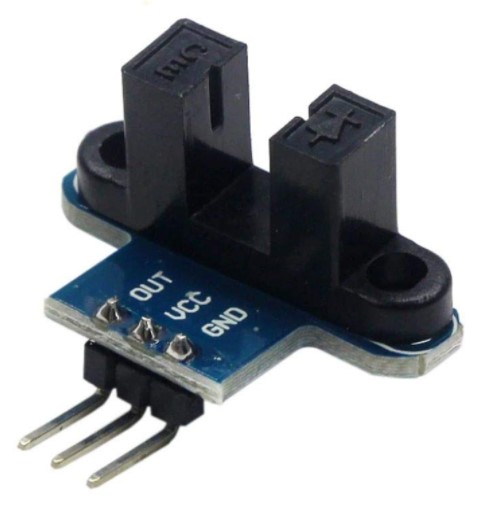
To rectify this minor roadblock, we decided to switch to a set of optical wheel encoders. These would allow the same RPM detection as done by the Hall Effect sensor, but without the issue of the car detecting its own movement whilst at a standstill. Additionally, we were able to use a second wheel encoder in conjunction with the first so that we could also detect reverse motion.
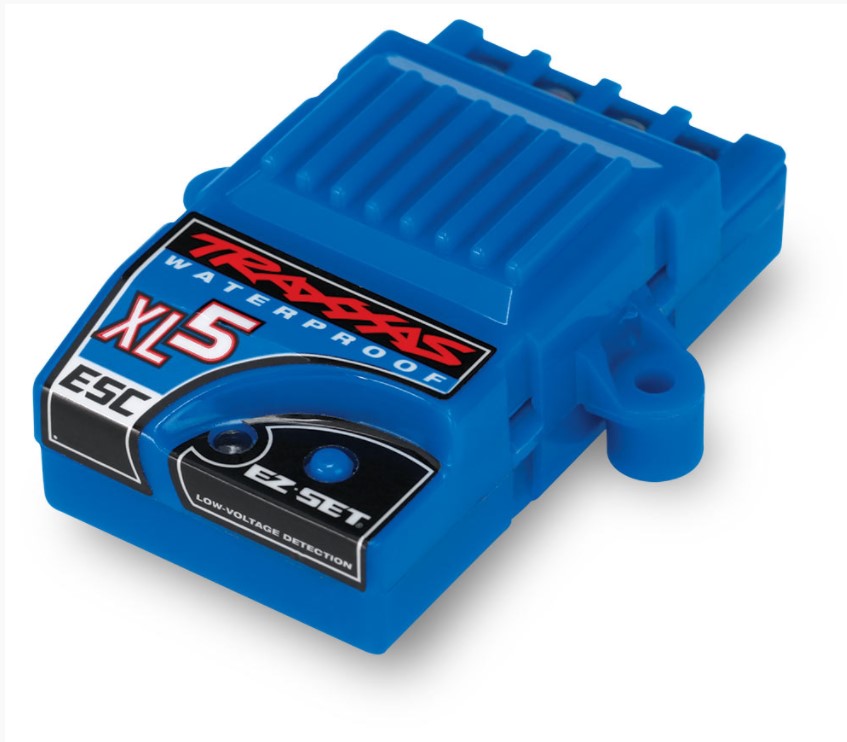
With wheel RPM detection complete, we moved onto integrating wheel speed into the PWM duty cycle applied to the ESC. Our car came equipped with the XL-5 ESC from Traxxas, and it has a very narrow range of PWM values dictating forwards, backwards, and neutral movement.
Since the XL-5 is intended to be controlled by a wireless transmitter, it doesn't have any documentation that helped us integrate with it using our SJ2 boards. So, through some experimentation, we were able to discern a few things about its behavior:
   1. PWM values of 15.0 - 20.0 move the car forward.
   2. PWM values of 10.0 - 14.9 move the car backward.
   3. To begin moving backward or apply "brakes" to the car, the ESC must be issued a reverse signal, then a neutral signal, and then your target PWM value.
      This is to prevent the ESC from causing any significant harm to the motor as well as the clutch that modulates left - to - right wheel speed.
After we knew how to control the ESC to control the drive motor, we applied the same methodology to the servo motor that turns the front wheels. As our car was RWD only, we didn't need to worry about front wheel speeds. Here's what we noticed about the servo motor and the car's turning behavior:
   1. PWM values of 15.0 - 20.0 turn the front wheels right.
   2. PWM values of 10.0 - 14.9 turn the front wheels left.
   3. The car needs some calibration to the front wheels using the TRIM knob on the wireless remote it came with so that it can run straight.
   4. Once the car is loaded with the weight of the boards, peripherals, and battery packs, the front wheels experience a lot of camber and toe angle changes.
      This causes an issue with the alignment previously set with TRIM knob and the car will likely pull in one direction. With some basic hand tools, this
      can be rectified by adjusting the car's camber and toe angle adjustments such that the car will pull straighter. Tightening the front wheels correctly
      is important for these adjustments to work correctly.
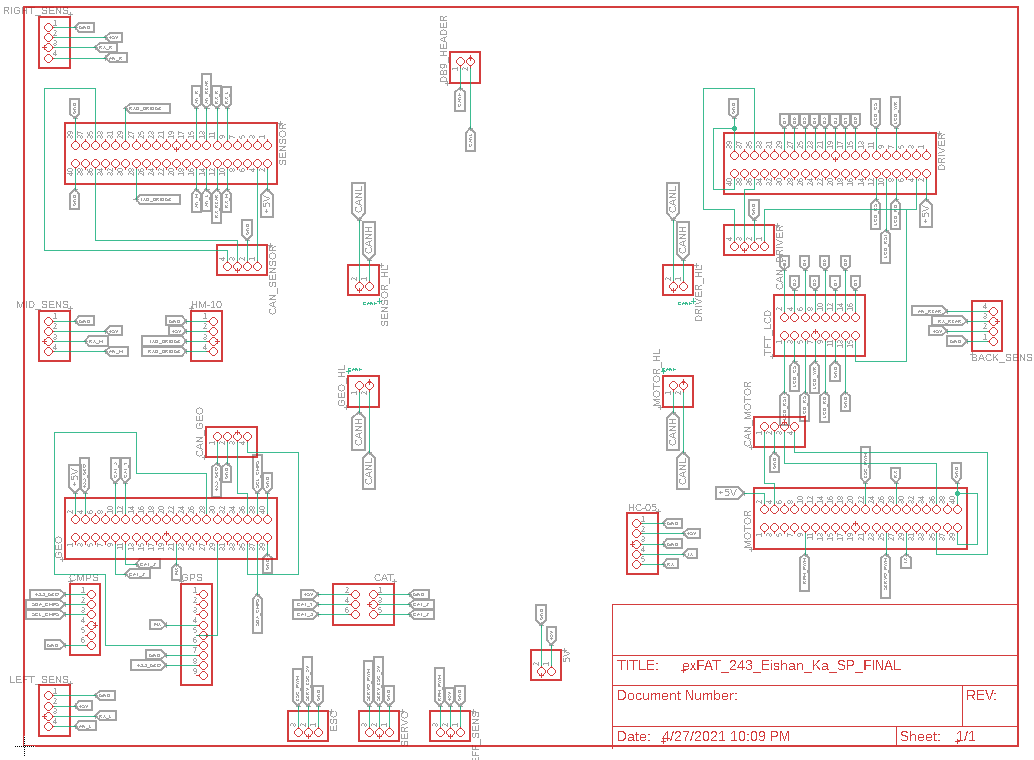
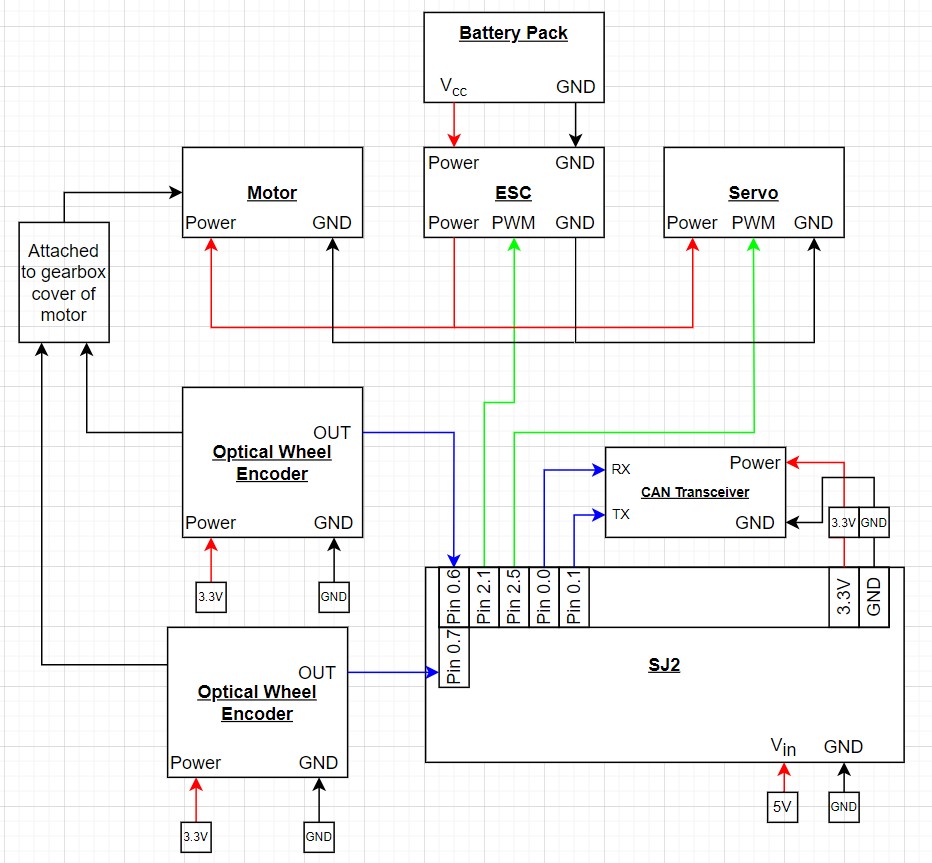
With ESC and servo control figured out, as well as the optical encoder setup to detect wheel RPM, we integrated them all together with the SJ2 Motor Controller board and made the necessary electrical connections. The schematic below shows how our hardware is connected.
Software Design
In our codebase, the motor controller logic was split into a few different files for the sake of simplicity, readability, abstracting away unnecessary code bulk, and easier unit-testing. The first module that we created was motor_controller_logic.c which takes care of a lot of functionality. It handles the PID control loop, motor controller related initializations, and serves as the receiver code module for CAN messages. That CAN utility is shown below
   void motor_receive_message(dbc_DRIVER_s *message) {
     motor_set_speed(message->DRIVER_throttle);
     motor_set_steering_angle(message->DRIVER_wheel_angle);
   }
By using some helper functions, we receive a message from the Driver node, set our speed and steering values accordingly, and proceed with reaching the target speed in the PID control loop and the target steering angle in the function shown below:
   void motor_set_steering_angle(int8_t steering_angle) {
     steering_pwm_duty_cycle = motor_map_steering_angle_from_driver_msg(steering_angle);
     pwm1__set_duty_cycle(SERVO_PWM_CONTROL_PIN, steering_pwm_duty_cycle);
   }
Much like motor_receive_message, our aim was to keep the functions light whenever possible. In this case, motor_set_steering_angle is only 2 lines. However, the enclosing motor_map_steering_angle_from_driver_msg is much longer because it maps steering values decoded from the CAN message to PWM values.
With all this mention of the PID control loop, here are some snippets that capture its functionality, along with some explanations to clarify a few details:
   float error = target_speed - current_speed;
   error_integral += error;
   if (error_integral > 25) {
     error_integral = 25;
   }
   if (error_integral < -25) {
     error_integral = -25;
   }
   float error_derivative = error - previous_error;
   previous_error = error;
   motor_pwm_duty_cycle =
       MOTOR_NEUTRAL + (gain_prop * error) + (gain_inte * error_integral) + (gain_deri * error_derivative);
The snippet of code above is the error calculation portion. It calculates an instant P (proportional) error by subtracting the current speed from the target speed. By accumulating this P error over time, we can calculate our I (integral) error. Finally, we calculate the D (derivative) error by subtracting the previous error from the current error. This effectively calculates the derivative of some equation that represents our error function.
However, what does all of this do for us? The final line, in which we set the value of motor_pwm_duty_cycle, is responsible for setting the correct PWM value so that the motor will respond smoothly. By setting and tuning some gains, we can multiply these gains by the errors of each domain and add them to our MOTOR_NEUTRAL PWM value so that the acceleration and deceleration will ramp up and down smoothly.
Next we will discuss how we are able to handle forward and backward movement. The code below represents the car's ability to detect forward motion after deciphering the CAN message.
   if (target_speed > 0) {
     direction_state = FORWARD;
     motor_pwm_duty_cycle += 0.5;
     if (motor_pwm_duty_cycle < 15) {
       motor_pwm_duty_cycle = 15;
     }
     if (motor_pwm_duty_cycle > 17) {
       motor_pwm_duty_cycle = 17;
     }
   }
If the car needs to move forward based on the CAN message's target speed, it will set a direction enumeration named direction_state to FORWARD. Additionally, we have clamped the motor PWM values in the FORWARD, BACKWARD, and NEUTRAL direction states so that the car doesn't exceed the pre-determined limits we set and run too quickly for us to be able to catch it. The mentioned enumeration is shown below:
enum direction { FORWARD, NEUTRAL, REVERSE };
However, we do have a form of safety measure in place so that the car will not attempt to raise its PWM value while stuck on an object. In our initial iteration of the PID control loop, if the car were stuck on an object, the PWM values would increase without limit and the car would spike in acceleration before the control loop lowered the speed of the car. This could have proven dangerous, as the car running into someone's body could have caused harm or damage to the car itself. To rectify this, we created the code below:
   if (current_speed == 0) {
     if (motor_pwm_duty_cycle > 16 || motor_pwm_duty_cycle < 14) {
       failure_state++;
     }
   }
   if (failure_state > 3) {
     pwm1__set_duty_cycle(MOTOR_PWM_CONTROL_PIN, MOTOR_NEUTRAL);
   }
This code detects how many times the car failed to accelerate, and will halt the car if it fails 5 times consecutively.
With the bulk of the code controlling the motor discussed, we shall quickly cover the optical encoder and its functionality. The rpm_sensor.c code module contains all of the code we used to interact with the optical encoder and its outputs. We configured a set of them to trigger GPIO interrupts. This way, we could use the number of interrupts counted in a set amount of time to calculate the RPM and speed of the car. The rpm_sensor.c code below shows the car's speed is calculated:
   float rpm_sensor_get_speed_in_kph_10Hz() {
     float rpm = rpm_sensor_get_rpm_10Hz(interrupts_per_100_ms);
     float kph = ((rpm * minutes_in_hour * wheel_circumference) / cm_in_km) / 10; // 3.74; // 3.33f;
     interrupts_per_100_ms = 0;
     return kph;
   }
Finally, we shall discuss our periodic callbacks. Everything for the motor controller is conducted in the periodic_callbacks_10Hz function as shown below:
   void periodic_callbacks__10Hz(uint32_t callback_count) {
     motor_10Hz_PID();
     motor_send_debug_message_to_can();
     can_handler__handle_all_incoming_messages();
     can_handler_mia_10Hz();
   }
Here we run our PID control loop, handle incoming CAN messages, handle MIA management, and send our motor RPM and current speed over CANBus for the LCD screen and web application to display.
Technical Challenges
- The first problem we ran into was controlling the ESC. As mentioned before, the XL-5 was intended to be controlled by a wireless transmitter, and thus doesn't have any documentation available online. When we were testing what PWM values would work, we eventually ran PWM duty cycle sweeps from 0% to 100% to determine what the minimum and maximum thresholds for movement were.
- The second problem we faced was motor acceleration tuning. Before we decided to make use of a PID loop to control the speed of the motor, we often dealt with long wind-up times before the motor began moving. Additionally, when the car needed to slow down, it would slow down too quickly and we would run into a loop of long wind-up times followed by fast deceleration. Our PID loop solved this issue by making the necessary calculations from the car's RPM and current speed and adjusting the PWM value more predictably.
- The final problem we faced was ESC calibration, though this issue was minor. Occasionally, the XL-5 ESC can fall out of calibration, and requires manual calibration to ensure correct operation. This calibration normally has to be done with the wireless transmitter and remote, but we managed to perform the same procedures using an SJ2 board, with its onboard buttons serving to issue PWM values as the ESC needed for calibration.
Geographical Controller
Hardware Design
GPS Module
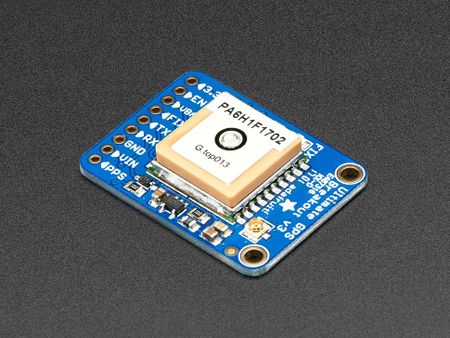
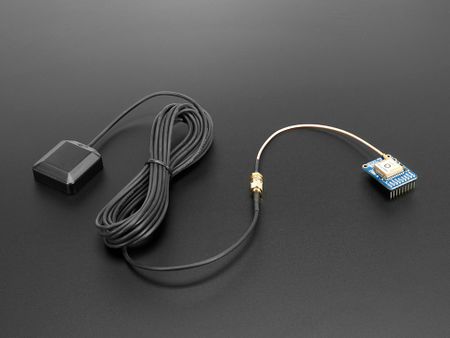
We used the Ultimate GPS Breakout v3 and an antenna to better receive the GPS signal. This GPS module has an LED that indicates a GPS fix is found so we can start the car.
The GPS module is connected to the microcontroller of our SJ2 board via UART.
It outputs several NMEA sentences by default. In our project, we only look for the $GPGGA ones. Therefore, we had to change the settings of the modules using a USB to UART bridge to send the command to the GPS module.
We used the GPS module to obtain the real time GPS coordinate of the car. The GPS coordinate of the car will be used to calculate the distance between the itself and the destination
The $GPGGA sentence we target looks like the following:
$GPGGA,hhmmss.ss,llll.ll,a,yyyyy.yy,a,x,xx,x.x,x.x,M,x.x,M,x.x,xxxx
| Format | Name | Example | Description |
|---|---|---|---|
| $GPGGA | Sentence Identifier | $GPGGA | Global Positioning System Fix Data |
| hhmmss.ss | Time | 201409 | UTC of position 20:14:09 Z |
| llll.ll | Latitude | 3721.4429 | Degrees Minutes Seconds form: 37°21'26.574" or Decimal Degree form: 37.357382 |
| a | Direction for Latitude | N or S | North or South |
| yyyyy.yy | Longitude | -12145.2451 | Degrees Minutes Seconds form: -121°45'14.706" or Decimal Degree form: -121.754085 |
| b | Direction for Longitude | E or W | East or West |
| x | GPS Quality indicator | 0 or 1 or 2 | 0 indicates no fix, 1 indicates GPS fix, 2 indicates Differential GPS |
| xx | Number of satellites | 05 | 5 satellites are in use |
| x.x | Horizontal dilution of precision | 1.5 | 1.5 Relative accuracy of horizontal position |
| x.x | Altitude above mean-sea-level | 25.3 | 25.3 meters above the mean-sea-level |
| M | Unit of altitude above mean-sea-level | M | meter |
| x.x | Height of geoid above WGS84 ellipsoid | -15.2 | -15.2 meters |
| M | Units of geoidal separation, meters | M | meter |
| x.x | Age of Differential GPS data (seconds) | blank | No last update |
| xxxx | Diff. reference station ID# | blank | No station ID |
| *hh | Checksum | *25 | Used to maintain data integraty |
|
Compass
Software Design
<List the code modules that are being called periodically.>
GPS logic
In the Geo controller node, we connected the GPS module via UART to get the GPS fix update for every 10Hz. The GPS module sends us the current coordinates the car is located. As we have covered in the previous section, the GPS module sends out the $GPGGA NMEA format. The SJ2 board receives the $GPGGA sentence in bytes. After the board receives the raw byte data, we convert and break them down to meaningful information that we need for our car.
We used 2 functions in our line_buffer.c module to parse the raw data we obtained from the GPS module.
1. line_buffer__add_byte() to add the raw data to our temporary line buffer,
2. line_buffer__remove_line() to parse the data into coordinates that is stored in the line buffer.
bool line_buffer__add_byte(line_buffer_s *buffer, char byte) {
  if (buffer->write_index < buffer->max_size) {
    *(char *)(buffer->memory + buffer->write_index) = byte;
    buffer->write_index++;
    return true;
  } else {
    return false;
  }
}
bool line_buffer__remove_line(line_buffer_s *buffer, char *line, size_t max_line_size) {
  uint16_t index = 0;

  if (*(char *)(buffer->memory + max_line_size - 1) != '\0') {
    strncpy(line, (char *)(buffer->memory), max_line_size);
    *(line + max_line_size - 1) = '\0';
    *(char *)(buffer->memory) = '\0';
    buffer->write_index = 0;
    return true;
  }

  while ((*(char *)(buffer->memory + index) != '\n') && (*(char *)(buffer->memory + index) != '\0')) {
    *(line + index) = *(char *)(buffer->memory + index);
    index++;
  }

  if ((*(char *)(buffer->memory + index) == '\n') && (*(char *)(buffer->memory + index + 1) == '\0')) {
    *(line + index) = '\0';
    *(char *)(buffer->memory) = '\0';
    buffer->write_index = 0;
    return true;
  } else if ((*(char *)(buffer->memory + index) == '\n') && (*(char *)(buffer->memory + index + 1) != '\0')) {
    strcpy((char *)buffer->memory, (char *)(buffer->memory + index + 1));
    return true;
  }

  return false;
}
After we obtained the GPS coordinates from the car is currently located at, we need to:
1. sends the current car GPS coordinates to the bridge controller
2. calculate the distance and bearing of the car and sends information to the driver controller to handle the driving logic
They are both sent via the CAN bus.
- CAN bus code paste here
- convert to degree min sec format to keep accuracy
- haversine
- cmps & gps logic respectively distance bearing
void periodic_callbacks__10Hz(uint32_t callback_count) {

  // receive desintation coordinates from the web app (sensor/bridge controller)
  gps__receive_message(can1);

  gps__run_once();

  // transmit current gps coordinates to the web app (sensor/bridge controller)
  gps__transmit_msg_to_bridge(can1);

  // transmit compass heading, bearing, distance to the driver (driver controller)
  cmps14__transmit_message(can1);

  led_ring_turn_on_led_north();

  count = gps_fix_led_logic(gpio_input_p2_0, gpio_output_p1_18, count);
}
Technical Challenges
< List of problems and their detailed resolutions>
/*** TEMPORARY NOTES ***/
1. Encountered issues with getting fixed coordinates. Fixed it by obtaining external antenna and plugging in CR1220 as a backup battery.
The compass module needs calibration
2. The dbc format can support up to only 6 decimal point, which is not accurate when it is being used to store the GPS coordinates. Fix by using the Degrees Minutes Seconds format.
/***********************/
Driver & LCD Controller
Driver controller link
LCD controller link
Hardware Design
Software Design
<List the code modules that are being called periodically.>
Technical Challenges
< List of problems and their detailed resolutions>
Mobile Application
<Picture and link to Gitlab>
Hardware Design
Software Design
<List the code modules that are being called periodically.>
Technical Challenges
< List of problems and their detailed resolutions>
Conclusion
<Organized summary of the project>
<What did you learn?>
Project Video
Project Source Code
Our source code is on Gitlab.
Advise for Future Students
<Bullet points and discussion>
