MINGW Development Package(MAC OS)
From Embedded Systems Learning Academy
This tutorial shows you how to compile a C/C++ program in windows using Eclipse and MINGW. MINGW stands for "Minimalist GNU for Windows". Remember that GNU is the linux-based compiler and hence if we want to use it for Windows, we have to have certain executable(s) to be running in Windows.
Development Package
You can get the same development package as the one we promote for ARM processors.
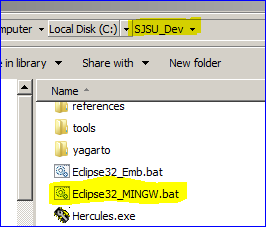
- Get the Development Package and unzip in your C drive
- SourceForge SJSU Development Package
- It is important to NOT unzip at your desktop
- The unzipped path should not have spaces
Open Eclipse and Create New Project
|
1. Open Eclipse.
|
|
|
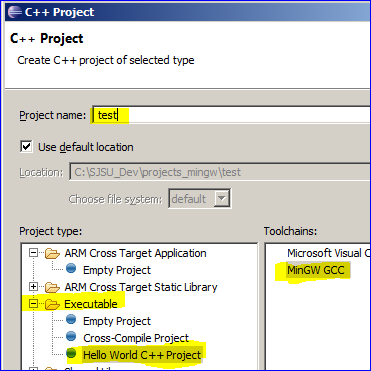
2. Create a new C/C++ Project
|
|
|
3. Write your source code
|
#include <stdio.h>

int main(void)
{
    /* Without this, printf() will not work */
    setvbuf(stdout, 0, _IONBF, 0);
    setvbuf(stdin,  0, _IONBF, 0);

    /* Write rest of your code here */
    printf("Hello World\n");
    return 0;
} |
|
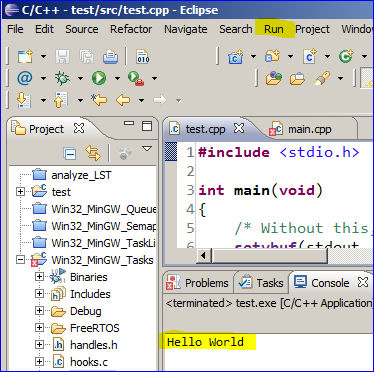
4. Run your program
|
|
|
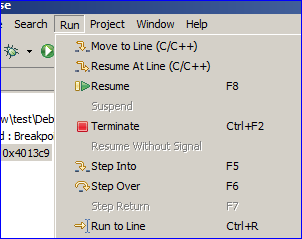
4. Optional : Debug your program
|


