S13: Smart Security
Contents
Grading Criteria
- How well is Software & Hardware Design described?
- How well can this report be used to reproduce this project?
- Code Quality
- Overall Report Quality:
- Software Block Diagrams
- Hardware Block Diagrams
- Schematic Quality
- Quality of technical challenges and solutions adopted.
Smart Security
Safety often tends to wary people in various part of the world. Whether or not an individual is living in a neighborhood with high or low crime rates, security have always been a main concern. With the rising crime rates, even in area known to be safe, security companies have been trying to attract customer with their innovative features, but not so attractive pricing. Often the price could range anywhere starting at $1,400 for installation and from $23 a month [1]. Our project is to provide a solution for people who want a home security system, but not have to pay the huge installation cost and monthly fee.
Abstract
Smart Security is a system targeted for home security that continuously monitors movement, when armed. This system will alert the user wirelessly when it detects motion via text message and flash LEDs on the spot to try and scare off the intruder. The whole process can be control using a web based GUI for arming and disarming the system.
Objectives & Introduction
The Smart Security project communicates with the user using wireless connection to alert them of any movement within the proximity of the sensor. A PIR motion sensor is, connected to a LPC1758 microcontroller board, used as a detector to register any movement. A Wifly module, also attached to the LPC, maintain wireless connection to send and receive commands. The user is able to communicate with the board using a web based GUI, designed with Bootstrap, to arm and disarm the system as he/she please. When armed and motion is detected, the board will send commands to alert user using text messages. To prevent spam, users will receive periodic text messages versus one per motion detected.
Our objectives for the project:
- Interface PIR Sensor with LPC1758 board and register readings
- Use Wifly to communicate between the board and server
- Send alerts in the form of email/text messages when movement is detected
- Setup alarm in the form of flashing LEDs
- Create an interactive user web interface that handles the control of the sensor
- Setup connection between the board and server
Team Members & Responsibilities
- Kevin Deng
- Interfacing PIR Motion Sensor with LPC1758 Microcontroller
- Design Web UI
- Project Report and Documentation
- Nelson Wong
- Interface Wifly module with LPC1758
- Wireless communication
Schedule
| Week | Planned Tasks | Actual Tasks |
|---|---|---|
| 1 |
|
|
| 2 |
|
|
| 3 |
|
|
| 4 |
|
|
| 5 |
|
|
Parts List & Cost
| Item | Type | Quantity | Cost | Link |
|---|---|---|---|---|
Design & Implementation
Our project designs are composed of hardware and software, intercommunicating with one another to fulfill the overall process. The main component revolves around the sensor receiving and sending signals depending on the situation to a host server to transfer that signal into a message to the user. Each of these processes does so in a chain scenario where one depends on the other to function.
Hardware Design
Hardware components used in this project:
- LPC1758 MicroController
- Wifly Module
- PIR Motion Sensor
- Battery Pack
LPC1758 MicroController
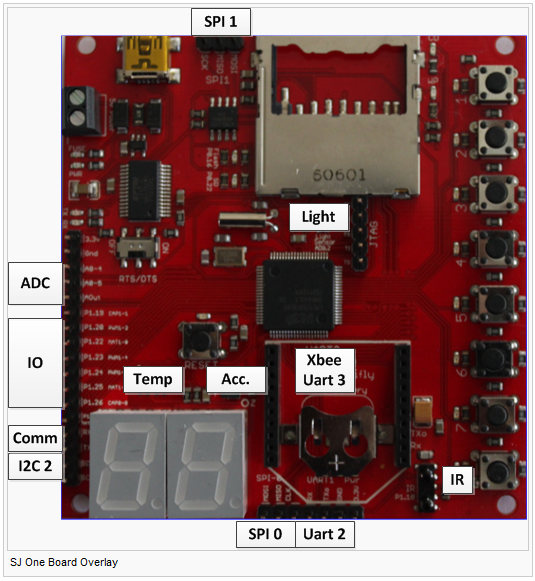
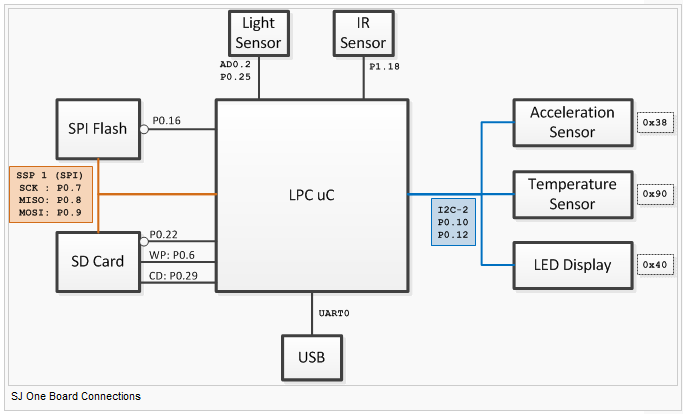
The LPC1758 is the center of control for our whole project. It connects everything together into a single system to perform necessary operation to make this project function. We have our Wifly module, PIR motion sensor, LEDs, etc. all connected to this LPC to communicate interchangeably. Without this component, this project will not function at all.
Wifly Module
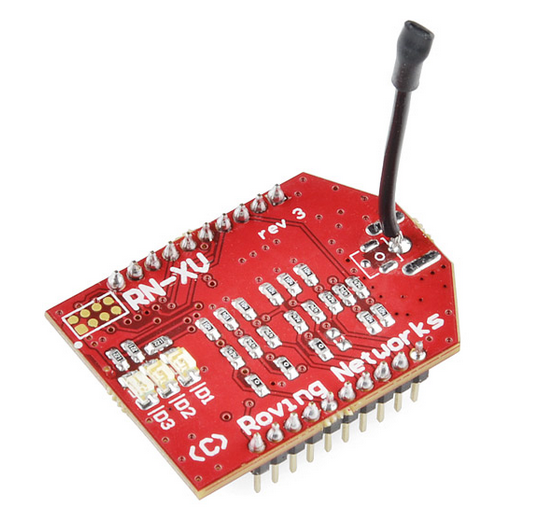
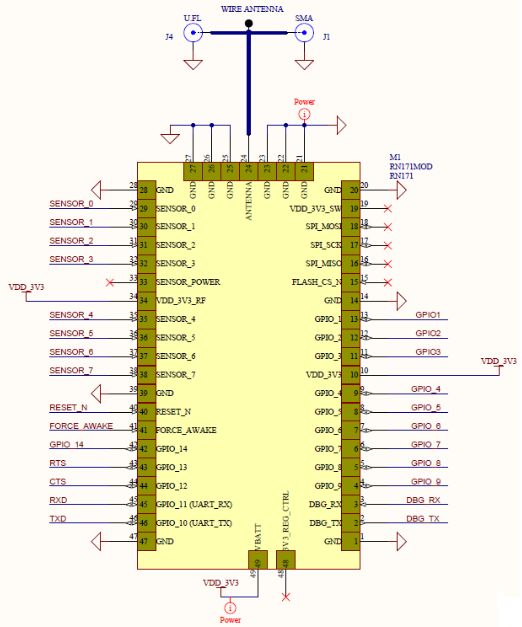
The RX-XV Wifly Module is our communication source between the wireless network and our overall system. The module is connected to our LPC1758 board and program to send and receive data based on events. This component allows us to communicate with the user and receive command from our website to arm and disarm the whole system. This device architecture is a standard TCP/IP platform and can migrate from 802.15.4 without any change.
PIR Motion Sensor
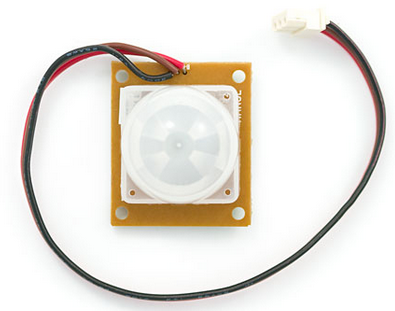
The PIR motion sensor is our ‘eye’ for this project. Its main purpose is to detect motion within its proximity and log the result. The PIR is connected to our LPC1758 board and upon detection when armed, it will use the Wifly module to send an alert to the user. This component is very critical because it acts as our surveillance for our security system.
Battery Pack
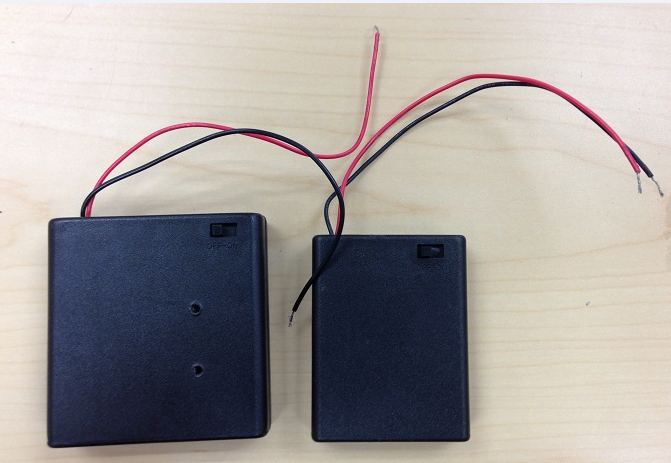
Initially the board and the motion sensor pull-up were powered by two separate USB connections. We then interface it with a battery pack to supply the necessary voltage amount to both.
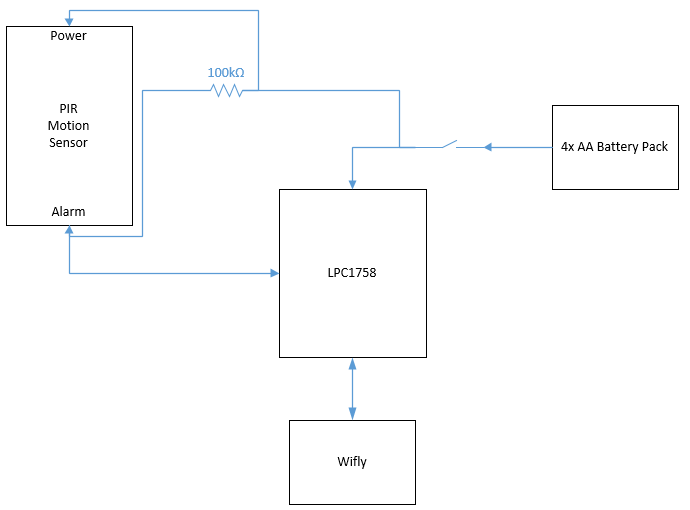
Top Level Connections
The following diagram shows the top level connection of all the components.
Hardware Interface
PIR Motion Sensor
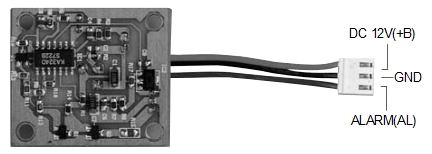
Our PIR motion sensor requires a pull-up resistor for the alarm pin. When the sensor is in idle state, not detecting anything, the alarm pin will be high, but once motion is detected, the pin will pull to a low. The reason behind it is, the alarm pin is an open collector. This type of setup allows multiple motion sensors to be connected at once.
Wifly Module
The Wifly module was design to be a direct replacement from XBee to wireless connection. Everything is a direct fitment on top of XBee UART3. Once the pins are connected, between the board and module, it will be slightly harder to take off and be careful of the surrounding pins, as it might push it outward a little.
Battery Pack
We connected our Battery pack to the 5V Power input on the development board. We just screwed in power and ground to their respective inlet.
Connection Table
Our connections between the LPC1758 development board and components can be seen on the table below:
| LPC1758 | PIR Motion Sensor | Wifly Module | Battery Pack |
|---|---|---|---|
Software Design
The project was built based off of lab knowledge and Preet’s Replay Controller Project for our wireless implementation. From our lab we use our knowledge of binary and mutex semaphores to handle tasks. Our sensor needs to handle communication from sensor to transmit and receive data. Whereas transmit and receive communicate with one another.
Implementation
This section includes implementation, but again, not the details, just the high level. For example, you can list the steps it takes to communicate over a sensor, or the steps needed to write a page of memory onto SPI Flash. You can include sub-sections for each of your component implementation.
Testing & Technical Challenges
Describe the challenges of your project. What advise would you give yourself or someone else if your project can be started from scratch again? Make a smooth transition to testing section and described what it took to test your project.
Include sub-sections that list out a problem and solution, such as:
Wifi Connection Issues
Many wifi connection issues were encountered. To solve this problem, a dedicated task was created to re-connect to wifi if the connection was ever lost.
Conclusion
Conclude your project here. You can recap your testing and problems. You should address the "so what" part here to indicate what you ultimately learnt from this project. How has this project increased your knowledge?
Project Video
Upload a video of your project and post the link here.
Project Source Code
Send me your zipped source code and I will upload this to SourceForge and link it for you.
References
Acknowledgement
Any acknowledgement that you may wish to provide can be included here.
References Used
Appendix
You can list the references you used.
