Difference between revisions of "S14: Need For Speed"
Proj user17 (talk | contribs) (→Testing) |
Proj user17 (talk | contribs) (→Steering Control) |
||
| Line 315: | Line 315: | ||
==== Android App Package ==== | ==== Android App Package ==== | ||
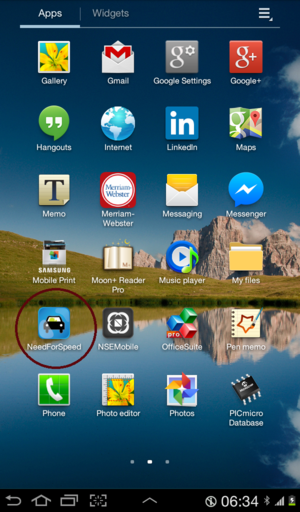
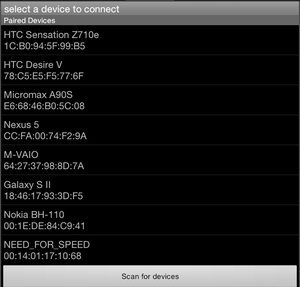
In our Android App Package, CMPE_244_NEED_FOR_SPEED, we have developed two activities. Our first Activity is the MainActivity which searches all the Bluetooth Devices possibly available and pairs the one we click on. For this purpose we have used the scanning of devices method instead of the IP Address technique. Once the pairing is successful, it will go to the next activity which is JSActivity which sends charachters and integers via bluetooth to the SJOne Board. This different data are send with the help of accelerometer Sensor in the Android Device. This is done by tilting the device. These sensor values were calibrated using the code in JSActivity. For accelerometer results, we find values of x, y and z values. These values are thus converted into integers and send via Bluetooth. We have made many projects before, until we finalized this one. We also made one spare application, in which we had a joystick kind of controller. This was done using Android Widgets. But we liked the accelerometer android app more and decided to go with it. Thus for this app, we have two files in source folder, one is MainActivity.java and other is JSActivity.java. Their corresponding xml file were written in Relative Layout format. One is activity_main.xml and other is remote_active.xml. And finally in AndroidManifest we declare the MainActivity first and after that we declare the JSActivity. | In our Android App Package, CMPE_244_NEED_FOR_SPEED, we have developed two activities. Our first Activity is the MainActivity which searches all the Bluetooth Devices possibly available and pairs the one we click on. For this purpose we have used the scanning of devices method instead of the IP Address technique. Once the pairing is successful, it will go to the next activity which is JSActivity which sends charachters and integers via bluetooth to the SJOne Board. This different data are send with the help of accelerometer Sensor in the Android Device. This is done by tilting the device. These sensor values were calibrated using the code in JSActivity. For accelerometer results, we find values of x, y and z values. These values are thus converted into integers and send via Bluetooth. We have made many projects before, until we finalized this one. We also made one spare application, in which we had a joystick kind of controller. This was done using Android Widgets. But we liked the accelerometer android app more and decided to go with it. Thus for this app, we have two files in source folder, one is MainActivity.java and other is JSActivity.java. Their corresponding xml file were written in Relative Layout format. One is activity_main.xml and other is remote_active.xml. And finally in AndroidManifest we declare the MainActivity first and after that we declare the JSActivity. | ||
| − | |||
| − | |||
| − | |||
| − | |||
| − | |||
| − | |||
| − | |||
| − | |||
| − | |||
| − | |||
| − | |||
| − | |||
| − | |||
| − | |||
| − | |||
| − | |||
| − | |||
| − | |||
| − | |||
| − | |||
| − | |||
| − | |||
| − | |||
==== Distance Sensors: I2C ==== | ==== Distance Sensors: I2C ==== | ||
Revision as of 01:07, 23 May 2014
Contents
- 1 Abstract
- 2 Introduction
- 3 Objectives
- 4 Team Members & Responsibilities
- 5 Schedule
- 6 Parts List & Cost
- 7 Design and Implementation
- 8 Technical Challenges
- 9 Conclusion
- 10 Finished Product
- 11 References
Abstract
This page contains design and implementation of our Embedded Software project, Need For Speed. It's about maneuvering an RC vehicle using the Acceleration Sensor in a smart phone. An Android Application is developed to transmit the Acceleration Sensor Signals to the vehicle via Bluetooth. The car is mounted with a Bluetooth module to receive data from the phone. And the acceleration and turning of the vehicle will be based on this data. The vehicle is also mounted with two Infrared Sensor modules for collision detection, one in the front and other in the rear.Detection of any obstacle in the vehicles path will bring the vehicle to a halt state immediately.
Introduction
In this project we are using JY-MCU Bluetooth module to be the wireless link between the smartphone and the battery powered RC vehicle. The Android application is developed to transmit a particular byte for every threshold value of the Acceleration Sensor i.e. when the phone is one byte for front tilt and another for back. This received byte is compared by the SJOne board with few predefined values and accordingly PWM signals are given to the motors.
The input of the IR sensors is connected to the hardware interrupts on the SJOne board, the interrupt subroutine will be called every time there is an obstacle in the path of the vehicle, this subroutine will in turn stop the vehicle.
Objectives
As this project is both software and hardware based, our objectives were as follows;
- Hardware Objectives
- To achieve a constant 6V DC supply for the motors and 5V DC for the board from the battery.
- To interface the motors to the SJOne board via L298 motor driver.
- To calibrate the IR sensors to sense obstacle in 6" proximity.
- Software Objectives
- To develop an Android application to send the data from Acceleration Sensor via Bluetooth.
- To develop a FreeRTOS code to receive these signals and process them.
- To develop a FreeRTOS code to send PWM sigal to the motor for variable speed.
- To develop a FreeRTOS code to accept interrupt from the IR sensors and take actions accordingly.
Team Members & Responsibilities
- Amey Patil
- Hardware Design
- Free RTOS (Part 1: To interface motors and LPC1758 using PWM)
- Free RTOS (Part 2: To configure the Bluetooth module)
- Siddhata Patil
- Free RTOS (Part 3: To send and receive data between Bluetooth module and LPC1758)
- Android Application(Part1: To send data from Android Phone to LPC1758)
- Android Application(Part2: To send results of accelerometer sensor from Android Phone to LPC1758)
Schedule
| Week# | Planned Date | Completed Date | Tasks | Status |
|---|---|---|---|---|
| 1 | 3/6 | 3/13 | Planning Hardware and placing order for the required components | Completed |
| 2 | 3/20 | 3/20 | Designing and Assembling the Hardware(Motors+Motor Driver+LPC1758) | Completed |
| 3 | 3/20 | 3/20 | Reviewing Datasheet, Pin Selection and Setting up the Software | Completed |
| 4 | 3/27 | 3/27 | Designing and Assembling the Hardware(Bluetooth Module+LPC1758) | Completed |
| 5 | 3/27 | 3/27 | Free RTOS pairing between LPC1758 and Bluetooth Module | Completed |
| 6 | 3/28 | 3/28 | Testing the pairing of Bluetooth and LPC1758 | Completed |
| 7 | 4/3 | 4/3 | Free RTOS code for PWM | Completed |
| 8 | 4/11 | 4/18 | Free RTOS code for sending and receiving data from Bluetooth | Completed |
| 9 | 4/18 | 4/24 | Android App Designing and learning basics of Android SDK | Completed |
| 10 | 4/24 | 4/24 | Android App Designing | Completed |
| 11 | 5/1 | Android App java code to transfer data from phone to LPC1758 | ||
| 12 | 5/1 | Android App java code to send values of accelerometer sensor to LPC1758 | ||
| 13 | 5/1 | 5/ | Final Project Report | |
| 14 | 5/8 | 5/8 | Final Demo |
Parts List & Cost
| Category | Item | Quantity | Unit Cost | Total Cost |
|---|---|---|---|---|
| Electronics | SJOne Board | 1 | 80.00 | 80.00 |
| 9.6V 1600mAh Rechargeable Ni-Mh Battery | 1 | 14.42 | 14.42 | |
| 6V DC Gear Motor with Tyres | 4 | 3.25 | 13.00 | |
| JY-MCU Bluetooth Module | 1 | 7.68 | 7.68 | |
| IR Transceiver Module | 2 | 1.00 | 2.00 | |
| L298 Motor Driver | 1 | 7.50 | 7.50 | |
| LM 7806 Voltage Regulator | 1 | 0.45 | 0.45 | |
| LM 7805 Voltage Regulator | 1 | 0.32 | 0.32 | |
| 10uF Electrolytic Capacitor | 2 | 0.13 | 0.26 | |
| 1uF Ceramic Capacitor | 2 | 0.10 | 0.20 | |
| Chassis | Smart Car Chassis | 1 | 10.00 | 10.00 |
| Connections | Nuts, Bolts and Spacers | 3.00 | ||
| Phone | Android Smart Phone | 1 | ||
| TOTAL | $138.83 |
Design and Implementation
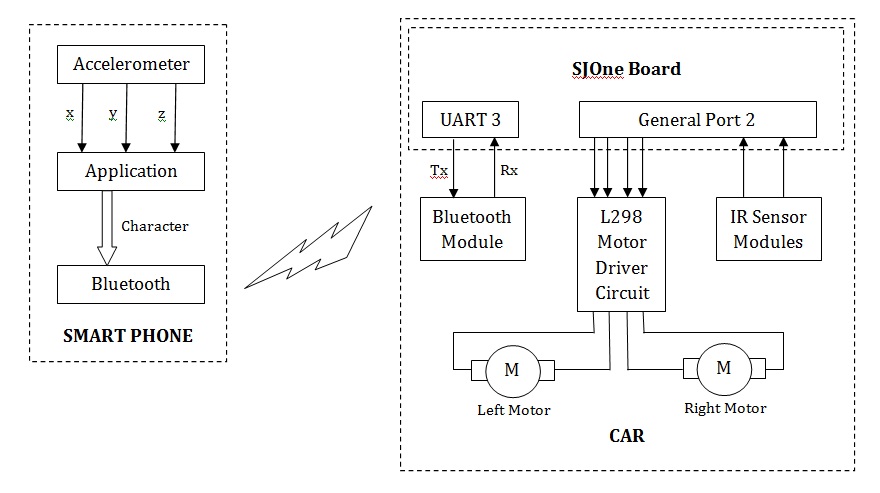
The above Block Diagram shows the overall implementation of the project. The accelerometer values (x, y, z) are used as an input by the android application. Depending on the instantaneous values, tilt will be determined. This tilt value will be provided to the Bluetooth for transmission. At the receiver, this tilt data will be received by the Bluetooth Module and provided to the LPC 1758 board via an UART channel. The on board processor will compare the received data with the stored values and generate PWM signals accordingly. The motor driver upon reception of this will driver the vehicle in the respective direction. We will see detailed explanation of the hardware and software in their respective sections.
Hardware Interface
Let us understand the whole structure piece by piece.
1. LPC 1758 SJOne Board
This board was a part of our course on Embedded Software at San Jose State University. For more information on the SJOne board Click_me.
2. Power Supply
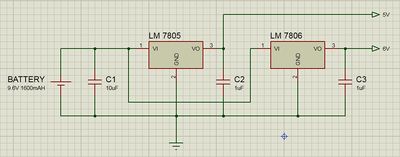
We need to generate steady 5V supply for the board while 6V for the motors without any current limitation otherwise the motors will not give its optimum output. To our luck, LM7806 voltage regulators are also available in the market along with the LM7805. The circuit schematic is as shown in the figure above.
The total current requirement of the circuit is around 1Amp. If this much current is to be drawn through the regulators then we must make sure the heat generated is properly dissipated, so we use heat sink. Most of the current will be driven through the LM7806 regulator as it drives the motors hence, we made sure that it is not surrounded by any other component. As, the LM7805 regulator just drives the SJOne board and IR module, current flowing through it is around 100mA. Hence, this regulator won't heat as much as the other one.
3. L298 Motor Driver
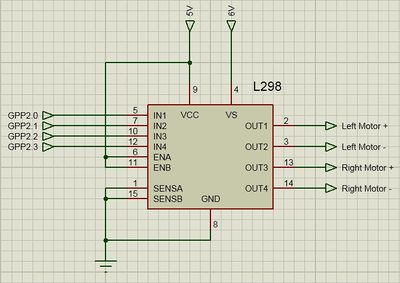
You must be thinking why didn't I use L293D as it is best for 6V motors and much easy to interface. Well, one of our motor consumes 200mA of current, which makes the total current 800mA that too in no load conditions. With load it might have seared upto 1A. Now the maximum handling capacity of L293D is 1A while that of L298 is 2A. Hence, for safety reasons I went for L298 motor driver. The pin connect for this interface is as shown in the above figure. The functions of the pins are as follows;
IN1 receives 'PWM input for left motor +' from LPC 1758 and drives OUT1
IN2 receives 'PWM input for left motor -' from LPC 1758 and drives OUT2
IN3 receives 'PWM input for right motor +' from LPC 1758 and drives OUT3
IN4 receives 'PWM input for right motor -' from LPC 1758 and drives OUT4
SENSE A limits the current for Left Motor
SENSE B limits the current for Right Motor
VS: Supply voltage for the Motors
For more information on L298 Driver, Click_me.
4. IR module
The IR module we are using is custom made. It is is designed to output logic '1' if any obstacle is detected or else logic '0'. The output signal from the IR receiver is directly proportional to the amount of IR waves falling on it. Hence, the output voltage for an obstacle far from the receiver will be less than that of a closer object.
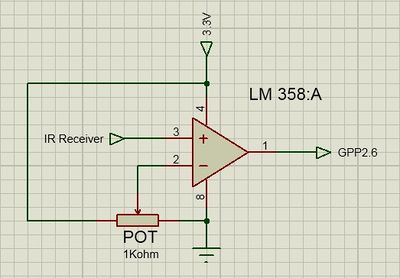
In any case this output is in millivolts hence, we gave it as an input to LM358 which is a dual op-amp IC. This op-amp is configured in comparator mode. When the input at the non-inverting terminal is higher than the threshold voltage provided to the inverting terminal, the op-amp will give a logic high output. Hence, the threshold voltage is inversely proportional to the distance of the obstacle. So we connected a potentiometer at the input of the threshold voltage by which we can vary the range of obstacle detection.
In the case of IR the sensitivity of the reciever is not sufficient to detect obstacle at a longer distance. We were able to acheive obstacle detection in 2 inches of proximity. If, you are looking for detection at a longer distance, we would suggest you to go for Ultrasonic sensor modules which can even give you the distance of the obstacle from the vehicle.
Figure shows the circuit schematic of the IR module. This is circuit for one of the IR module. Two such circuits are implemented for front and back.
Hardware Design
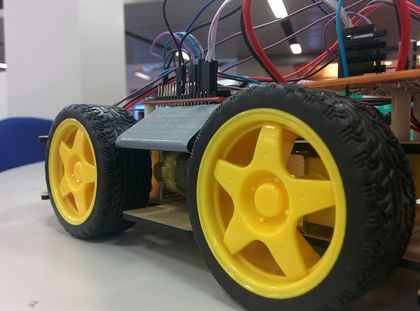
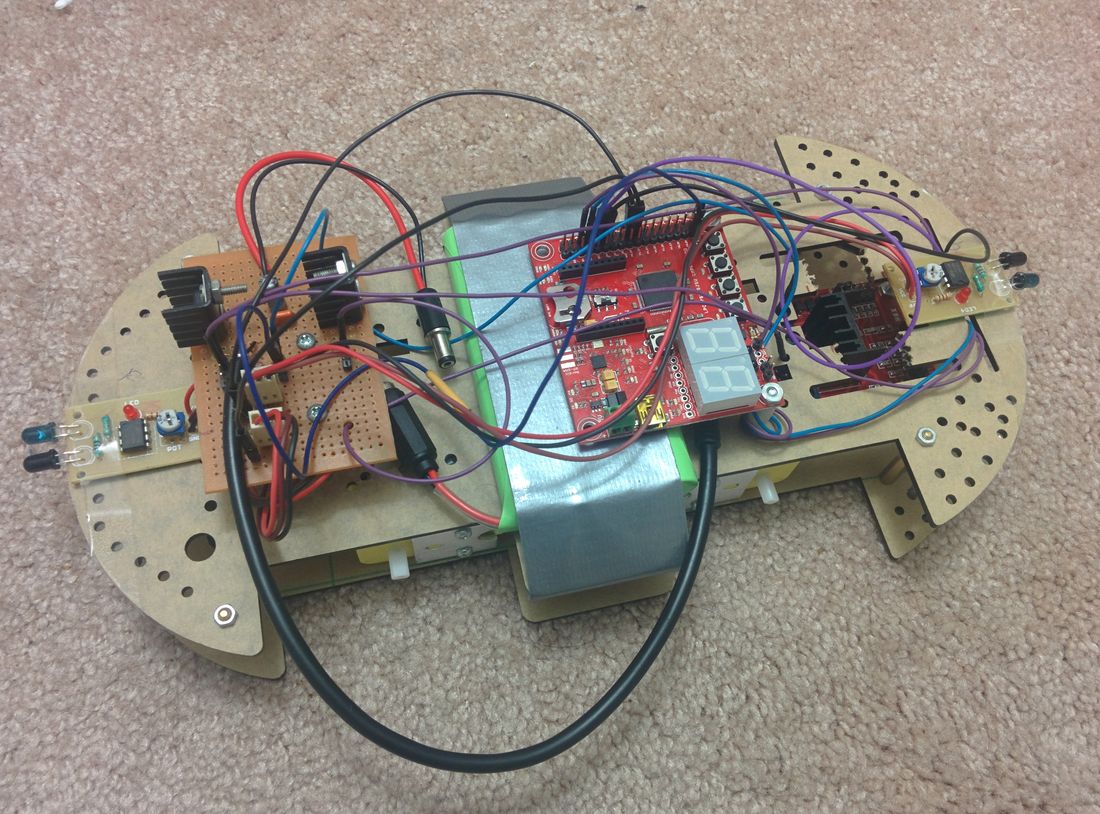
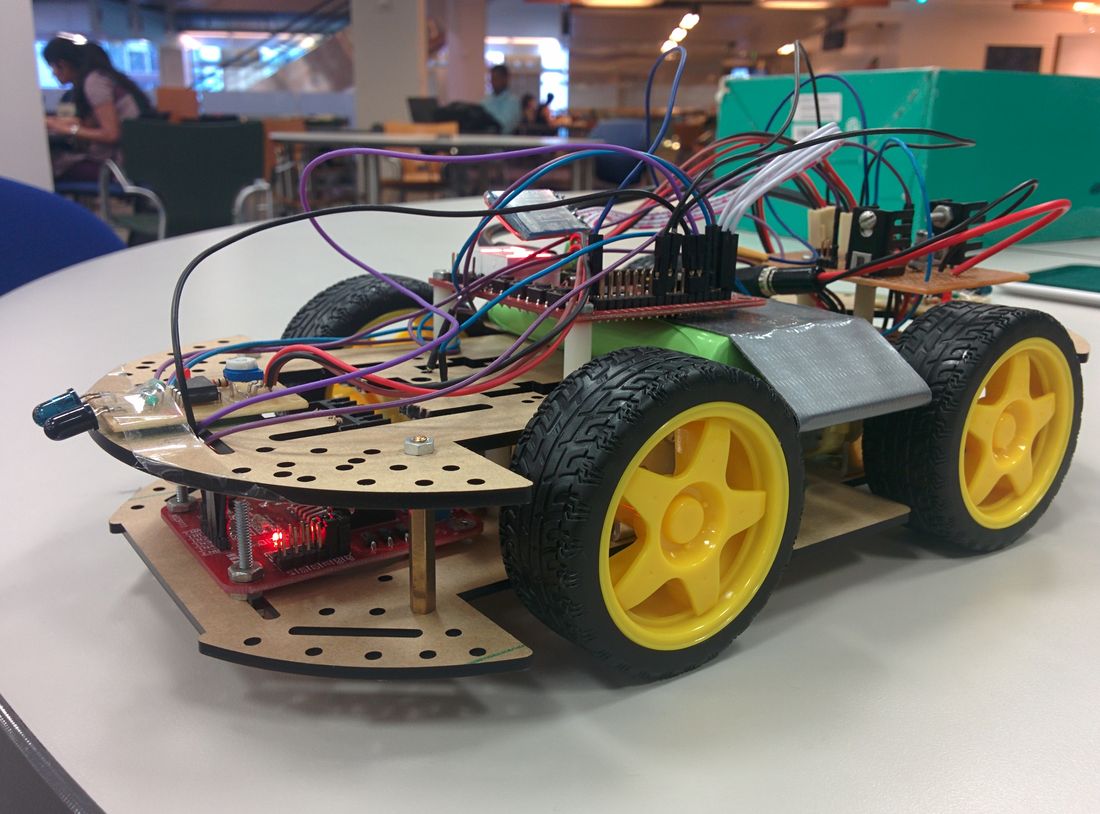
This section emphasizes on how all the modules we saw above were put together. It was really a task to accommodate all the devices on the chassis. The following image shows the hardware in progress followed by the final product.
Hardware Implementation
Frame and Inner Placement
[[]]For convenience, a New Bright toy RC car was purchased and disassembled. The motors and wheels were already pre-mounted onto the chassis. Motor controllers could easily control the motors to drive and steer the vehicle. On the chassis, slots above the wheel wells were large enough to house motor controllers while the center of the chassis provided enough room to include a small breadboard and the microcontroller. All wires were shortened to the shortest length possible to reduce clutter.
FreeRTOS Programming
Android App Developement Design
Using Android SDK
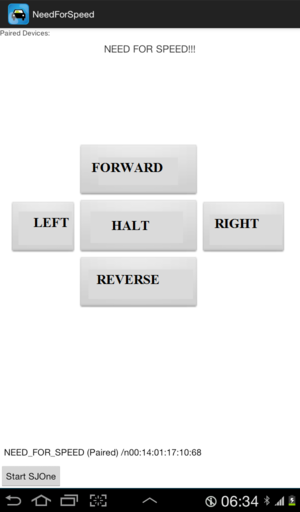
Android Application Developement was new to both of us. So we started with basic lectures on Android SDK. In our Android Application our objective was to pair bluetooth device on our phone with the bluetooth module that we used with SJOne Board. For pairing of devices we used the search and scan method of bluetooth devices insted of using IP address. Thus making it more User friendly. Once the pairing was done successfully we went to the next step, which was designing of Controller for the RC Car. In this process we designed lots of controllers like remote based controller, joystick based controller and finally settled to the motion controller with the help of the in built accelerometer sensor of the android device. This was done using tilting motion of the android device. Here the device was calibrated such that the parallel position with respect to ground was considered zero position.
Testing the Android Application
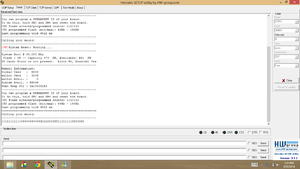
The Testing was carried out by using the android device in developement mode. In this mode, we had enabled USB debugging which allowed us to run our Android Application directly on our Android Device, thus saving lot of our time due to the slow emulator. When the project was build successfully, the APK file was then transfered to another android device and thus double testing was carried out. After the Android Application was ready, it was time to test the interface of the hardware. For this, we had to first check whether the android device was able to send data to the SJOne Board via bluetooth. This was done by connecting the SJOne Board to the Laptop. The result were seen on Hercules. If you enlarge the image you can see various numbers which show a successfull sending of the data. We have conditions like Forward, Backward, Right, Left and Halt. Each one is assigned a different integer value as seen in the screenshot.
Android App Package
In our Android App Package, CMPE_244_NEED_FOR_SPEED, we have developed two activities. Our first Activity is the MainActivity which searches all the Bluetooth Devices possibly available and pairs the one we click on. For this purpose we have used the scanning of devices method instead of the IP Address technique. Once the pairing is successful, it will go to the next activity which is JSActivity which sends charachters and integers via bluetooth to the SJOne Board. This different data are send with the help of accelerometer Sensor in the Android Device. This is done by tilting the device. These sensor values were calibrated using the code in JSActivity. For accelerometer results, we find values of x, y and z values. These values are thus converted into integers and send via Bluetooth. We have made many projects before, until we finalized this one. We also made one spare application, in which we had a joystick kind of controller. This was done using Android Widgets. But we liked the accelerometer android app more and decided to go with it. Thus for this app, we have two files in source folder, one is MainActivity.java and other is JSActivity.java. Their corresponding xml file were written in Relative Layout format. One is activity_main.xml and other is remote_active.xml. And finally in AndroidManifest we declare the MainActivity first and after that we declare the JSActivity.
Distance Sensors: I2C
The distance sensors were designed for use on the I2C or serial buses. Based on pin availability and software convenience, I2C was used to gather distance information from the sensors. The next question was: How would the microcontroller distinguish between the three sensors? A glance at the technical specifications provided the solution. Each sensor was equipped with a handy LED that flashed its address in a recognizable sequence. Each sequence was one long flash, accompanied by a number of short flashes. The short flashes represented the difference in the current address from 0xE0 in increments of 0x02, up to 15 short flashes. Legal addresses ranged from 0xE0 to 0xFE.
By comparing the sequence emitted, a programmer could determine the sensor's set address. Also, its address could be altered to allow the I2C to accommodate additional sensors, though each sensor must be programmed individually, one at a time. This sequence was used to set each sensor:
- Get sensor address
- Send 0xA0 to address
- Send 0xAA to address
- Send 0xA5 to address
- Send new address to address
For convenience, the following addresses were selected for the sensors: 0xE2 for the left sensor, 0xE4 for the center, and 0xE6 for the right. [[]] An I2C call is made when the microcontroller wants to retrieve information from the distance sensors. The I2C bus is shared, and the program allocates enough time to release slave devices when required. The "unit_command" variable was set to 81 to force the sensor to measure distances in centimeters. If the user wants to opt for measurements in inches, the variable can simply be changed to 80.
Locations 2 and 3 hold the newest reading in a 16-bit unsigned integer format. Through high and low bytes, the sensor readings could be retrieved. The datasheet warns that it is best to give a minimum of 65 milliseconds for the pings to fade away properly. In the code, a 75 ms vTaskDelay was added to accommodate for the wait.
Motion Sensor
As with the front motor, the pins for the motion sensor were initialized:
- Assign P0.10 as GPIO
- Set P0.10 as input
A GPIO input pin was designated on the microcontroller to interact with the motion sensor. The motion sensor dropped its voltage to zero whenever motion was detected, which registered sufficient data for the pin on the board.
To check for motion, the code looked for a zero on the P0.10 pin.
The system surveyed for motion eight times in 500 millisecond intervals. When motion was detected in five out of those eight intervals, the alarm was sounded. This prevented false alarms from occurring, in the event that stray, non-legitimate motion came across the sensor's environment. This diagram shows the motion surveying method: [[]]
Loading the Software
[[]]Once the program was built and compiled, a .hex file was generated, which contained the program that will be read by the microcontroller. The .hex file was transferred from computer to microcontroller through a USB cable. HyperLoad 1.1 was run on the programming computer to interact with the microcontroller via USB. Setting up HyperLoad 1.1 included changing the COM port speed to 500000 bps and target CPU frequency to 48000000. The .hex file was chosen, the proper port was opened, and the file was transferred.
Software Implementation
Task Flowchart
The program was designed to run by employing tasks that handled sensor readings and appropriate outputs. A "drive" task was assigned to handle vehicular driving, and a "SensorValue" task was assigned to continuously capture data from the distance and motion sensors. When combined, the tasks worked to drive the vehicle safely through a path. The below illustrates how the general function of the program used to control the Evil Watchdog: [[]] A timer, in conjunction with the vTaskDelay command, allowed the microcontroller to switch between driving mode and motion sensing mode. It is important to note that scanning for motion while the vehicle is moving is pointless. Unless there was a way to filter out motion caused by the vehicle, it was better to stop the vehicle briefly to look for motion before continuing driving.
Technical Challenges
Battery Life
Distance Sensor Placement
Motion Sensor Polling
Vehicle Weight
Conclusion
Finished Product
References
Thanks To...
- Preet Kang: Lecturer
Datasheets
- [1] Philips Semiconductors. LPC214x datasheet. August 2006.
- [2] Robot Electronics. SRF02 ultrasonic range finder datasheet. Retrieved from http://www.robot-electronics.co.uk/htm/srf02techI2C.htm
Appendix
- [Project source code is available at SourceForge]
- [Project Demonstration Video]
