Difference between revisions of "F20: Flappy"
Proj user2 (talk | contribs) (→Abstract) |
Proj user2 (talk | contribs) (→Abstract) |
||
| Line 3: | Line 3: | ||
== Abstract == | == Abstract == | ||
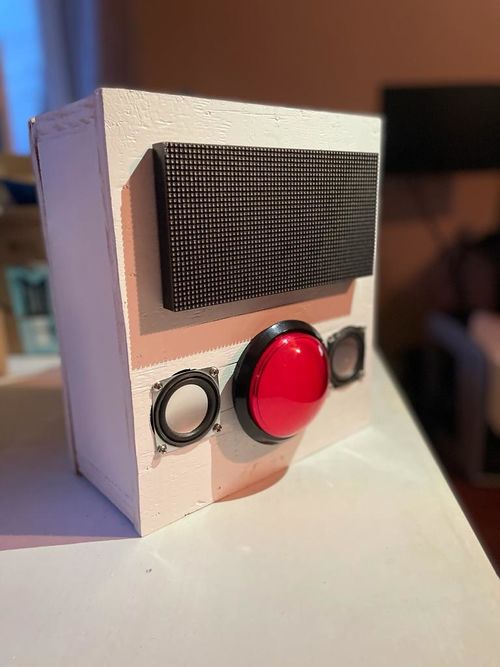
'''''FLAPPY''''' is one of the most anticipated gaming machines of the year 2020. Adopted the timeless design of the Gameboy Advance, it can play one and only one game(albeit the best game of all time in our opinion): FLAPPY BIRD. The player is advised to move the main character wisely (up and down) to NOT hit the beautiful green pipe. With simple gameplay and catchy music, it guarantees thousands of seconds of interesting game for the entire family. | '''''FLAPPY''''' is one of the most anticipated gaming machines of the year 2020. Adopted the timeless design of the Gameboy Advance, it can play one and only one game(albeit the best game of all time in our opinion): FLAPPY BIRD. The player is advised to move the main character wisely (up and down) to NOT hit the beautiful green pipe. With simple gameplay and catchy music, it guarantees thousands of seconds of interesting game for the entire family. | ||
| − | [[File:FlappyDevice.jpg]] | + | [[File:FlappyDevice.jpg |500px]] |
== Objectives & Introduction == | == Objectives & Introduction == | ||
Revision as of 03:43, 18 December 2020
Contents
FLAPPY
Abstract
FLAPPY is one of the most anticipated gaming machines of the year 2020. Adopted the timeless design of the Gameboy Advance, it can play one and only one game(albeit the best game of all time in our opinion): FLAPPY BIRD. The player is advised to move the main character wisely (up and down) to NOT hit the beautiful green pipe. With simple gameplay and catchy music, it guarantees thousands of seconds of interesting game for the entire family.
Objectives & Introduction
The main objective of our project was to re-create the iconic Flappy Bird mobile game into a physical gaming device. Our team tried to simplify the device in accordance with the original game spirit: its simplicity. Using the SJ2 board, our team started by researching for suitable components and interfaced them together to replicate Flappy Bird
Objectives:
- Smooth button usage and it must handle the push differently based on the scenes
- Write a simple driver to communicate with the LED
- Write a separate driver for game graphic
- Design a state machine to handle different game tasks such as the start screen, gameplay, and ending screen
- Implement the game logic for movement of the bird, collision detection, randomized obstacle generation, and a score keeping system
Team Members & Responsibilities
- Huy Nguyen
- Git Admin
- LED Matrix Driver
- Game Graphic Driver
- Overall Software Stack
- Michael Wang
- LED Matrix Driver
- Obstacle Generations
- Overall Software Stack
- Brian Tran
- Soundboard Driver and Hardware Integration
- Overall Hardware Stack
- Case built and design
- Code debug
- Danny Nuch
- PCB design and Hardware Integration
- Overall Hardware Stack
- Code debug
Schedule
| Week | Date | Task | Status |
|---|---|---|---|
| 1 | 10/13 |
|
|
| 2 | 10/20 |
|
|
| 3 | 10/27 |
|
|
| 4 | 11/3 |
|
|
| 5 | 11/10 |
|
|
| 6 | 11/17 |
|
|
| 7 | 11/24 |
|
|
| 8 | 12/1 |
|
|
| 10 | 12/16 |
|
|
Parts List & Cost
| Part Name | Quantity | Cost Per Unit |
|---|---|---|
| SJ2 Board | 1 | $50 |
| 32x64 RGB LED Matrix | 1 | $22 |
| 5V Power Supply | 1 | $13.19 |
| Adafruit Soundboard | 1 | $29.95 |
| Adafruit Amplifier | 1 | $9.95 |
| Speaker | 2 | $1.95 |
| Red Button | 1 | $19.95 |
| Wood | 6 | $9.95 |
| Satin White Spray Paint | 6 | $5.98 |
Design & Implementation
The design section can go over your hardware and software design. Organize this section using sub-sections that go over your design and implementation.
Hardware Design
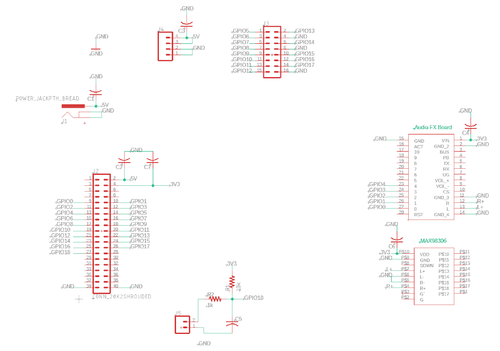
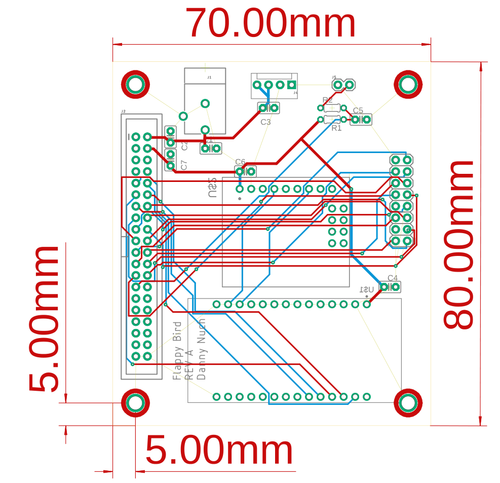
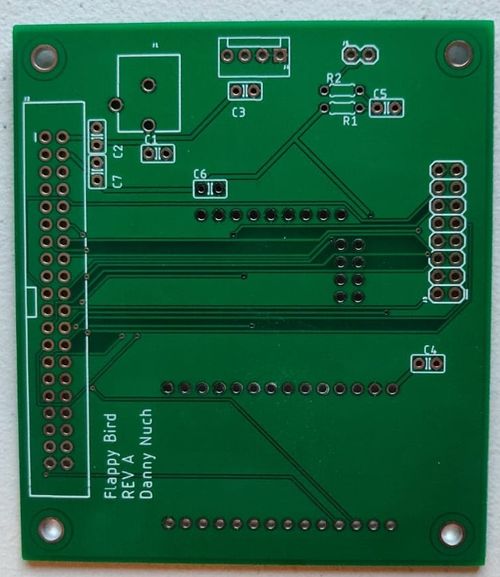
Discuss your hardware design here. Show detailed schematics, and the interface here.
Why PCB? Accomplishes?
| GPIO ID number | SJ2 GPIO | Connection |
|---|---|---|
| 0 | P0.6 | Audio 0 |
| 1 | P0.7 | Audio music connection 1 |
| 2 | P0.8 | Audio music connection 2 |
| 3 | P0.9 | Audio music connection 3 |
| 4 | P0.26 | Audio music connection 4 |
| 5 | P0.25 | LED matrix Red 1 |
| 6 | P1.31 | LED matrix Blue 1 |
| 7 | P1.30 | LED matrix Red 2 |
| 8 | P1.20 | LED matrix Blue 2 |
| 9 | P1.23 | LED matrix A selector |
| 10 | P1.28 | LED matrix C selector |
| 11 | P1.29 | LED matrix clock |
| 12 | P2.0 | LED matrix output enable |
| 13 | P2.1 | LED matrix Green 1 |
| 14 | P2.2 | LED matrix Green 2 |
| 15 | P2.4 | LED matrix B selector |
| 16 | P2.5 | LED matrix D selector |
| 17 | P2.5 | LED matrix Latch |
| 18 | P2.7 | Game button connection |
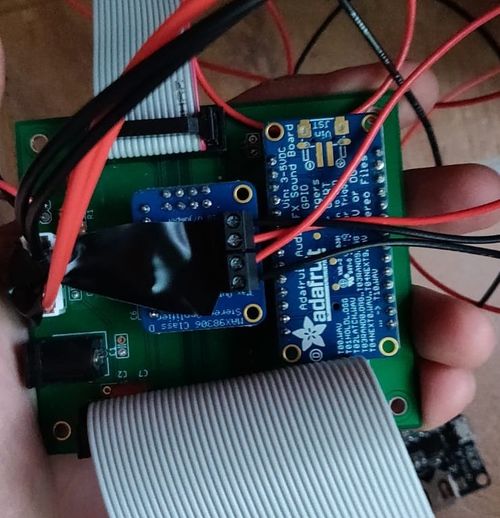
- 5v jack barrel adapter - Two audio hats via female headers - SJ2 2x20 ribbon cable - LED matrix 2x8 ribbon cable, Molex 4-pin power connector - Button RC circuit - decoupling capacitors
trace widths; placements of units;
qwerty
Hardware Interface
In this section, you can describe how your hardware communicates, such as which BUSes used. You can discuss your driver implementation here, such that the Software Design section is isolated to talk about high level workings rather than inner working of your project.
Software Design
Show your software design. For example, if you are designing an MP3 Player, show the tasks that you are using, and what they are doing at a high level. Do not show the details of the code. For example, do not show exact code, but you may show psuedocode and fragments of code. Keep in mind that you are showing DESIGN of your software, not the inner workings of it.
Implementation
This section includes implementation, but again, not the details, just the high level. For example, you can list the steps it takes to communicate over a sensor, or the steps needed to write a page of memory onto SPI Flash. You can include sub-sections for each of your component implementation.
Testing & Technical Challenges
Describe the challenges of your project. What advise would you give yourself or someone else if your project can be started from scratch again? Make a smooth transition to testing section and described what it took to test your project.
For our project we ran into many road block that were amplified due to the current state of affairs. Our advice would be to get the hardware layout done ASAP so PCB design and ordering can began. This will give some leeway for shipping delays, bad products, and debugging time.
Testing the project itself was not hard, but time was definitely an invaluable resource. Testing the parts individually (cables, PCB, LED matrix, etc) was simple but time consuming. To test our parts we utilized a multi-meter to check continuity on the PCB connections and our soldering work. A mistake we made was not testing our ribbon cables, which damaged one of our SJ2s when we switched out our GPIO cables.
Major Challenges:
1. Estimated Delivery of Parts
We faced some unexpected issues when gathering all the components for our project. Several parts came in late like our LED matrix and sometimes were dead-on-arrival. This issue was the worst regarding our PCB parts. Components such as the 2x20 headers and ribbon cable were delayed and did not arrive in a reasonable amount of time. Looking back, ordering the parts online was not ideal. Going to a parts store such as Anchor electronics would have saved us many of the headaches waiting for common parts to arrive.
2. Shoddy Quality Parts
Parts we ordered from amazon and parts from our local electronics shop proved to be faulty. Two LED matrixes did not properly light-up and it was not until our third matrix were we able to get a working one. The ribbon cables we used in our project were also shorted, which resulted in us shorting one of our SJ2s. To resolve this issue we should have budgeted extra time to individually check cable connections.
3. Music/Sound Effect Playback
One of the issues we experienced was our speakers only outputting noise during final project testing. This issue did not show up when testing parts individually using the SJ2 as a 3.3V power source. The issue was however determined to be the SJ2. Although it correctly flashed code and ran the LED matrix or DAC+AMP individually without issue, when combined the DAC was unable to output music. Using a different groupmate's SJ2 solved the issue completely. This issue was most likely tied to us using a faulty ribbon cable that only partially damaged our SJ2 board.
4. RGB LED Matrix Irregular Brightness
This is an issue we could not resolve in time before project submission. When our project was connection via GPIO pins it looked perfect. When connected through our PCB however, several rows of LEDs would shine brighter than the rest. Seeing this to be the case we determined the issue to most likely be noise at the PCB level.
Conclusion
Conclude your project here. You can recap your testing and problems. You should address the "so what" part here to indicate what you ultimately learnt from this project. How has this project increased your knowledge?
For our project we successfully created our game with our the designed game mechanics. The overall project however, was hindered by our poor time management. Many of the major problems encountered could have been solved more elegantly given more time and more rigorous testing. Overall, the biggest lesson we learned from the project is time & project management. Utilizing our time more wisely would have allowed us to allocate more resources into problem solving and additional gameplay features.
All in all, the project was a demonstration of the FreeRTOS knowledge learned in CMPE244 to create a deliverable.
Project Video
Upload a video of your project and post the link here.
Project Source Code
References
Acknowledgement
Any acknowledgement that you may wish to provide can be included here.
References Used
List any references used in project.
Appendix
You can list the references you used.
