Difference between revisions of "F15: Laser Security System"
Proj 146u4 (talk | contribs) (→Conclusion) |
Proj 146u4 (talk | contribs) (→My Issue #1) |
||
| Line 282: | Line 282: | ||
=== My Issue #1 === | === My Issue #1 === | ||
| − | + | One of the problems encounter in this project was that a pin in the cellular shield was not giving enough power for two boards. To solve this problem we connected an external power supply to the Arduino board and connected the voltage pin to the SJSU one board and the cellular shield board. | |
| + | |||
| + | === My Issue #2 === | ||
| + | Another of the problems encounter in this project was that we never had worked with bluetooth communication and interfacing it with laser detection circuit and between two microcontrollers was challenging so to solve this problem so a lot of research was done before even building the first circuit in this project which was the light detection sensor circuit. One way to solve this problem was to break our project into 3 parts and make sure the first part of the project was performing its functionality before moving into the other part of the project. | ||
== Conclusion == | == Conclusion == | ||
Revision as of 11:06, 17 December 2015
Contents
Laser Security System
Abstract
The Laser Security System allows to maintain security in a room by shining a laser across a door's entrance and alerting via bluetooth communication by sending a text message to a smart phone that security has been compromised.
Objectives & Introduction
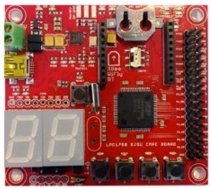
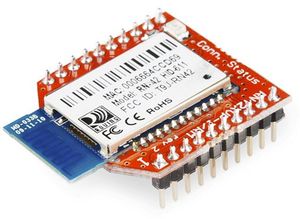
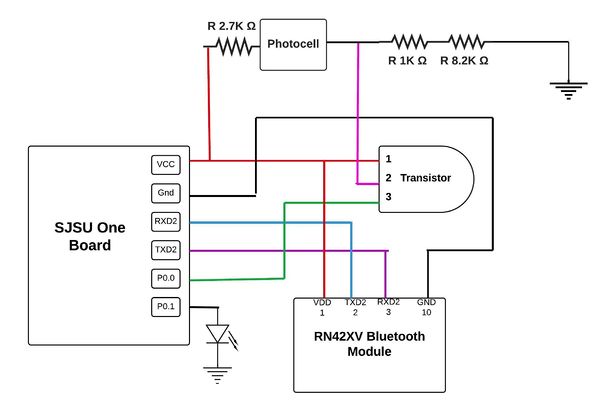
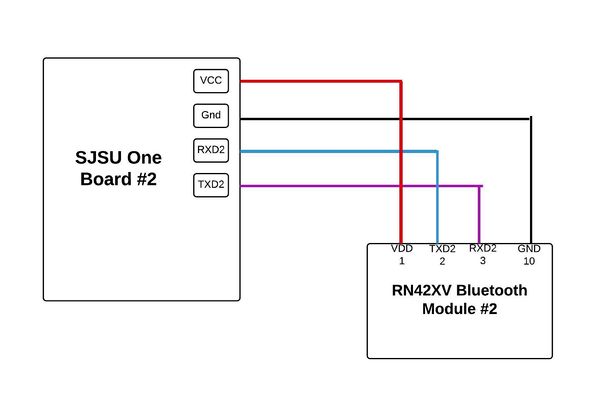
This security system will be using GPIO pins from the SJSUOne Board to connect to the RN42-XV Bluetooth Module using serial communication and another pin to the Arduino. The two bluetooth modules each connected to a SJSUOne Board will communicate with each other sending a message via text message using the Arduino module alerting that security has been compromised.
Objectives for this project:
- Research and design the schematics to connect a light detection circuit to one of the SJSUOne Board and showing the output by lighting an LED
- Research bluetooth communication and implement it to the light detection circuit
- Complete hardware design
- Test functionality of the system
- Able to send and receive text messages to smart phone via bluetooth
- Detect and connect to other bluetooth devices
Team Members & Responsibilities
Emmanuel Gonzalez: Software Implementation and Report Writer
Irlanda Altamirano: Hardware Implementation and Report Writer
Schedule
| Week# | Date | Planned Task | Actual |
|---|---|---|---|
| 1 | 10/12-10/18 |
• Project Approval • Project Research • Purchase all required parts |
• Project Research |
| 2 | 10/19-10/25 |
• Build Schematics • Order all parts • Test individual components |
• Schematics for the overall system is done • Order all parts |
| 3 | 10/26-11/1 |
• Begin hardware design interfacing a laser, photo-resistor and SJ One Board • Test the hardware design |
• Hardware design implementation started |
| 4 | 11/2-11/8 |
• Trouble shoot hardware design with • Test the hardware as a whole |
• Hardware design implementation interfacing a laser, photo-resistor and SJ One Board completed |
| 5 | 11/9-11/15 |
• Research about Bluetooth communication • Build Bluetooth circuit |
• Test the hardware design • Starting software interfacing previous hardware implementation • Read data sheet for Bluetooth communication |
| 6 | 11/16-11/22 |
• Interface Bluetooth communication with SJ One Board • Test the complete hardware interface |
• Order another board for Bluetooth communication • Research more about Bluetooth communication |
| 7 | 11/23-11/29 |
• Test Bluetooth communication with SJ One Board |
• Hardware design implementation interfacing a laser, photo-resistor, bluetooth communication and SJ One Board started |
| 8 | 11/30-12/6 |
• Complete the software interfaces for laser, SJ One Board and Bluetooth communication • Implement text message feature with Bluetooth communication |
• Debugging bluetooth communication interface |
| 9 | 12/7-12/13 |
• Finish Debugging text message communication feature • Start writing project report • Test system design |
• Started implementing SMS feature with bluetooth communication • Continued the project report |
| 10 | 12/14-12/16 |
• Complete system testing • Finish project report |
• Debugging SMS/ bluetooth communication • Completed system testing • Created video for presentation • Finish project report |
| 11 | 12/17 |
• Demo Project on Thursday, December 17, 2015 |
• Demo Project completed |
Parts List & Cost
| Quantity | Item | Cost |
|---|---|---|
| 2 | SJ One Board | $80.00 |
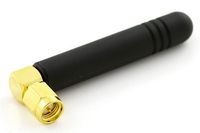
| 1 | Quad-band Cellular Duck Antenna SMA | $7.95 |
| 2 | RN42-XV Bluetooth Module - PCB Antenna | $24.95 |
| 1 | Mini Photocell | $1.50 |
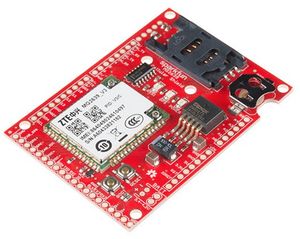
| 1 | SparkFun Cellular Shield - MG2639 | $69.95 |
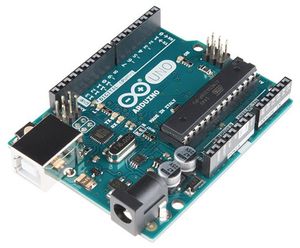
| 1 | Arduino Uno R3 | $24.95 |
| 1 | LED | $0.10 |
| 1 | Resistors 8.2K, 2.7K and 1K ohms | $0.20 |
Design & Implementation
The design section can go over your hardware and software design. Organize this section using sub-sections that go over your design and implementation.
Hardware Design
Discuss your hardware design here. Show detailed schematics, and the interface here.
Hardware Interface
In this section, you can describe how your hardware communicates, such as which BUSes used. You can discuss your driver implementation here, such that the Software Design section is isolated to talk about high level workings rather than inner working of your project.
Software Design
Show your software design. For example, if you are designing an MP3 Player, show the tasks that you are using, and what they are doing at a high level. Do not show the details of the code. For example, do not show exact code, but you may show psuedocode and fragments of code. Keep in mind that you are showing DESIGN of your software, not the inner workings of it.
Implementation
This section includes implementation, but again, not the details, just the high level. For example, you can list the steps it takes to communicate over a sensor, or the steps needed to write a page of memory onto SPI Flash. You can include sub-sections for each of your component implementation.
Testing & Technical Challenges
Describe the challenges of your project. What advise would you give yourself or someone else if your project can be started from scratch again? Make a smooth transition to testing section and described what it took to test your project.
Include sub-sections that list out a problem and solution, such as:
My Issue #1
One of the problems encounter in this project was that a pin in the cellular shield was not giving enough power for two boards. To solve this problem we connected an external power supply to the Arduino board and connected the voltage pin to the SJSU one board and the cellular shield board.
My Issue #2
Another of the problems encounter in this project was that we never had worked with bluetooth communication and interfacing it with laser detection circuit and between two microcontrollers was challenging so to solve this problem so a lot of research was done before even building the first circuit in this project which was the light detection sensor circuit. One way to solve this problem was to break our project into 3 parts and make sure the first part of the project was performing its functionality before moving into the other part of the project.
Conclusion
After overcoming the problems associated with this project and a lot of software debugging was performed we were able to successfully complete this project. Through out this project we learn about how to implement bluetooth communication between two microcontrollers from the hardware and software side. Understanding data sheets for the devices and obtaining the information needed to implemented such as bluetooth module, Arduino board, SJSO one board and cellular shield was crucial in order to obtain a successful outcome and functionality of the security system.
Project Video
Project Demo: https://youtu.be/Z2P5bmgPy7c
Project Source Code
References
Acknowledgement
We would like to thank the following people for their contributions and support during this project:
Preetpal Kang and Dr. Haluk Ozemek
References Used
Appendix
Bluetooth Module
https://www.sparkfun.com/products/11601
LPC1759 Datasheet
http://www.nxp.com/documents/data_sheet/LPC1759_58_56_54_52_51.pdf
LPC176x/5x User manual
http://www.nxp.com/documents/user_manual/UM10360.pdf
RN42XV Bluetooth Module
http://cdn.sparkfun.com/datasheets/Wireless/Bluetooth/RN42XV.pdf
General Purpose Transistor
file:///Users/Irlanda/Downloads/410427.pdf
