Difference between revisions of "F19: Space Impact"
Proj user3 (talk | contribs) (→Schedule) |
Proj user3 (talk | contribs) (→Team Members & Responsibilities:) |
||
| (195 intermediate revisions by the same user not shown) | |||
| Line 2: | Line 2: | ||
== Abstract == | == Abstract == | ||
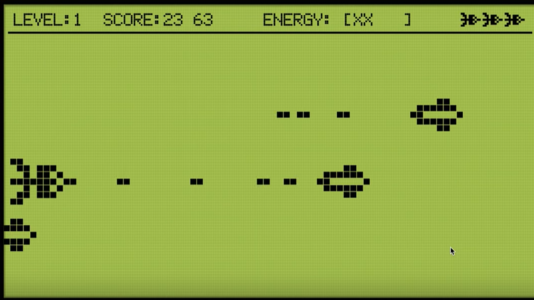
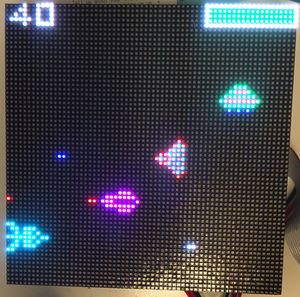
| − | Space Impact is a classic game from the days of the Nokia era. Our objective is to design a game in which a player is prompted to protect a spaceship from incoming missiles by moving the ship up and down. The player will also have the ability to fire back at the incoming enemies. | + | Space Impact is a classic game from the days of the Nokia era. Our objective is to design a game in which a player is prompted to protect a spaceship from incoming missiles by moving the ship up and down. The player will also have the ability to fire back at the incoming enemies. Taking damage from the enemy will reduce the health of the spaceship and zero health will lead to the game over screen. The game involves a user controlling a spaceship through an accelerometer, guiding the spaceship across many enemy spacecraft and obstacles. These obstacles are generated randomly and appear from the right-hand side of the screen. The player shoots the obstacles with bullets by pressing a button clearing a path for him or herself. The game starts on the press of the button and ends when the players runs out of health by taking too many hits. The objective of the game is to survive as long as possible acquiring as many points as he or she can. |
Example Link: https://www.youtube.com/watch?v=jh49RWFnZHk | Example Link: https://www.youtube.com/watch?v=jh49RWFnZHk | ||
== Objectives & Introduction == | == Objectives & Introduction == | ||
| − | + | === Introduction: === | |
| + | We intended to design an embedded system whose sole purpose is to run an arcade game with just an RGB LED Matrix and a microcontroller. | ||
| − | === Team Members & Responsibilities === | + | === Objectives: === |
| − | * Nikhil Pabbisetty | + | * Interfacing the RGB LED Matrix with SJTwo Microcontroller |
| − | * | + | * Coding simple to use display functions for displaying spacecraft, bullets, enemies at any given position |
| − | * | + | * Randomizer to generate random locations for enemies |
| + | * Tasks that can move the spacecraft and detect collisions between: | ||
| + | ** Bullet to Bullet (Cancels out) | ||
| + | ** Bullet to Enemy (Clears enemy and increments score) | ||
| + | ** Enemy bullet to ship (Damage to ship and decrements energy bar) | ||
| + | ** Ship to Ship (Extra damage to energy bar) | ||
| + | * Interrupt to be generated on press of button to start game/fire bullets | ||
| + | * Score Counter and Energy Counter to be displayed at the top and updated in real time as the game progresses | ||
| + | * Title Screen and Game Over screens | ||
| + | * MP3 driver for playing audio | ||
| + | |||
| + | === Team Members & Responsibilities: === | ||
| + | *Higher level Game Logic (Randomizer for enemy generation and Collision Detection) | ||
| + | ** [https://www.linkedin.com/in/%E6%9D%BE%E7%94%AB-%E8%94%A1-5aa059104/ '''Daniel Tsai'''] | ||
| + | **[https://www.linkedin.com/in/harihk/ '''Hari Haran Kura'''] | ||
| + | *Lower level Game Logic (Score counter & Health bar, Accelerometer input, Player and enemy movements) | ||
| + | ** [https://www.linkedin.com/in/harihk/ '''Hari Haran Kura'''] | ||
| + | **[https://www.linkedin.com/in/nikhilpabbisetty/'''Nikhil Pabbisetty'''] | ||
| + | *LED Matrix Interfacing and Drivers | ||
| + | **[https://www.linkedin.com/in/nikhilpabbisetty/'''Nikhil Pabbisetty'''] | ||
| + | **[https://www.linkedin.com/in/harihk/ '''Hari Haran Kura'''] | ||
| + | *Audio Decoder Interfacing and Drivers | ||
| + | **[https://www.linkedin.com/in/harihk/ '''Hari Haran Kura'''] | ||
| + | *Game Design (Title Screen and Game over screen) | ||
| + | **[https://www.linkedin.com/in/nikhilpabbisetty/'''Nikhil Pabbisetty'''] | ||
| + | *Task Synchronization | ||
| + | **[https://www.linkedin.com/in/%E6%9D%BE%E7%94%AB-%E8%94%A1-5aa059104/ '''Daniel Tsai'''] | ||
| + | *Wiki Page | ||
| + | **[https://www.linkedin.com/in/nikhilpabbisetty/'''Nikhil Pabbisetty'''] | ||
| + | *Github Repository | ||
| + | **[https://www.linkedin.com/in/harihk/ '''Hari Haran Kura'''] | ||
| + | *Packaging | ||
| + | **[https://www.linkedin.com/in/%E6%9D%BE%E7%94%AB-%E8%94%A1-5aa059104/'''Daniel Tsai'''] | ||
== Schedule == | == Schedule == | ||
| Line 78: | Line 111: | ||
| 11/05/2019 | | 11/05/2019 | ||
| | | | ||
| − | * Test LED Matrix by writing GPIO driver | + | * Test LED Matrix by writing GPIO driver |
| − | |||
| | | | ||
* Completed | * Completed | ||
| − | |||
| | | | ||
| − | * | + | * 11/08/2019 |
| − | |||
|- | |- | ||
! scope="row"| 6 | ! scope="row"| 6 | ||
| Line 93: | Line 123: | ||
* Display the spaceship and control its movement using input buttons. | * Display the spaceship and control its movement using input buttons. | ||
* Generate projectiles from the spaceship on user input. | * Generate projectiles from the spaceship on user input. | ||
| − | | | + | | |
| − | | | + | * Completed |
| + | * Completed | ||
| + | * Completed | ||
| + | | | ||
| + | * 11/11/2019 | ||
| + | * 11/12/2019 | ||
| + | * 11/12/2019 | ||
|- | |- | ||
! scope="row"| 7 | ! scope="row"| 7 | ||
| 11/19/2019 | | 11/19/2019 | ||
| | | | ||
| + | * Use Accelerometer as input controls for spaceship instead of buttons. | ||
* Randomizer to generate enemies at random locations at end of the screen. | * Randomizer to generate enemies at random locations at end of the screen. | ||
* Move the enemies towards space ship and generate enemy bullets. | * Move the enemies towards space ship and generate enemy bullets. | ||
| − | | | + | | |
| − | | | + | *Completed |
| + | | | ||
| + | *11/19/2019 | ||
|- | |- | ||
! scope="row"| 8 | ! scope="row"| 8 | ||
| Line 112: | Line 151: | ||
**3) Spaceship and enemies' bullets (Reduce health of spaceship) | **3) Spaceship and enemies' bullets (Reduce health of spaceship) | ||
**4) Spaceship's bullets and enemies' bullets (The bullets should cancel out each other) | **4) Spaceship's bullets and enemies' bullets (The bullets should cancel out each other) | ||
| − | | | + | | |
| − | | | + | *Completed |
| + | | | ||
| + | *11/26/2019 | ||
|- | |- | ||
! scope="row"| 9 | ! scope="row"| 9 | ||
| Line 119: | Line 160: | ||
| | | | ||
* Add Score counter and health meter. | * Add Score counter and health meter. | ||
| − | | | + | * Add sound effects using UART Serial MP3 player |
| − | | | + | | |
| + | *Completed | ||
| + | *Completed | ||
| + | | | ||
| + | *12/03/2019 | ||
| + | *12/03/2019 | ||
|- | |- | ||
! scope="row"| 10 | ! scope="row"| 10 | ||
| Line 126: | Line 172: | ||
| | | | ||
* Final testing and Fine-tuning. | * Final testing and Fine-tuning. | ||
| − | | | + | * Packaging |
| − | | | + | | |
| + | *Completed | ||
| + | *Completed | ||
| + | | | ||
| + | *12/10/2019 | ||
| + | *12/10/2019 | ||
|- | |- | ||
|} | |} | ||
| Line 152: | Line 203: | ||
| 1 | | 1 | ||
| $85 | | $85 | ||
| + | |||
|- | |- | ||
! scope="row"| 3 | ! scope="row"| 3 | ||
| − | | | + | | Serial MP3 Player |
| − | | | + | | [https://www.amazon.com/gp/product/B01JCI23JG/ref=ppx_yo_dt_b_asin_title_o00_s00?ie=UTF8&psc=1 Aideepen] |
| 1 | | 1 | ||
| − | | $ | + | | $8 |
|- | |- | ||
|} | |} | ||
== Design & Implementation == | == Design & Implementation == | ||
| − | |||
| − | |||
=== Hardware Design === | === Hardware Design === | ||
| − | + | The hardware design in this project involved an LED Matrix, MP3 Audio Decoder, SJTwo Board along with its on-board accelerometer. | |
| + | ==== LED Matrix ==== | ||
| + | The main component in our hardware design is the 64x64 LED Matrix. It uses 5 data lines (A,B,C,D,E) which is used for row selection of LED Matrix. R1,G1,B1 control the colors of the upper half of the LED Matrix and R2,G2,B2 control the lower half the matrix.The CLK signal is used to indicate the arrival of a bit of data. Each time the clock goes high, a bit of data is clocked in for the current row. OE (output enable) switches the LEDs off when transitioning from one row to the next. The LAT (latch) signal marks the end of a row of data.The following are its technical specifications: | ||
| + | *Module size: 192 x 192mm | ||
| + | *Pixel pitch: 3mm | ||
| + | *Pixel density: 111,111 pixels/ sqm | ||
| + | *Pixel resolution: 64 pixels (W) x 64 (H) pixels | ||
| + | *Max power consumption: 18W | ||
| + | *Module thickness: 14.66mm (without magnet), 26.55mm (with magnet) | ||
| + | *Weight: 0.31kg | ||
| + | *Scan mode: 1/ 16 scan | ||
| + | *Power Supply: 5V regulated power input, 4A max | ||
| − | + | {| | |
| + | |[[File:CmpE244 F19 T4 Matrix picture.jpg|thumb|400 px|left|LED Matrix]] | ||
| + | |[[File:CmpE244 F19 T4 Matrix picture back.jpg|thumb|400 px|left|LED Matrix Backpanel]] | ||
| + | |[[File:CmpE244 F19 T4 Spade conn picture.jpg|thumb|400 px|left|Spade Connectors, Ribbon Cables and Magnets]] | ||
| + | |} | ||
| + | <br clear=all> | ||
| + | ==== MP3 Audio Decoder ==== | ||
| + | We also used an audio decoder for the in-game sound effects. This module is a simple MP3 player device based on high quality MP3 audio chip MH3028M. It has 4 pins namely Vcc, GND, Rx, and Tx. MCU can send commands to module through UART port to control MP3 playback. | ||
| + | [[File:CmpE244 F19 T4 Audio Decoder.jpg|thumb|left|Aideepen YX5300 UART Control Serial MP3 Music Player Module]] | ||
| + | <br clear=all> | ||
| + | ==== Accelerometer ==== | ||
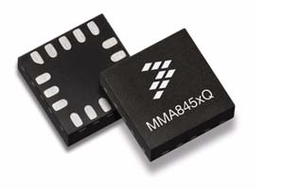
| + | The SJTwo board has its own accelerometer on-board. It has the MMA8452Q, 3-axis, 12-bit/8-bit digital accelerometer. It has an I2C digital output interface. | ||
| + | [[File:CmpE244 F19 T4 Accelerometer.png|thumb|left|On-board accelerometer]] | ||
| + | <br clear=all> | ||
| − | + | === Hardware Interface === | |
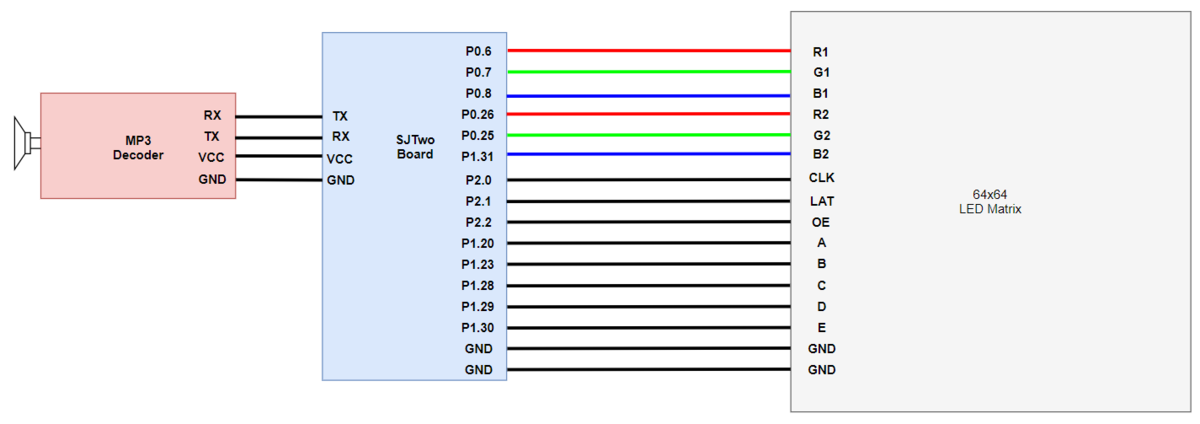
| + | Our design for LED control was based on the below simplified block diagram. We are using the SJTwo board GPIO pins for turning on and off an LED in the LED matrix. R1 G1 B1 is used to control the colors of LEDs in the top half of the matrix (0-31 rows) and R2 G2 B2 in the bottom half of the matrix (32-63 rows). GPIO were also selected for the CLK, LAT and OE purposes. ABCDE pins are used for row selection. Each pin is made high or low based on the requirement. Using these pins we can form our LED animation based on transmission pattern. | ||
| − | = | + | [[File:CmpE244 F19 T4 BlockDiagram.PNG|1200x530px|left]] |
| − | + | <br clear=all> | |
=== Software Design === | === Software Design === | ||
| − | + | ||
| + | Our approach to the software design involved the use of eight different tasks for the various moving elements of our gameplay. Seven of these tasks are dedicated to updating the matrix buffer of size 32x64 which is just a two-dimensional array holding the R2, G2, B2 and R1, G1, B1 values. The ninth task has the highest priority which is used to refresh the display. This task get the latest values from the matrix buffer and is used to display a frame of the game on the LED Matrix display. The matrix buffer is constantly updated in real-time by the other seven tasks such as: | ||
| + | # Title Screen: | ||
| + | #* Used to initially display the title screen | ||
| + | #* Waits for a button press to launch the game and then suspends itself | ||
| + | # Life Display: | ||
| + | #* Displays the health bar of the spaceship | ||
| + | #* When health runs out, suspends all other tasks and displays end screen (Game Over) | ||
| + | # Move Spaceship: | ||
| + | #* Used to display the spaceship at a location based on input from accelerometer | ||
| + | #* Collision detection between the Enemy ships and User Spaceship | ||
| + | #* On detection, changes the color of spaceship temporarily indicating damage | ||
| + | # Spaceship Bullet | ||
| + | #* Displays bullet on button press | ||
| + | #* Displays super-weapon on button press | ||
| + | #* Checks for collision between bullet and enemy bullet along with bullet with enemy ship | ||
| + | # Enemy Bullet | ||
| + | #* Displays enemy bullets | ||
| + | #* Checks for collision between bullet and enemy bullet along with bullet with user’s spaceship | ||
| + | # Kill Animation Task | ||
| + | #* Used to display explosions on collision between bullet and enemy | ||
| + | # Moving Enemy ship | ||
| + | #* Generates the enemies at random positions from the end of the screen | ||
| + | #* Moves the enemies in right to left direction towards the user | ||
| + | # Boss Enemy Task | ||
| + | #* Create a boss to fight every 12 seconds | ||
| + | |||
| + | |||
| + | The last task is the refresh display task mentioned above. This task includes a display function that controls the Latch, Clock, Output Enable pins of the LED Matrix display. This function reads the matrix buffer and extracts the R2, G2, B2, R1, G1, B1 values using shift operators. | ||
=== Implementation === | === Implementation === | ||
| − | + | ==== LED Driver ==== | |
| + | #Initialize all the pins and construct as output pins | ||
| + | #Create a matrix buffer of size 32x64 to hold the color values for the display | ||
| + | # Loop through matrix buffer from 0 to 31 rows and 0 to 63 columns | ||
| + | # Check if the R1,G1,B1 or R2,G2,B2 bits are set | ||
| + | # After every column the clock is set and then reset | ||
| + | # After every row the OE and LAT is set | ||
| + | #On clearing all the ABCDE bits, we extract each address bit and set the pin accordingly | ||
| + | # The LAT and OE is cleared, marking the completion of a row | ||
| + | #Refresh display task calls the display function and has highest priority | ||
| + | <source lang="cpp"> | ||
| + | void display() { | ||
| + | for (uint8_t row = 0; row < 32; row++) { | ||
| + | for (uint8_t col = 0; col < 64; col++) { | ||
| + | if (matrixbuff[row][col] & 0x1) { | ||
| + | gpio__set(B1); | ||
| + | } else { | ||
| + | gpio__reset(B1); | ||
| + | } | ||
| + | if (matrixbuff[row][col] & 0x2) { | ||
| + | gpio__set(G1); | ||
| + | } else { | ||
| + | gpio__reset(G1); | ||
| + | } | ||
| + | if (matrixbuff[row][col] & 0x4) { | ||
| + | gpio__set(R1); | ||
| + | } else { | ||
| + | gpio__reset(R1); | ||
| + | } | ||
| + | if (matrixbuff[row][col] & 0x8) { | ||
| + | gpio__set(B2); | ||
| + | } else { | ||
| + | gpio__reset(B2); | ||
| + | } | ||
| + | if (matrixbuff[row][col] & 0x10) { | ||
| + | gpio__set(G2); | ||
| + | } else { | ||
| + | gpio__reset(G2); | ||
| + | } | ||
| + | if (matrixbuff[row][col] & 0x20) { | ||
| + | gpio__set(R2); | ||
| + | } else { | ||
| + | gpio__reset(R2); | ||
| + | } | ||
| + | |||
| + | gpio__set(CLK); | ||
| + | gpio__reset(CLK); | ||
| + | } | ||
| + | |||
| + | gpio__set(OE); | ||
| + | gpio__set(LAT); | ||
| + | |||
| + | gpio__reset(A); | ||
| + | gpio__reset(B); | ||
| + | gpio__reset(C); | ||
| + | gpio__reset(D); | ||
| + | gpio__reset(E); | ||
| + | |||
| + | if (row & 0x1) { | ||
| + | gpio__set(A); | ||
| + | } | ||
| + | |||
| + | if (row & 0x2) { | ||
| + | gpio__set(B); | ||
| + | } | ||
| + | |||
| + | if (row & 0x4) { | ||
| + | gpio__set(C); | ||
| + | } | ||
| + | |||
| + | if (row & 0x8) { | ||
| + | gpio__set(D); | ||
| + | } | ||
| + | |||
| + | if (row & 0x10) { | ||
| + | gpio__set(E); | ||
| + | } | ||
| + | |||
| + | gpio__reset(LAT); | ||
| + | gpio__reset(OE); | ||
| + | } | ||
| + | } | ||
| + | |||
| + | void refreshdisplay(void *p) { | ||
| + | while (1) { | ||
| + | display(); | ||
| + | vTaskDelay(2); | ||
| + | } | ||
| + | } | ||
| + | </source> | ||
| + | ==== Accelerometer Input ==== | ||
| + | #I2C protocol to communicate with on-board accelometer | ||
| + | #Reading only the x-direction accelerometer data for spaceship movement | ||
| + | #Using simple math to calibrate the accelerometer data to corresponding position of the spaceship | ||
| + | #Comparing the accelaration data with its previous value to increase or decrease sensitivity | ||
| + | <source lang="cpp"> | ||
| + | int getSpaceshipPos() { | ||
| + | acc = acceleration__get_data(); | ||
| + | if (abs(acc.x - prev_acc) > 30) { //Comparing the accelaration data with its previous value | ||
| + | prev_acc = acc.x; | ||
| + | if ((acc.x < 3400) && (acc.x > 2048)) { | ||
| + | sp = 10; | ||
| + | } else if ((acc.x >= 3400) && (acc.x <= 4096)) { | ||
| + | sp = 10 + (acc.x - 3400) / 29; | ||
| + | } | ||
| + | if ((acc.x >= 0) && (acc.x <= 700)) { | ||
| + | sp = 35 + (acc.x / 29); | ||
| + | } else if ((acc.x > 700) && (acc.x < 2048)) { | ||
| + | sp = 59; | ||
| + | } | ||
| + | } | ||
| + | return sp; //sp is spaceship position which will used in SpaceShip Task | ||
| + | } | ||
| + | </source> | ||
| + | |||
| + | ==== Music Driver ==== | ||
| + | #Aideepen Serial MP3 Player works when it receives specific bytes through UART protocol | ||
| + | #Depending upon the data and command bytes received from the micro controller, it will play file from SD card | ||
| + | #Supports .mp3 and .wav file formats. | ||
| + | #The MP3 chip undestands orders made of int array[8] with this format: (0x7E 0xFF 0x06 Command 0x00 Data1 Data2 0xEF) | ||
| + | #Format SD card as FAT32 | ||
| + | #Add songs without creating any folder and name them as 001.mp3, 002.mp3 and so on | ||
| + | <source lang="cpp"> | ||
| + | //For example, a couple of the macros used: | ||
| + | static int8_t Send_buf[8] = {0}; // The MP3 player undestands orders in a 8 int string | ||
| + | // 0X7E FF 06 command 00 00 00 EF;(if command =01 next song order) | ||
| + | #define NEXT_SONG 0X01 | ||
| + | #define PREV_SONG 0X02 | ||
| + | #define CMD_PLAY_W_INDEX 0X03 // DATA IS REQUIRED (number of song) | ||
| + | #define VOLUME_UP_ONE 0X04 | ||
| + | #define VOLUME_DOWN_ONE 0X05 | ||
| + | #define CMD_SET_VOLUME 0X06 // DATA IS REQUIRED (number of volume from 0 up to 30(0x1E)) | ||
| + | |||
| + | //To send eight bytes to mp3 player using UART: | ||
| + | void sendCommand(int8_t command, int16_t dat) { | ||
| + | Send_buf[0] = 0x7e; // starting byte | ||
| + | Send_buf[1] = 0xff; // version | ||
| + | Send_buf[2] = 0x06; // the number of bytes of the command without starting byte and ending byte | ||
| + | Send_buf[3] = command; // | ||
| + | Send_buf[4] = 0x00; // 0x00 = no feedback, 0x01 = feedback | ||
| + | Send_buf[5] = (int8_t)(dat >> 8); // datah | ||
| + | Send_buf[6] = (int8_t)(dat); // datal | ||
| + | Send_buf[7] = 0xef; // ending byte | ||
| + | for (uint8_t i = 0; i < 8; i++) | ||
| + | uart__polled_put(UART__3, Send_buf[i]); | ||
| + | } | ||
| + | |||
| + | </source> | ||
| + | ==== Collision Detection ==== | ||
| + | We used collision detection in a lot of places in our code. | ||
| + | Bullet to Enemy/Spaceship/OtherBullet: | ||
| + | #Every time the bullet moves, we will check if the next pixel to the bullet is off (black) or not | ||
| + | #If the pixel is off (black), move on otherwise, check if the pixel is in the boundary of which object (enemy1/enemy2/UFO/BOSS/other bullets) then take action | ||
| + | #Same collision detection principle with Spaceship and Enemy, Spaceship and enemy bullet and so on | ||
| + | |||
| + | Here is an example where we used it for collision detection between enemy ship and bullet: (The part which can make a connection and get hit by the bullet) | ||
| + | <source lang="cpp"> | ||
| + | //The if condition describes the detection between bullet and front boundary of the enemy spaceship: | ||
| + | if ((SpaceShipBullet_pos_x[i] == enemy_x && SpaceShipBullet_pos_y[i] <= enemy_y && | ||
| + | SpaceShipBullet_pos_y[i] >= enemy_y - 8) || | ||
| + | ((SpaceShipBullet_pos_x[i] == enemy_x + 1 || SpaceShipBullet_pos_x[i] == enemy_x - 1) && | ||
| + | (SpaceShipBullet_pos_y[i] <= enemy_y - 1 && SpaceShipBullet_pos_y[i] >= enemy_y - 7)) || | ||
| + | ((SpaceShipBullet_pos_x[i] == enemy_x + 2 || SpaceShipBullet_pos_x[i] == enemy_x - 2) && | ||
| + | (SpaceShipBullet_pos_y[i] <= enemy_y - 2 && SpaceShipBullet_pos_y[i] >= enemy_y - 4))) { | ||
| + | </source> | ||
== Testing & Technical Challenges == | == Testing & Technical Challenges == | ||
| − | + | === LED Matrix driver=== | |
| − | + | Writing the LED Matrix driver was a challenge. We didn't get any material with the display. We had to search online and got a couple of websites explaining about the display. We also had help from the previous year's projects. After all the knowledge we could gain, we started writing the driver. We were successfully able to write the refresh display driver which uses a 32x64 matrix buffer that stores multiple 6-bit color data. The driver worked fine but there was one small issue. 32nd and 64th rows were much brighter than the others. After some testing, we figured out that we weren't clearing the last rows in each half of the display. After resolving that, our refresh display driver worked flawlessly. | |
| − | + | === Title Screen and Game Over Screen=== | |
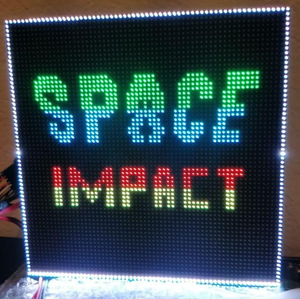
| + | When we tried to write the code for the title and game over screens, we wanted to make the design/font more eye-catching like most arcade-games are. However, coding each letter with the fancy font proved to be challenging and lengthy. Initially, we were having a function that would take the starting coordinate of where the letter should appear. To display the rest of the letter, we would have had to code the exact position of every pixel we wanted to turn on. This approach worked fine for small designs such as our spaceship, bullets, enemy ships and other minimal moving elements of the game. For gigantic letters with fancy fonts, we used a 2-Dimensional array of size 64x64, and input the values using Notepad++ and its handy column selection feature. Then it was just a matter of reading from this array to display the letters. | ||
| + | === Soldering Issues === | ||
| + | Initially, we couldn't get the LED matrix to work at all. The LED Matrix would just display random lines at a time. We did some testing and found out that ground pins on SJTwo Board were not soldered properly. A very simple issue but it got overlooked. | ||
| − | === | + | === Testing and Results === |
| − | + | {| | |
| + | |[[File:CmpE244 F19 T4 Title Screen.png|300 px|thumb|left|Start Screen]] | ||
| + | |[[File:CmpE244 F19 T4 Gameplay Screen.jpeg|300 px|thumb|left|Gameplay]] | ||
| + | |[[File:CmpE244 F19 T4 Game over screen.jpeg|300 px|thumb|left|Game Over Screen]] | ||
| + | |} | ||
| + | {| | ||
| + | |[[File:CmpE244 F19 T4 Boss battle.jpeg |300 px|thumb|left|Boss battle along with final packaging]] | ||
| + | |[[File:20191219_160032.gif |270 px|thumb|left| ]] | ||
| + | |[[File:20191219_160836.gif |270 px|thumb|left| ]] | ||
| + | |} | ||
== Conclusion == | == Conclusion == | ||
| − | + | This project was completely successfully after a period of two months. Although we faced initial hiccups due to a lack of datasheets for the LED Matrix, the project went smoothly afterwards. Working on this project has given us so much confidence in using the FreeRTOS API and sharpened our embedded software skills. We also followed a strict schedule which helped us deliver the project on time and improved our time management skills. Working in a team of 3 has also boosted our teamwork skills. | |
=== Project Video === | === Project Video === | ||
| − | + | * [https://youtu.be/yZs4nal5Rek Space Impact Fall 2019] | |
=== Project Source Code === | === Project Source Code === | ||
| − | * [https:// | + | * [https://github.com/nikhilpeoria/Space-Impact- GitHub Link] |
== References == | == References == | ||
=== Acknowledgement === | === Acknowledgement === | ||
| − | + | Firstly, we would like to thank our professor Preetpal Kang gave us this opportunity to challenge ourselves and master the concepts of FreeRTOS. We would also like to thank the ISA members for their unwavering support and guidance throughout the semester. This project was successful, thanks to all three of our team members and all the hard work each of us put in. | |
=== References Used === | === References Used === | ||
| − | + | *[http://socialledge.com/sjsu/index.php/Main_Page WikiPage by Preetpal Kang] | |
| − | + | *[https://www.sparkfun.com/sparkx/blog/2650 Everything You Didn't Want to Know About RGB Matrix Panels] | |
| − | = | + | *[http://www.socialledge.com/sjsu/index.php?title=Realtime_OS_on_Embedded_Systems FreeRTOS documentations] |
| − | + | *[https://learn.sparkfun.com/tutorials/rgb-panel-hookup-guide/all RGB Panel Hookup Guide] | |
Latest revision as of 07:19, 20 May 2025
Contents
Abstract
Space Impact is a classic game from the days of the Nokia era. Our objective is to design a game in which a player is prompted to protect a spaceship from incoming missiles by moving the ship up and down. The player will also have the ability to fire back at the incoming enemies. Taking damage from the enemy will reduce the health of the spaceship and zero health will lead to the game over screen. The game involves a user controlling a spaceship through an accelerometer, guiding the spaceship across many enemy spacecraft and obstacles. These obstacles are generated randomly and appear from the right-hand side of the screen. The player shoots the obstacles with bullets by pressing a button clearing a path for him or herself. The game starts on the press of the button and ends when the players runs out of health by taking too many hits. The objective of the game is to survive as long as possible acquiring as many points as he or she can.
Example Link: https://www.youtube.com/watch?v=jh49RWFnZHk
Objectives & Introduction
Introduction:
We intended to design an embedded system whose sole purpose is to run an arcade game with just an RGB LED Matrix and a microcontroller.
Objectives:
- Interfacing the RGB LED Matrix with SJTwo Microcontroller
- Coding simple to use display functions for displaying spacecraft, bullets, enemies at any given position
- Randomizer to generate random locations for enemies
- Tasks that can move the spacecraft and detect collisions between:
- Bullet to Bullet (Cancels out)
- Bullet to Enemy (Clears enemy and increments score)
- Enemy bullet to ship (Damage to ship and decrements energy bar)
- Ship to Ship (Extra damage to energy bar)
- Interrupt to be generated on press of button to start game/fire bullets
- Score Counter and Energy Counter to be displayed at the top and updated in real time as the game progresses
- Title Screen and Game Over screens
- MP3 driver for playing audio
Team Members & Responsibilities:
- Higher level Game Logic (Randomizer for enemy generation and Collision Detection)
- Lower level Game Logic (Score counter & Health bar, Accelerometer input, Player and enemy movements)
- LED Matrix Interfacing and Drivers
- Audio Decoder Interfacing and Drivers
- Game Design (Title Screen and Game over screen)
- Task Synchronization
- Wiki Page
- Github Repository
- Packaging
Schedule
| Week# | Date | Task | Current Progress | Actual Completion Date |
|---|---|---|---|---|
| 1 | 10/01/2019 |
|
|
|
| 2 | 10/15/2019 |
|
|
|
| 3 | 10/22/2019 |
|
|
|
| 4 | 10/29/2019 |
|
|
|
| 5 | 11/05/2019 |
|
|
|
| 6 | 11/12/2019 |
|
|
|
| 7 | 11/19/2019 |
|
|
|
| 8 | 11/26/2019 |
|
|
|
| 9 | 12/03/2019 |
|
|
|
| 10 | 12/10/2019 |
|
|
|
Parts List & Cost
| S.No. | Parts | Seller | Quantity | Price |
|---|---|---|---|---|
| 1 | SJTwo Microcontroller | Preetpal Kang | 1 | $50 |
| 2 | RGB LED Matrix Panel - 64x64 | Sparkfun | 1 | $85 |
| 3 | Serial MP3 Player | Aideepen | 1 | $8 |
Design & Implementation
Hardware Design
The hardware design in this project involved an LED Matrix, MP3 Audio Decoder, SJTwo Board along with its on-board accelerometer.
LED Matrix
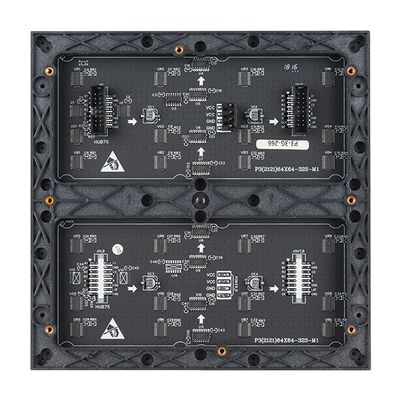
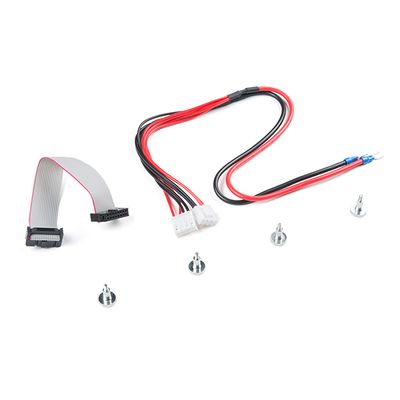
The main component in our hardware design is the 64x64 LED Matrix. It uses 5 data lines (A,B,C,D,E) which is used for row selection of LED Matrix. R1,G1,B1 control the colors of the upper half of the LED Matrix and R2,G2,B2 control the lower half the matrix.The CLK signal is used to indicate the arrival of a bit of data. Each time the clock goes high, a bit of data is clocked in for the current row. OE (output enable) switches the LEDs off when transitioning from one row to the next. The LAT (latch) signal marks the end of a row of data.The following are its technical specifications:
- Module size: 192 x 192mm
- Pixel pitch: 3mm
- Pixel density: 111,111 pixels/ sqm
- Pixel resolution: 64 pixels (W) x 64 (H) pixels
- Max power consumption: 18W
- Module thickness: 14.66mm (without magnet), 26.55mm (with magnet)
- Weight: 0.31kg
- Scan mode: 1/ 16 scan
- Power Supply: 5V regulated power input, 4A max
MP3 Audio Decoder
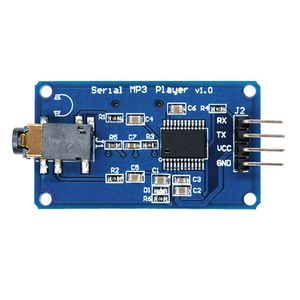
We also used an audio decoder for the in-game sound effects. This module is a simple MP3 player device based on high quality MP3 audio chip MH3028M. It has 4 pins namely Vcc, GND, Rx, and Tx. MCU can send commands to module through UART port to control MP3 playback.
Accelerometer
The SJTwo board has its own accelerometer on-board. It has the MMA8452Q, 3-axis, 12-bit/8-bit digital accelerometer. It has an I2C digital output interface.
Hardware Interface
Our design for LED control was based on the below simplified block diagram. We are using the SJTwo board GPIO pins for turning on and off an LED in the LED matrix. R1 G1 B1 is used to control the colors of LEDs in the top half of the matrix (0-31 rows) and R2 G2 B2 in the bottom half of the matrix (32-63 rows). GPIO were also selected for the CLK, LAT and OE purposes. ABCDE pins are used for row selection. Each pin is made high or low based on the requirement. Using these pins we can form our LED animation based on transmission pattern.
Software Design
Our approach to the software design involved the use of eight different tasks for the various moving elements of our gameplay. Seven of these tasks are dedicated to updating the matrix buffer of size 32x64 which is just a two-dimensional array holding the R2, G2, B2 and R1, G1, B1 values. The ninth task has the highest priority which is used to refresh the display. This task get the latest values from the matrix buffer and is used to display a frame of the game on the LED Matrix display. The matrix buffer is constantly updated in real-time by the other seven tasks such as:
- Title Screen:
- Used to initially display the title screen
- Waits for a button press to launch the game and then suspends itself
- Life Display:
- Displays the health bar of the spaceship
- When health runs out, suspends all other tasks and displays end screen (Game Over)
- Move Spaceship:
- Used to display the spaceship at a location based on input from accelerometer
- Collision detection between the Enemy ships and User Spaceship
- On detection, changes the color of spaceship temporarily indicating damage
- Spaceship Bullet
- Displays bullet on button press
- Displays super-weapon on button press
- Checks for collision between bullet and enemy bullet along with bullet with enemy ship
- Enemy Bullet
- Displays enemy bullets
- Checks for collision between bullet and enemy bullet along with bullet with user’s spaceship
- Kill Animation Task
- Used to display explosions on collision between bullet and enemy
- Moving Enemy ship
- Generates the enemies at random positions from the end of the screen
- Moves the enemies in right to left direction towards the user
- Boss Enemy Task
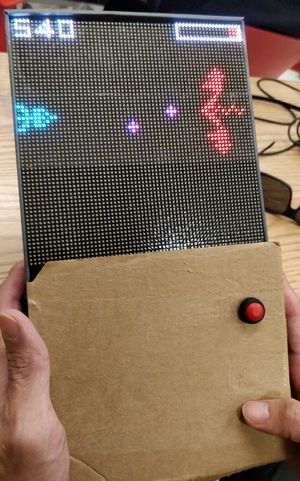
- Create a boss to fight every 12 seconds
The last task is the refresh display task mentioned above. This task includes a display function that controls the Latch, Clock, Output Enable pins of the LED Matrix display. This function reads the matrix buffer and extracts the R2, G2, B2, R1, G1, B1 values using shift operators.
Implementation
LED Driver
- Initialize all the pins and construct as output pins
- Create a matrix buffer of size 32x64 to hold the color values for the display
- Loop through matrix buffer from 0 to 31 rows and 0 to 63 columns
- Check if the R1,G1,B1 or R2,G2,B2 bits are set
- After every column the clock is set and then reset
- After every row the OE and LAT is set
- On clearing all the ABCDE bits, we extract each address bit and set the pin accordingly
- The LAT and OE is cleared, marking the completion of a row
- Refresh display task calls the display function and has highest priority
void display() {
  for (uint8_t row = 0; row < 32; row++) {
    for (uint8_t col = 0; col < 64; col++) {
      if (matrixbuff[row][col] & 0x1) {
        gpio__set(B1);
      } else {
        gpio__reset(B1);
      }
      if (matrixbuff[row][col] & 0x2) {
        gpio__set(G1);
      } else {
        gpio__reset(G1);
      }
      if (matrixbuff[row][col] & 0x4) {
        gpio__set(R1);
      } else {
        gpio__reset(R1);
      }
      if (matrixbuff[row][col] & 0x8) {
        gpio__set(B2);
      } else {
        gpio__reset(B2);
      }
      if (matrixbuff[row][col] & 0x10) {
        gpio__set(G2);
      } else {
        gpio__reset(G2);
      }
      if (matrixbuff[row][col] & 0x20) {
        gpio__set(R2);
      } else {
        gpio__reset(R2);
      }

      gpio__set(CLK);
      gpio__reset(CLK);
    }

    gpio__set(OE);
    gpio__set(LAT);

    gpio__reset(A);
    gpio__reset(B);
    gpio__reset(C);
    gpio__reset(D);
    gpio__reset(E);

    if (row & 0x1) {
      gpio__set(A);
    }

    if (row & 0x2) {
      gpio__set(B);
    }

    if (row & 0x4) {
      gpio__set(C);
    }

    if (row & 0x8) {
      gpio__set(D);
    }

    if (row & 0x10) {
      gpio__set(E);
    }

    gpio__reset(LAT);
    gpio__reset(OE);
  }
}

void refreshdisplay(void *p) {
  while (1) {
    display();
    vTaskDelay(2);
  }
}
Accelerometer Input
- I2C protocol to communicate with on-board accelometer
- Reading only the x-direction accelerometer data for spaceship movement
- Using simple math to calibrate the accelerometer data to corresponding position of the spaceship
- Comparing the accelaration data with its previous value to increase or decrease sensitivity
int getSpaceshipPos() {
  acc = acceleration__get_data();
  if (abs(acc.x - prev_acc) > 30) {               //Comparing the accelaration data with its previous value
    prev_acc = acc.x;
    if ((acc.x < 3400) && (acc.x > 2048)) {
      sp = 10;
    } else if ((acc.x >= 3400) && (acc.x <= 4096)) {
      sp = 10 + (acc.x - 3400) / 29;
    }
    if ((acc.x >= 0) && (acc.x <= 700)) {
      sp = 35 + (acc.x / 29);
    } else if ((acc.x > 700) && (acc.x < 2048)) {
      sp = 59;
    }
  }
  return sp;      //sp is spaceship position which will used in SpaceShip Task
}
Music Driver
- Aideepen Serial MP3 Player works when it receives specific bytes through UART protocol
- Depending upon the data and command bytes received from the micro controller, it will play file from SD card
- Supports .mp3 and .wav file formats.
- The MP3 chip undestands orders made of int array[8] with this format: (0x7E 0xFF 0x06 Command 0x00 Data1 Data2 0xEF)
- Format SD card as FAT32
- Add songs without creating any folder and name them as 001.mp3, 002.mp3 and so on
//For example, a couple of the macros used:
static int8_t Send_buf[8] = {0}; // The MP3 player undestands orders in a 8 int string
                                // 0X7E FF 06 command 00 00 00 EF;(if command =01 next song order)
#define NEXT_SONG 0X01
#define PREV_SONG 0X02
#define CMD_PLAY_W_INDEX 0X03 // DATA IS REQUIRED (number of song)
#define VOLUME_UP_ONE 0X04
#define VOLUME_DOWN_ONE 0X05
#define CMD_SET_VOLUME 0X06 // DATA IS REQUIRED (number of volume from 0 up to 30(0x1E))

//To send eight bytes to mp3 player using UART:
void sendCommand(int8_t command, int16_t dat) {
  Send_buf[0] = 0x7e;               // starting byte
  Send_buf[1] = 0xff;               // version
  Send_buf[2] = 0x06;               // the number of bytes of the command without starting byte and ending byte
  Send_buf[3] = command;            //
  Send_buf[4] = 0x00;               // 0x00 = no feedback, 0x01 = feedback
  Send_buf[5] = (int8_t)(dat >> 8); // datah
  Send_buf[6] = (int8_t)(dat);      // datal
  Send_buf[7] = 0xef;               // ending byte
  for (uint8_t i = 0; i < 8; i++)
    uart__polled_put(UART__3, Send_buf[i]);
}
Collision Detection
We used collision detection in a lot of places in our code. Bullet to Enemy/Spaceship/OtherBullet:
- Every time the bullet moves, we will check if the next pixel to the bullet is off (black) or not
- If the pixel is off (black), move on otherwise, check if the pixel is in the boundary of which object (enemy1/enemy2/UFO/BOSS/other bullets) then take action
- Same collision detection principle with Spaceship and Enemy, Spaceship and enemy bullet and so on
Here is an example where we used it for collision detection between enemy ship and bullet: (The part which can make a connection and get hit by the bullet)
//The if condition describes the detection between bullet and front boundary of the enemy spaceship:
if ((SpaceShipBullet_pos_x[i] == enemy_x && SpaceShipBullet_pos_y[i] <= enemy_y &&
         SpaceShipBullet_pos_y[i] >= enemy_y - 8) ||
        ((SpaceShipBullet_pos_x[i] == enemy_x + 1 || SpaceShipBullet_pos_x[i] == enemy_x - 1) &&
         (SpaceShipBullet_pos_y[i] <= enemy_y - 1 && SpaceShipBullet_pos_y[i] >= enemy_y - 7)) ||
        ((SpaceShipBullet_pos_x[i] == enemy_x + 2 || SpaceShipBullet_pos_x[i] == enemy_x - 2) &&
         (SpaceShipBullet_pos_y[i] <= enemy_y - 2 && SpaceShipBullet_pos_y[i] >= enemy_y - 4))) {
Testing & Technical Challenges
LED Matrix driver
Writing the LED Matrix driver was a challenge. We didn't get any material with the display. We had to search online and got a couple of websites explaining about the display. We also had help from the previous year's projects. After all the knowledge we could gain, we started writing the driver. We were successfully able to write the refresh display driver which uses a 32x64 matrix buffer that stores multiple 6-bit color data. The driver worked fine but there was one small issue. 32nd and 64th rows were much brighter than the others. After some testing, we figured out that we weren't clearing the last rows in each half of the display. After resolving that, our refresh display driver worked flawlessly.
Title Screen and Game Over Screen
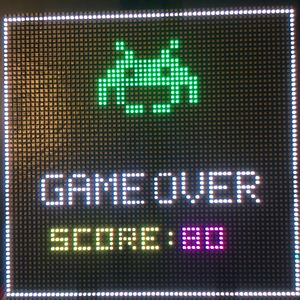
When we tried to write the code for the title and game over screens, we wanted to make the design/font more eye-catching like most arcade-games are. However, coding each letter with the fancy font proved to be challenging and lengthy. Initially, we were having a function that would take the starting coordinate of where the letter should appear. To display the rest of the letter, we would have had to code the exact position of every pixel we wanted to turn on. This approach worked fine for small designs such as our spaceship, bullets, enemy ships and other minimal moving elements of the game. For gigantic letters with fancy fonts, we used a 2-Dimensional array of size 64x64, and input the values using Notepad++ and its handy column selection feature. Then it was just a matter of reading from this array to display the letters.
Soldering Issues
Initially, we couldn't get the LED matrix to work at all. The LED Matrix would just display random lines at a time. We did some testing and found out that ground pins on SJTwo Board were not soldered properly. A very simple issue but it got overlooked.
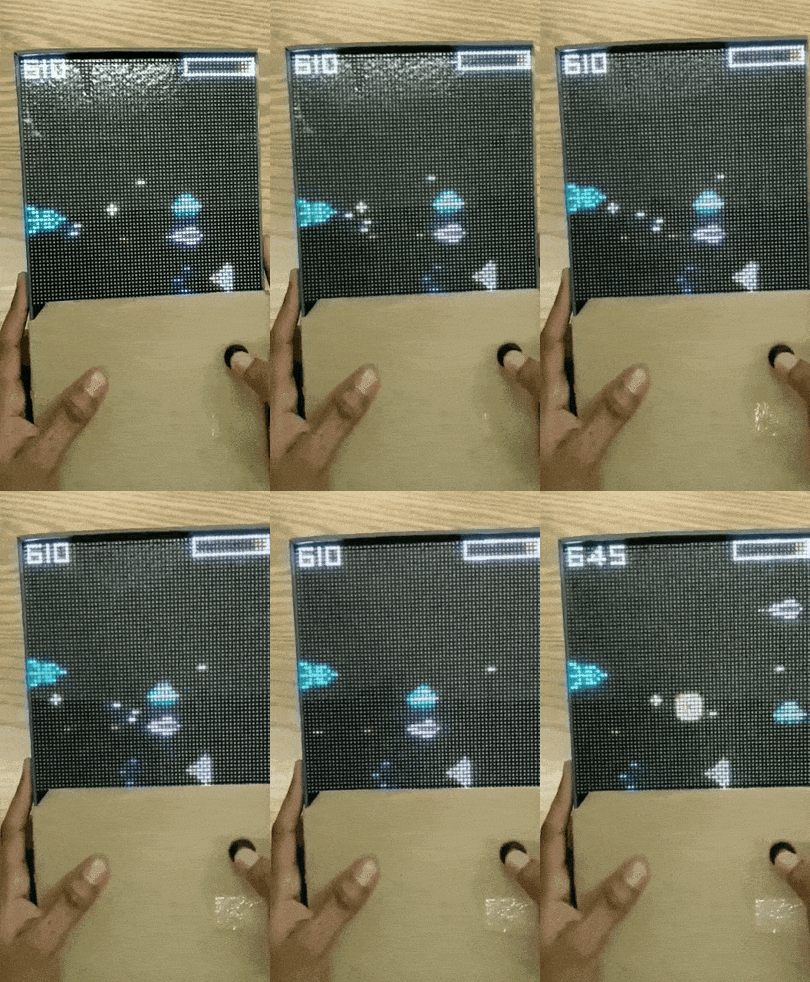
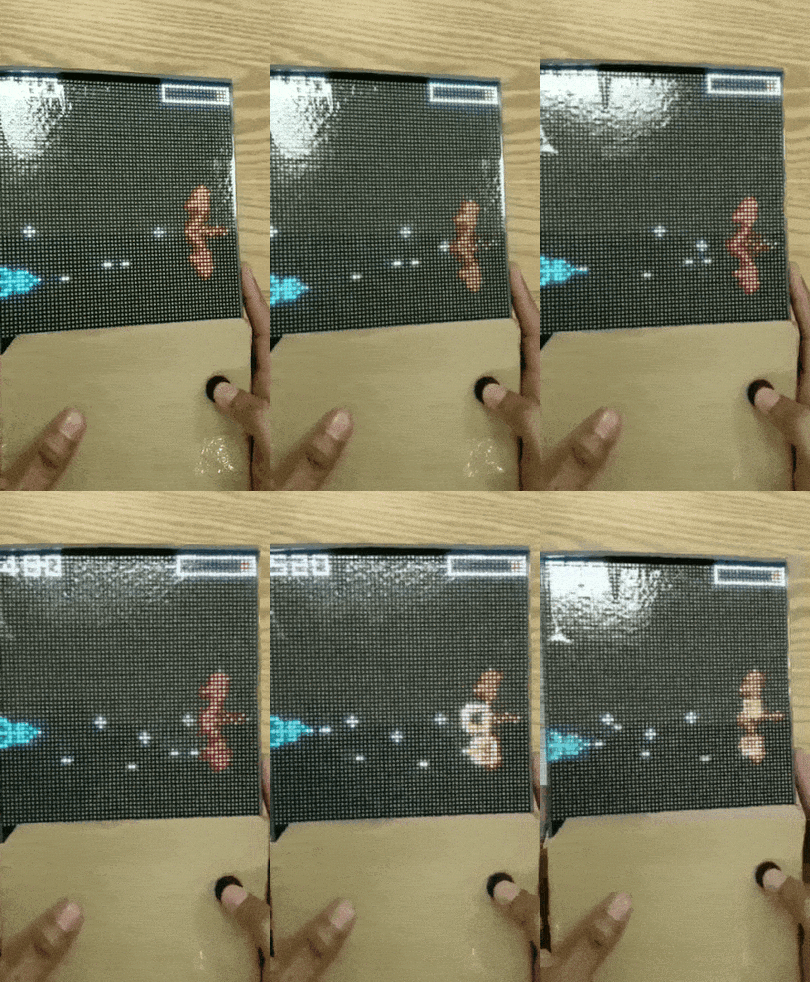
Testing and Results
Conclusion
This project was completely successfully after a period of two months. Although we faced initial hiccups due to a lack of datasheets for the LED Matrix, the project went smoothly afterwards. Working on this project has given us so much confidence in using the FreeRTOS API and sharpened our embedded software skills. We also followed a strict schedule which helped us deliver the project on time and improved our time management skills. Working in a team of 3 has also boosted our teamwork skills.
Project Video
Project Source Code
References
Acknowledgement
Firstly, we would like to thank our professor Preetpal Kang gave us this opportunity to challenge ourselves and master the concepts of FreeRTOS. We would also like to thank the ISA members for their unwavering support and guidance throughout the semester. This project was successful, thanks to all three of our team members and all the hard work each of us put in.
