Difference between revisions of "S24: Team Zero"
(→Sensor ECU) |
(→Sensor ECU) |
||
| Line 490: | Line 490: | ||
== Sensor ECU == | == Sensor ECU == | ||
| − | [[File:lv_ez1_tz. | + | [[File:lv_ez1_tz.jpeg]] |
=== Hardware Design === | === Hardware Design === | ||
Revision as of 18:36, 29 May 2024
Contents
Project Title
TEAM ZERO
Abstract
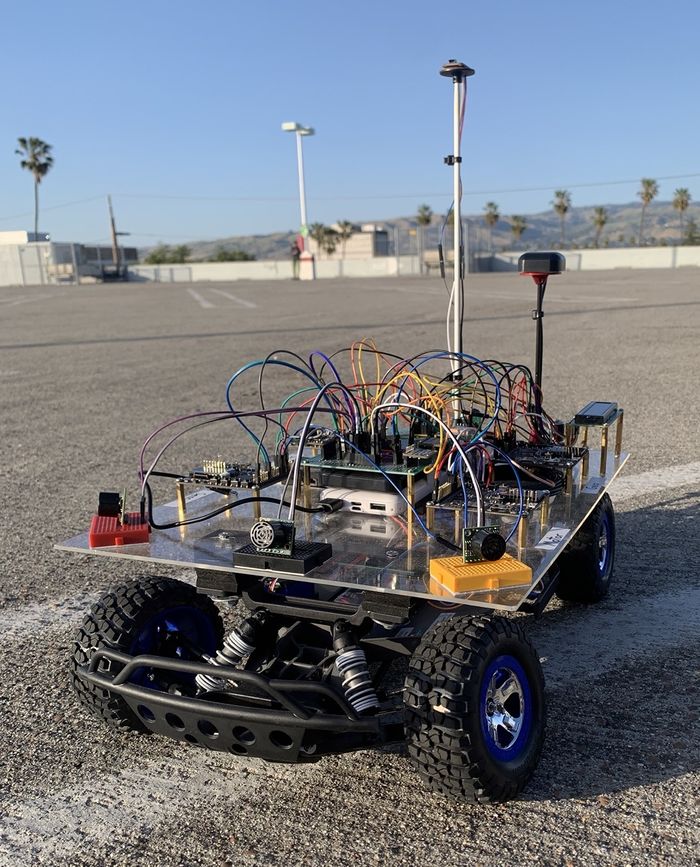
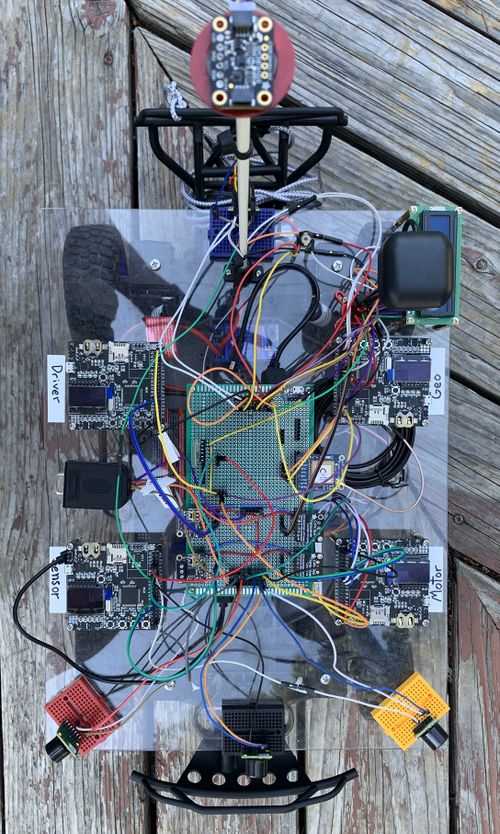
Team Zero's autonomous vehicle, as the name states, is a self driving car designed to navigate to a user defined destination while avoiding obstacles along the way. The car's infrastructure is built upon four key components: the Driver, Sensor-Bridge, Geo, and Motor nodes, which communicate via CAN bus lines. The vehicle periodically transmits, receives and processes data via I2C and UART from the GPS, compass, and ultrasonic sensors to correct orientation and avoid obstacles. It is built on a hobby-grade RC car, modified with the necessary components and adjustments to fulfill its primary objectives.
Introduction
The project was divided into N modules:
- Geographical Controller and LCD
- Motor Controller
- Sensor-Bridge Controller
- Driver Controller
- Mobile Application
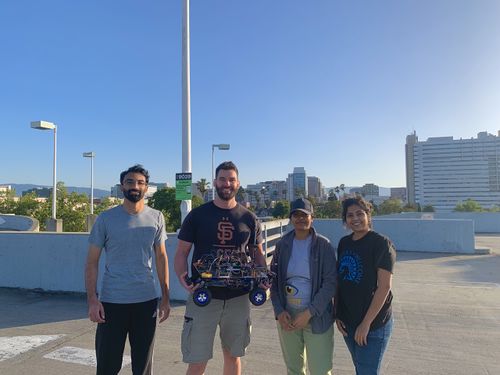
Team Members & Responsibilities
Gitlab Project Link - [1]
Cody Ourique [2]
- Geo controller
- Compass,GPS and LCD interfacing
- Hardware design, development and mounting
- LCD modules
- Unit Testing
Anusha Arunnandi [3]
- Sensor-Bridge controller
- Ultrasonic range finder and bluetooth interfacing
- Web application
- Unit Testing
Chaitanya Battula [4]
- Driver controller
- Motor controller
- RPM sensor, ESC, and servo motor interfacing
- Unit Testing
Rohit Duvvuru [5]
- Unit Testing
Schedule
| Week# | Start Date | End Date | Task | Status |
|---|---|---|---|---|
| 1 | 03/03/2024 | 03/09/2024 |
|
Completed |
| 2 | 03/10/2024 | 03/16/2024 |
|
Completed |
| 3 | 03/17/2024 | 03/23/2024 |
|
Completed |
| 4 | 03/24/2024 | 03/30/2024 |
|
Completed |
| 5 | 03/31/2024 | 04/06/2024 |
|
Completed |
| 6 | 04/07/2024 | 04/13/2024 |
|
Completed |
| 7 | 04/14/2024 | 04/20/2024 |
|
Completed |
| 8 | 04/21/2024 | 04/27/2024 |
|
Completed |
| 9 | 04/28/2024 | 05/04/2024 |
|
Completed |
| 10 | 05/05/2024 | 05/11/2024 |
|
Completed |
| 11 | 05/12/2024 | 05/18/2024 |
|
Completed |
| 12 | 05/19/2024 | 05/25/2024 |
|
Completed |
Parts List & Cost
| Item# | Part Desciption | Vendor | Qty | Cost |
|---|---|---|---|---|
| 1 | RC car | Traxxas [6] | 1 | $239.95 |
| 2 | RPM sensor | Traxxas [7] | 1 | $12.00 |
| 3 | GPS Breakout Board | Adafruit [8] | 1 | $54.95 |
| 4 | PCB prototype circuit board | A1 Cables N PCBs [9] | 1 | $8.57 |
| 5 | Plexiglass | Lesnlok [10] | 1 | $9.98 |
| 6 | Wireless bluetooth RF transceiver | HiLetgo [11] | 1 | $9.95 |
| 7 | Compass | Adafruit [12] | 1 | $5.95 |
| 8 | Ultrasonic range finder | Adafruit [13] | 4 | $114.00 |
| 8 | Potentiometer | Amazon [14] | 1 | $9.99 |
| 8 | 2 Pack 15000mAh power bank | Amazon [15] | 1 | $19.99 |
| 8 | GPS Antenna Mount | Honbay [16] | 2 | $7.29 |
| 8 | I2C Qwiic Cable Kit | Amazon [17] | 1 | $9.99 |
| 8 | Black Foam Padding | Amazon [18] | 1 | $11.99 |
| 8 | Traxxas 6537 Wire Retainers | Amazon [19] | 1 | $6.95 |
| 8 | USB Micro-B Breakout Board | Adafruit [20] | 1 | $4.88 |
| 8 | 24 awg Wire Solid Core | Amazon [21] | 1 | $14.99 |
| 8 | ELEGOO 6PCS 170 tie-Points Mini Breadboard | Amazon [22] | 1 | $6.98 |
| 8 | GPS Antenna | Amazon [23] | 1 | $10.99 |
| 8 | Standoffs | Amazon [24] | 1 | $22.96 |
| 8 | Breadboard Wires | Amazon [25] | 1 | $5.97 |
| 8 | 3/16 inch fiberglass rod | TAP plastics | 1 | $5.11 |
Prototype Circuit Board
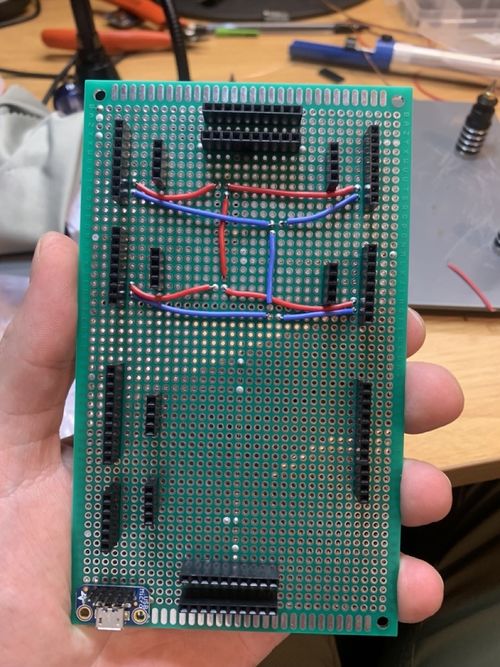
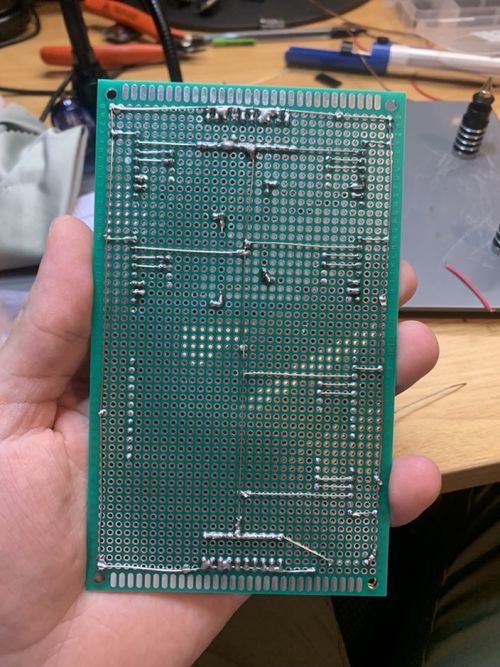
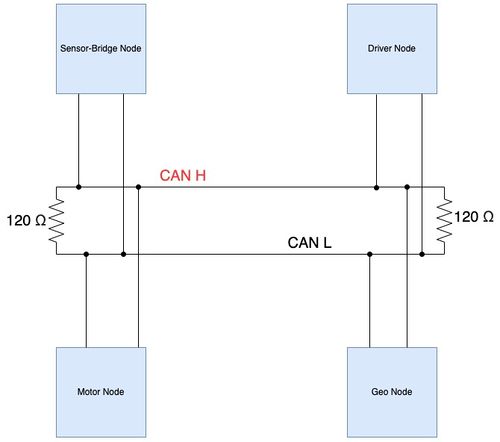
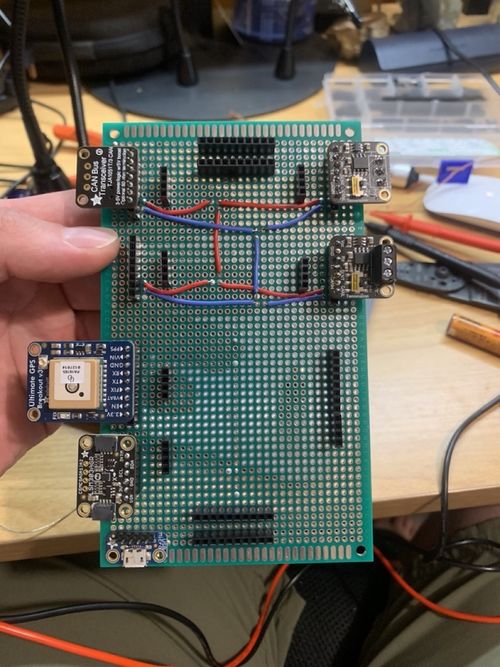
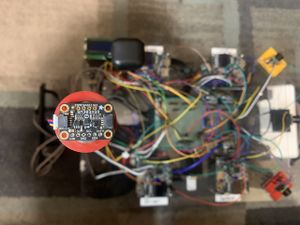
This prototype circuit board was carefully designed so that it could power all the microcontrollers, compass module, GPS module, bluetooth module, ultrasonic sensors and the LCD. In addition, the board has 4 slots for CAN tranceivers and an integrated CAN bus line. The board has a common ground line for all connected devices and has a total of 20 available sockets. Also, the board has 3.3V power and has 20 open sockets. Additionally, the board has 5V power with 4 available sockets delivered via micro USB.
The power rails run alongside the perimeter of the board and the common ground rails run alongside the center of the board. All available component slots have direct connections to the power and common ground rails.
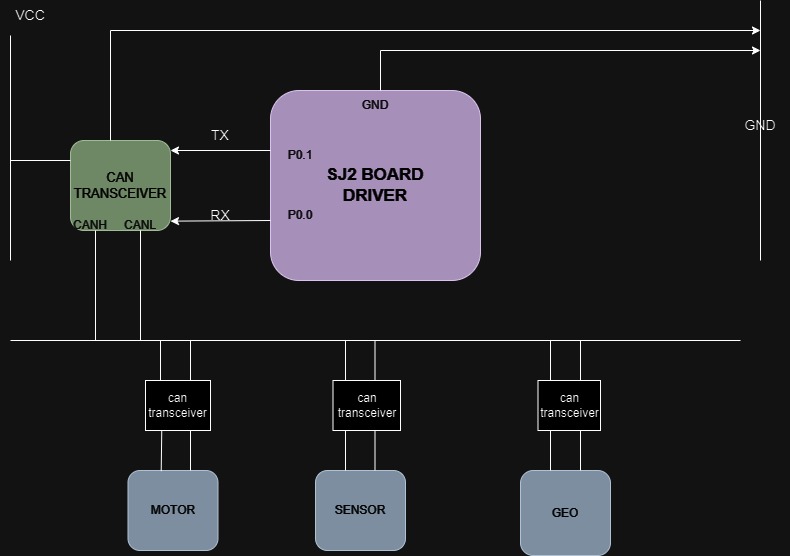
CAN Communication
The microcontrollers communicate using the CAN bus. Each controller is sending or receiving CAN messages through periodic callback functions. All CAN bus messages are transmitted every 10Hz.
Geographical Controller CAN Messages:
- GEO_READINGS: The geo readings message responsibility is to send the heading, bearing and distance to destination information to the driver and sensor-bridge nodes. The driver node uses the geo readings to determine which direction it should go and when the vehicle should stop. In addition, the sensor-bridge needs the data to display it to the user on the mobile application.
- GEO_DATA_TO_DRIVER_AND_BRIDGE: This message's responsibility was to send current coordinates to the driver and sensor-bridge nodes so that the data could be properly displayed over the mobile application. The MIA threshold for this message is 100 and if this message goes into MIA its values will be set to 0.
- GEO_DEBUG_MESSAGE: The purpose of the debug message was to send a signal to the driver that the GPS has acquired a fix on the current location and another value to indicate the number of periodic callbacks needed to acquire the lock.
Sensor_Bridge Controller CAN Messages:
- SENSOR_ULTRA_SONIC: This message has 4 signals each of which hold an individual ultrasonic sensor reading with units in centimeters. The sender is the sensor-bridge node and the recipient is the driver node. This data is used by the driver node to set alert thresholds so that the vehicle stops in time to avoid obstacles.
- SENSOR_BATTERY: The sensor battery message has 1 signal which is used to send the battery voltage to the driver.
- BRIDGE_DATA_TRANSFER: The bridge data transfer message has 2 signals which is used to send the user defined destination coordinates to the geo node from the sensor-bridge node. This data is then used by the geo node to calculate the distance to destination and vehicle bearing.
Motor Controller CAN Messages:
- MOTOR_READINGS: The motor readings is a 2 signal message that is used to send the steering direction and current speed, in kph, to the driver node from the motor node. The purpose of the speed data is to allow the driver to increase or decrease speed following some logic. The purpose for the steering direction is to ensure the car makes smart decisions with respect to obstacle avoidance and vehicle heading.
Driver Controller CAN Messages:
- DRIVER_HEARTBEAT: This message is 1 signal that is sent from the driver node to the motor and sensor-bridge nodes. The purpose is to indicate the operational status of the vehicle.
- MOTOR_CMD: Motor command is a 2 signal message from the driver node to the motor node. This message contains steering direction and speed data. The purpose of this data is to tell the motor to increase or decrease speed and to turn left or turn right.
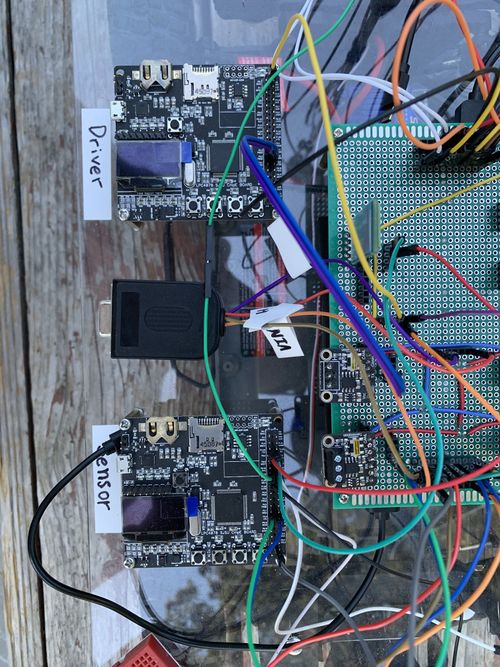
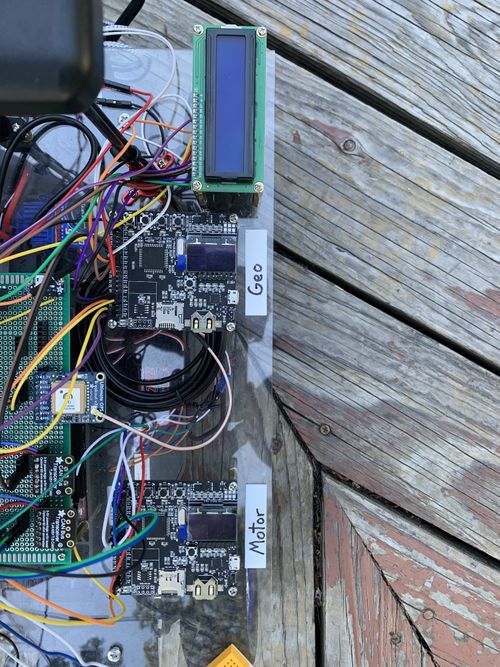
Hardware Design
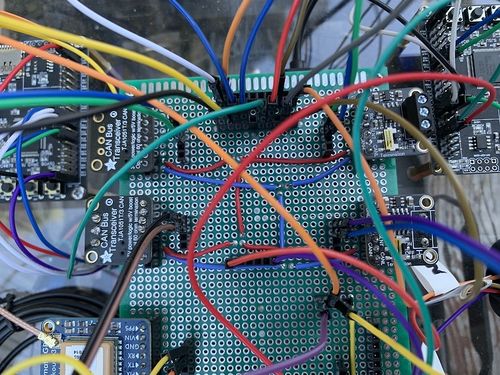
The CAN high and CAN low lines can be observed here as the red (CANH) and blue (CANL) wires. These wires connect to all 4 CAN transceiver slots on the board. In addition, there is a special tap for the DB9 connector so that messages that are being transmitted over the CAN bus can be read using Bus Master software and PCAN-USB.
DBC File
VERSION ""

NS_ :
	BA_
	BA_DEF_
	BA_DEF_DEF_
	BA_DEF_DEF_REL_
	BA_DEF_REL_
	BA_DEF_SGTYPE_
	BA_REL_
	BA_SGTYPE_
	BO_TX_BU_
	BU_BO_REL_
	BU_EV_REL_
	BU_SG_REL_
	CAT_
	CAT_DEF_
	CM_
	ENVVAR_DATA_
	EV_DATA_
	FILTER
	NS_DESC_
	SGTYPE_
	SGTYPE_VAL_
	SG_MUL_VAL_
	SIGTYPE_VALTYPE_
	SIG_GROUP_
	SIG_TYPE_REF_
	SIG_VALTYPE_
	VAL_
	VAL_TABLE_

BS_:

BU_: DBG DRIVER MOTOR SENSOR_BRIDGE GEO

BO_ 100 DRIVER_HEARTBEAT: 1 DRIVER
 SG_ DRIVER_HEARTBEAT_cmd : 0|8@1+ (1,0) [0|0] "" SENSOR_BRIDGE,MOTOR

BO_ 101 MOTOR_CMD: 1 DRIVER
 SG_ MOTOR_CMD_steer : 0|4@1- (1,0) [-5|5] "steering direction" MOTOR
 SG_ MOTOR_CMD_drive : 4|4@1+ (0.1,-5) [-5|5] "kph" MOTOR

BO_ 102 MOTOR_READINGS: 4 MOTOR
 SG_ MOTOR_READINGS_steer_degrees : 0|4@1- (1,0) [-5|5] "steer direction" DRIVER
 SG_ MOTOR_READINGS_speed : 4|4@1+ (0.1,-5) [-5|5] "kph" DRIVER

BO_ 200 SENSOR_ULTRA_SONIC: 8 SENSOR_BRIDGE
 SG_ SENSOR_ULTRA_SONIC_left : 0|10@1+ (1,0) [0|500] "cm" DRIVER
 SG_ SENSOR_ULTRA_SONIC_right : 10|10@1+ (1,0) [0|500] "cm" DRIVER
 SG_ SENSOR_ULTRA_SONIC_middle : 20|10@1+ (1,0) [0|500] "cm" DRIVER
 SG_ SENSOR_ULTRA_SONIC_back : 30|10@1+ (1,0) [0|500] "cm" DRIVER

BO_ 202 SENSOR_BATTERY: 1 SENSOR_BRIDGE
 SG_ SENSOR_BATTERY_voltage : 0|8@1+ (1,0) [0|0] "V" DRIVER

BO_ 300 BRIDGE_DATA_TRANSFER: 8 SENSOR_BRIDGE
 SG_ GPS_DESTINATION_send_latitude : 0|32@1+ (0.000001,0) [0|0] "Degrees" GEO
 SG_ GPS_DESTINATION_send_longitude : 32|32@1+ (0.000001,0) [0|0] "Degrees" GEO

BO_ 301 GEO_READINGS: 8 GEO
 SG_ GEO_READINGS_COMPASS_HEADING : 0|12@1+ (1,0) [0|359] "Degrees" DRIVER, SENSOR_BRIDGE
 SG_ GEO_READINGS_COMPASS_BEARING : 12|12@1+ (1,0) [0|359] "Degrees" DRIVER, SENSOR_BRIDGE
 SG_ GEO_READINGS_DISTANCE_TO_DESTINATION : 24|24@1+ (1,0) [0|0] "Meters" DRIVER, SENSOR_BRIDGE

BO_ 302 GEO_DATA_TO_DRIVER_AND_BRIDGE: 8 GEO
	SG_ GEO_DATA_TO_DRIVER_AND_BRIDGE_latitude : 0|32@1+ (0.000001,0) [0|0] "Degrees" DRIVER, SENSOR_BRIDGE
	SG_ GEO_DATA_TO_DRIVER_AND_BRIDGE_longitude : 32|32@1+ (0.000001,0) [0|0] "Degrees" DRIVER, SENSOR_BRIDGE

BO_ 304 GEO_DEBUG_MESSAGE: 2 GEO
	SG_ GEO_DEBUG_MESSAGE_LOCK : 0|8@1+ (1,0) [0|0] "Boolean" DRIVER
	SG_ GEO_DEBUG_MESSAGE_LOCK_TIME : 8|8@1+ (0.1,0) [0|0] "Seconds" DRIVER

CM_ BU_ GEO "The gps contoller";
CM_ BU_ SENSOR_BRIDGE "The bridge controller";
CM_ BU_ DRIVER "The driver controller driving the car";
CM_ BU_ MOTOR "The motor controller of the car";
CM_ BO_ 100 "Sync message used to synchronize the controllers";
CM_ SG_ 100 DRIVER_HEARTBEAT_cmd "Heartbeat command from the driver";

BA_DEF_ "BusType" STRING ;
BA_DEF_ BO_ "GenMsgCycleTime" INT 0 0;
BA_DEF_ SG_ "FieldType" STRING ;

BA_DEF_DEF_ "BusType" "CAN";
BA_DEF_DEF_ "FieldType" "";
BA_DEF_DEF_ "GenMsgCycleTime" 0;

BA_ "GenMsgCycleTime" BO_ 100 1000;
BA_ "GenMsgCycleTime" BO_ 200 50;
BA_ "FieldType" SG_ 100 DRIVER_HEARTBEAT_cmd "DRIVER_HEARTBEAT_cmd";

VAL_ 100 DRIVER_HEARTBEAT_cmd 2 "DRIVER_HEARTBEAT_cmd_REBOOT" 1 "DRIVER_HEARTBEAT_cmd_SYNC" 0 "DRIVER_HEARTBEAT_cmd_NOOP" ;
Sensor ECU
Hardware Design
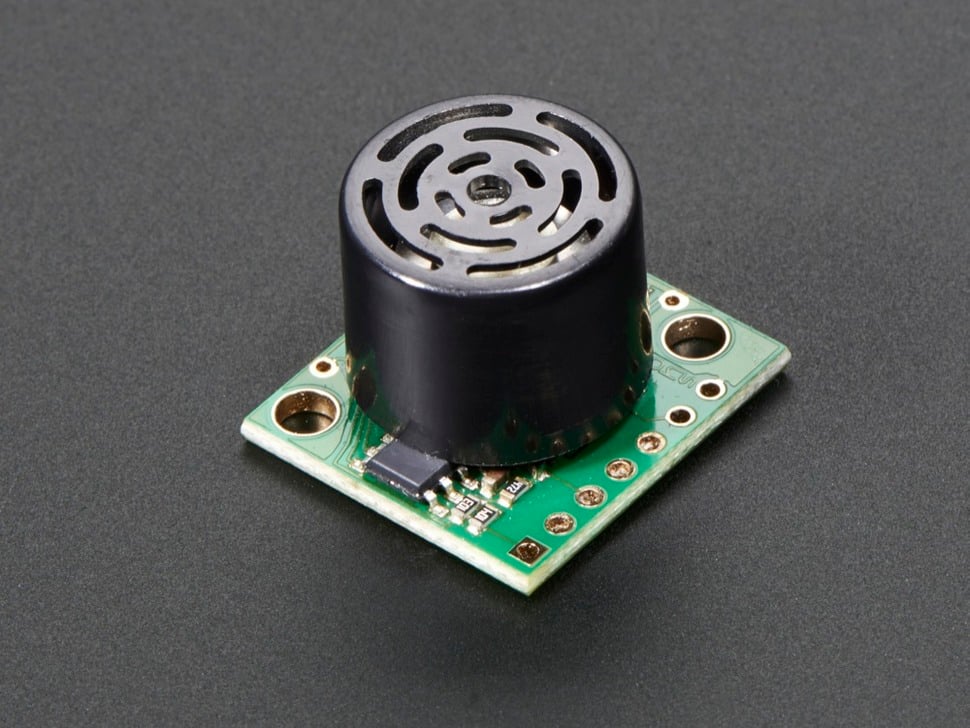
The obstacle detection sensors utilized here are ultrasonic sensors, specifically the MB1000 LV-MaxSonar-EZ0 sensors from MaxBotix. These sensors contain a membrane that must be triggered to emit ultrasonic waves at regular intervals. When these waves collide with an object and return to the sensor, they strike the membrane, generating a pulse that is used for detection.
Software Design
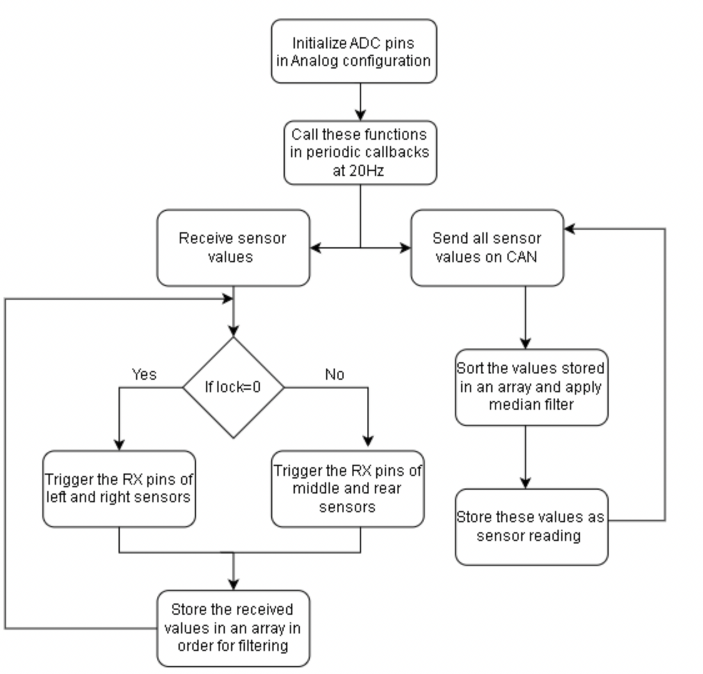
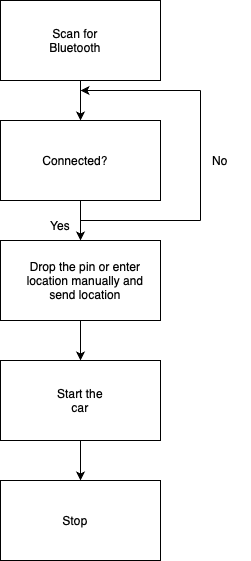
The flow is depcited below. We will start the trigger and wait for the sensor to recieve the data back. We will calculate the time of the sound transmitted and recieved and based on this, we get to know the distance.
Technical Challenges
For frequency noise measurements, such as when values suddenly change or fluctuate within a certain range, a filter is implemented. For this purpose is the mean filter, which stores a series of values in an array and then calculates the mean of all the stored values.
Motor ECU
Motor - https://gitlab.com/Ouriquco/cmpe_243_team_zero/-/tree/NodeMotor/projects/MotorNode?ref_type=heads
The motor is controlled by an Electronic Speed Controller (ESC), which serves as an interface between the motor and the power source (e.g., battery). The ESC receives input signals, typically from a microcontroller or remote control receiver, to adjust the motor's speed, direction, and sometimes braking. The motor node sends PWM signals to the ESC, which decodes these signals and converts them into the appropriate power levels for the motor. The motor node's role is to receive commands from the driver node, which processes obstacle avoidance and geolocation algorithms over the CAN bus. Understanding the various PWM values corresponding to different motor operations is critical for precise control and efficient performance.
Hardware Design
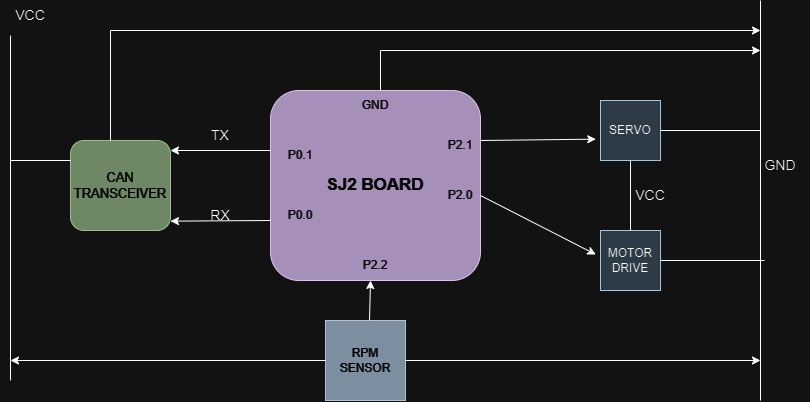
The motor is controlled using various PWM signals to move forward, backward, or steer in different directions. The SJ2C board has specific pins designated for PWM signals. Two such pins, P2.0 and P2.1, are dedicated to controlling the motor's speed and servo. The SJ2 board, with its excellent I/O capabilities, allows for precise modulation of output signals to accurately control both the DC and servo motors.
RPM SENSOR
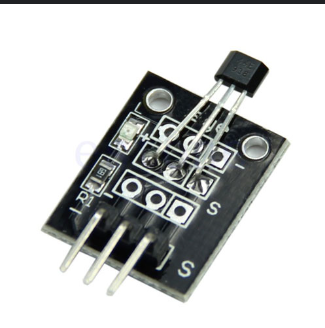
In our project, we have integrated a Hall effect RPM sensor to accurately monitor the rotational speed of the vehicle's wheels. This sensor is strategically positioned on the car's chassis, adjacent to the shock absorbers, to ensure precise measurement of wheel rotation. The RPM sensor provides essential data for maintaining a consistent vehicle speed. Additionally, this sensor data can be used for various performance analyses, such as detecting wheel slippage, improving traction control, and enhancing overall vehicle stability. The real-time RPM data is transmitted to the vehicle's control unit, which adjusts the motor's power output to achieve optimal driving conditions. By utilizing the Hall effect RPM sensor, we ensure that the vehicle operates efficiently and safely under different driving scenarios.
Decoding the ESC PWM
The motor serves two primary functions: driving and steering. For driving, the motor can move forward or backward. For steering, it can turn left, right, slightly left, or slightly right. Each of these modes requires unique PWM signals that must be applied to the ESC to operate the motor and servo correctly.
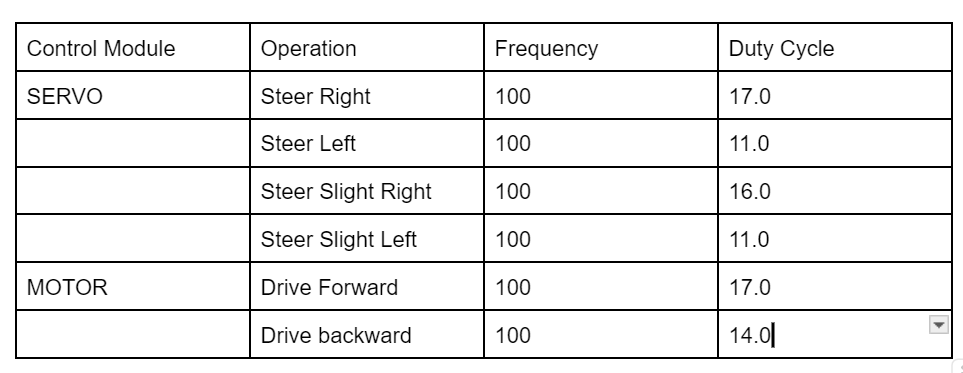
There are two methods to achieve this: using a logic analyzer or an oscilloscope. We employed a logic analyzer to read and analyze the signals from the RC car when connected to the remote control for different operations. Through this analysis, we identified key parameters of the PWM signals, such as duty cycle and frequency. These parameters corresponded to various actions performed by the motor and servo in the RC car. By understanding the relationship between these parameters and the desired actions, we could replicate and control these actions autonomously, effectively replacing the functionality of the remote control.
This analysis enabled us to develop autonomous vehicle motor operations by hardcoding these values into the code. It allowed us to create a custom control system that could replicate the desired actions based on the analyzed PWM signals. With this system in place, the RC car could execute predefined maneuvers and tasks without relying on manual input from a remote control.
Observed PWM signals for traxxas is :
Software Design
The codebase is divided into multiple modules, including PID logic, PWM logic, and RPM sensor, to ensure easy and efficient code management. The core section focuses on the motor driver logic, detailing the motor's response to obstacles or impediments. This encapsulation keeps the code focused and understandable, facilitating future updates and modifications. Another separate module handles the initialization process, streamlining the configuration of GPIO (General Purpose Input/Output) and PWM (Pulse Width Modulation) channels for the motor. This modular initialization file provides a clear overview of the motor setup, making it easier to manage and maintain.
PERIODIC CALLBACK FUNCTIONS
periodic_callbacks__intialize: This includes can intialization, gpio_set, RPM_init, motor__init.
uint32_t baudrate_kbps = 100;

  // 16 bytes per frame and 20 message in queue
  uint16_t rxq_size = 20;
  uint16_t txq_size = 20;

  can_initialization(can2, baudrate_kbps, rxq_size, txq_size);

  gpio_set(board_io_get_led0());
  gpio_set(board_io_get_led1());
  gpio_set(board_io_get_led2());
  gpio_set(board_io_get_led3());
  // fprintf(stderr, "in periodic before pwm\n");
  RPM_init();
  motor__init();
periodic_callbacks__10hz :
This has a callback_count wait to initialize the motor with neutral duty cycle and the main module to be run.
void periodic_callbacks__10Hz(uint32_t callback_count) {


  // Add your code here
  if (callback_count <= 10) {

    motor__set_dc_and_servo_to_neutral();
  } else {
    msg_bank__handle_msg();
    // test_run();
  }
}
Technical Challenges
1. Decoding startup sequence
The motor didn't start with a single 15.0f duty cycle. After analyzing with a logic analyzer, we discovered that the ESC requires a neutral cycle for at least 1 second to initialize. To address this, we utilized the `callback_count` parameter in the periodic function to provide a PWM signal with a neutral duty cycle for the first 10 counts, as each call represents 0.1 seconds in a 10Hz frequency, resulting in a total of 1 second (0.1 sec x 10 = 1 sec).
2. Decoding the reverse sequence
While all other motor operations functioned correctly, reverse did not work initially. We discovered that, similar to the startup sequence, there is a specific sequence required for reversing. The sequence is as follows: first, provide a reverse PWM signal (10.0f) to stop the car, then a neutral PWM signal (15.0f), followed by another reverse PWM signal (10.0f) which actually starts the vehicle reversing. Finally, send a neutral PWM signal (15.0f) to stop the car from reversing further.
3. Delay to each step of reverse
Even with the correct reverse sequence, the car did not reverse because a single PWM signal was insufficient for the vehicle to respond. Therefore, we introduced a `REVERSEMODE` flag. When this flag is set to true, all other operations are paused, and each step of the reverse sequence runs until a specified stop count is reached. The flag is then reset to false, allowing the car to resume normal operations.
Geographical Controller & LCD
Gitlab Geographical Controller Source Code - [26]
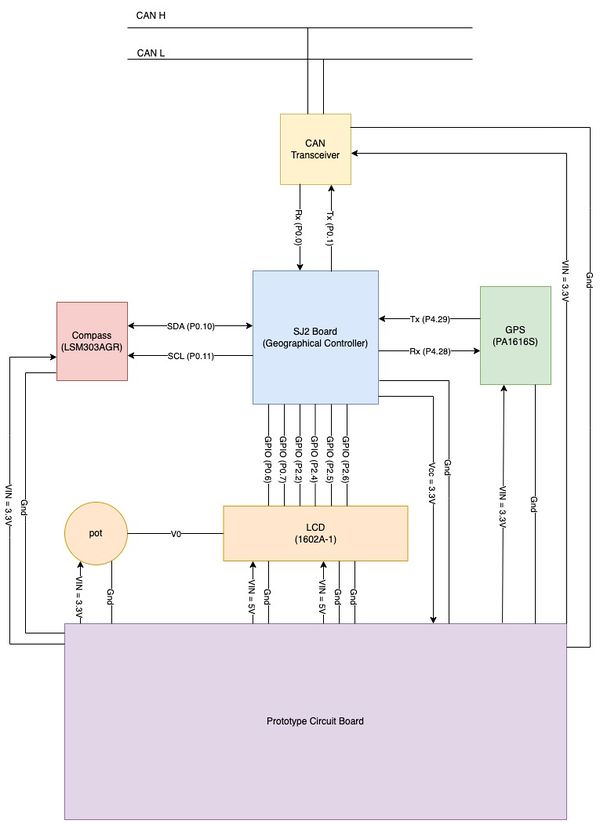
The geographical controllers responsibilities are to ensure that the driver and sensor-bridge controllers receive the most accurate data related to bearing, heading, destination and current coordinates. This information provides the driver controller with the data they need to make logical decisions related to the movement of the vehicle. Also, the information is needed to tell the user why the vehicle may be changing direction. A geographical controller is necessary in any application where location is integrated into the system.
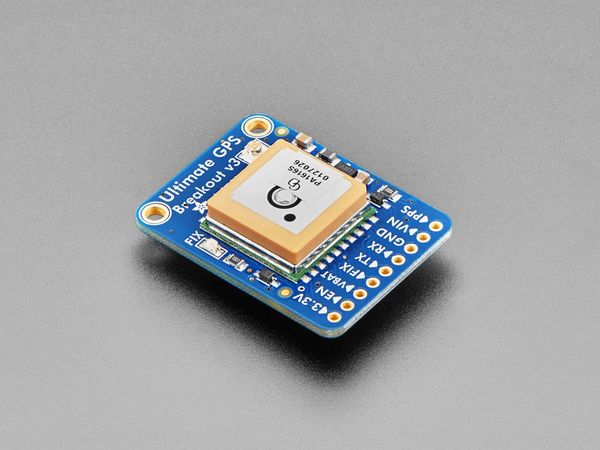
The GPS module has a built in antenna and acquires latitude and longitude in GPGGA format every 10Hz. This module is rated between 3.3V and 5V. In our project we powered this module using 3.3V by integrating it on the prototype board. In addition, we used an external antenna to increase signal strength.
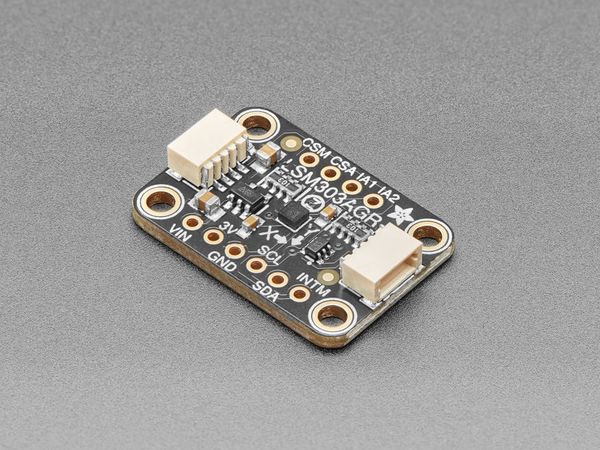
The compass module is a triple axis accelerometer/magnetometer. The accelerometer can tell you which direction is down towards the Earth (by measuring gravity). The magnetometer can sense where the strongest magnetic force is coming from, generally used to detect magnetic north.
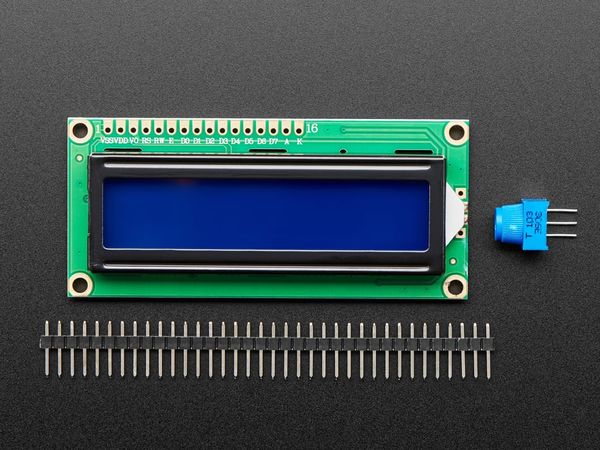
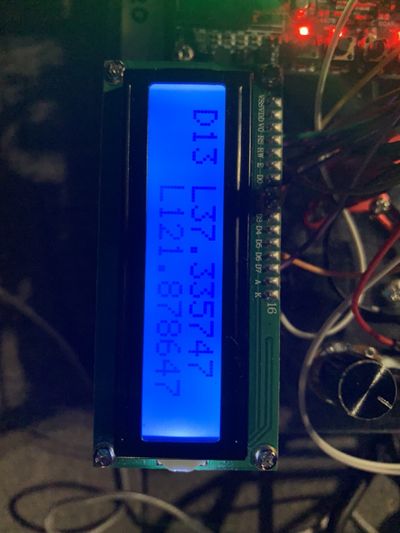
The LCD module has a screen that is can be configured up to 16 characters wide and spans 2 rows. The text is white on blue background and is lit by a single LED.
Hardware Design
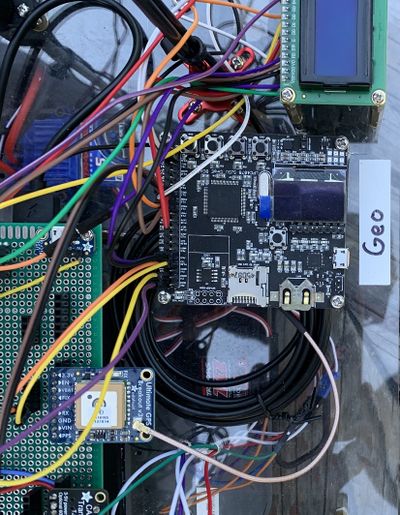
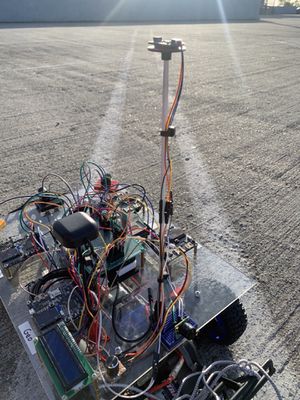
The GPS and Compass are both powered by 3.3.V through the prototype board. The GPS uses UART to send and receive GPGGA data. The Compass sends and receives data over I2C. The microcontroller processes this data periodically, every 10 Hz, and sends the data to the CAN transceiver which is connected to the CAN bus line. The compass experienced soft iron and hard iron distortions. Therefore, it was necessary to mount the compass as far away from the car as possible. This goal was accomplished by mounting it approximately 1 ft above the vehicle. In addition, it was difficult for the GPS to acquire a signal fix. To mitigate this issue we mounted an external compass approximately 6 inches above the vehicle.
Software Design
Geo controller modules:
- 1. GPS
- 2. Compass
- 3. Waypoints
- 4. Geo logic
- 5. CAN handler
- 6. Line buffer
- 7. LCD
- 1. GPS
gps.h
typedef struct {
  float latitude;
  float longitude;
} gps_coordinates_t;

void gps__init(void);
void gps__run_once(void);

gps_coordinates_t gps__get_coordinates(void);

}
- 2. Compass
compass.h
typedef struct {
  float x;
  float y;
  float z;
} mag_data_t;

typedef struct {
  double latitude;
  double longitude;
} Coordinates;

void compass_init();

float get_current_compass_heading();

double calculate_bearing(Coordinates point1, Coordinates point2);

double calculate_distance(Coordinates point1, Coordinates point2);

}
- 3. Waypoints
waypoints.h
gps_coordinates_t waypoints__find_next_waypoint(gps_coordinates_t origin, gps_coordinates_t destination);

double waypoints__calculate_distance(gps_coordinates_t point1, gps_coordinates_t point2);

double waypoints__update_current_bearing(gps_coordinates_t point1, gps_coordinates_t point2);
- 4. Geo logic
geo_logic.h
// Input Data
// Destination coordinates from the bridge controller
static dbc_BRIDGE_DATA_TRANSFER_s data_from_bridge;

// Output Data
// Compass and destination data
dbc_GEO_READINGS_s geo_readings;

// Debug Message Data
dbc_GEO_DEBUG_MESSAGE_s debug_messages;
dbc_GEO_DATA_TO_DRIVER_AND_BRIDGE_s coordinates_to_driver_and_bridge;

void geo_logic__encode_coordinates(can__msg_t *msg);

void geo_logic__encode_geo_readings(can__msg_t *msg);

void geo_logic__decode_bridge_messages(can__msg_t *msg);

gps_coordinates_t geo_logic__get_gps_readings(void);

void geo_logic__print_values(void);

void geo_logic__set_dummy_geo_readings(uint32_t callback_count);

dbc_GEO_DATA_TO_DRIVER_AND_BRIDGE_s geo_logic__get_current_coordinates(void);

dbc_BRIDGE_DATA_TRANSFER_s geo_logic__get_destination_coordinates(void);

dbc_GEO_READINGS_s geo_logic__get_navigation_data(void);

void geo_logic__encode_debug_messages(can__msg_t *msg, uint32_t callback_count);
- 5. CAN handler
can_handlers.h
void can_handler__init(void);

void can_handler__manage_mia_10hz(void);

void can_handler__handle_all_incoming_messages(void);

bool can_handler__transmit_messages_10hz(uint32_t callback_count);

void can_bus_reset_on_is_off(void);
- 6. Line Buffer
line_buffer.h
// Do not access this struct directly in your production code or in unit tests
// These are "internal" details of the code module
typedef struct {
  void *memory;
  size_t max_size;
  size_t write_index;
  size_t read_index;
  size_t item_count;
} line_buffer_s;

/**
 * Initialize *line_buffer_s with the user provided buffer space and size
 * Use should initialize the buffer with whatever memory they need
 * @code
 *  char memory[256];
 *  line_buffer_s line_buffer = { };
 *  line_buffer__init(&line_buffer, memory, sizeof(memory));
 * @endcode
 */
void line_buffer__init(line_buffer_s *buffer, void *memory, size_t size);

// Adds a byte to the buffer, and returns true if the buffer had enough space to add the byte
bool line_buffer__add_byte(line_buffer_s *buffer, char byte);

/**
 * If the line buffer has a complete line, it will remove that contents and save it to "char * line"
 * Note that the buffer may have multiple lines already in the buffer, so it will require multiple
 * calls to this function to empty out those lines
 *
 * The one corner case is that if the buffer is FULL, and there is no '\n' character, then you should
 * empty out the line to the user buffer even though there is no newline character
 *
 * @param line_max_size This is the max size of 'char * line' memory pointer
 */
bool line_buffer__remove_line(line_buffer_s *buffer, char *line, size_t line_max_size);
- 7. LCD
lcd.h
void lcd__init_pins();

void lcd__init();

void lcd__command(uint8_t cmd);

void lcd__data(uint8_t data);

void lcd__write_string(char *str);

void lcd__print_geo_readings(dbc_GEO_READINGS_s geo_readings, dbc_GEO_DATA_TO_DRIVER_AND_BRIDGE_s current_ccordinates);

void lcd__print_distance_to_destination(dbc_GEO_READINGS_s geo_readings, dbc_BRIDGE_DATA_TRANSFER_s bridge_data);
Technical Challenges
- Issue: There was difficulty acquiring GPS signal during testing.
- Reason: We were testing in a space surrounded by a lot of infrastructure (e.g. buildings).
- Solution: Test in a space that is open and flat.
- Issue: Compass values were varying a lot and seemed arbitrary.
- Reason: This is due to the soft iron and hard iron distortion.
- Solution: Mounting the compass away from ferrous material and electronic currents.
Communication Bridge Controller
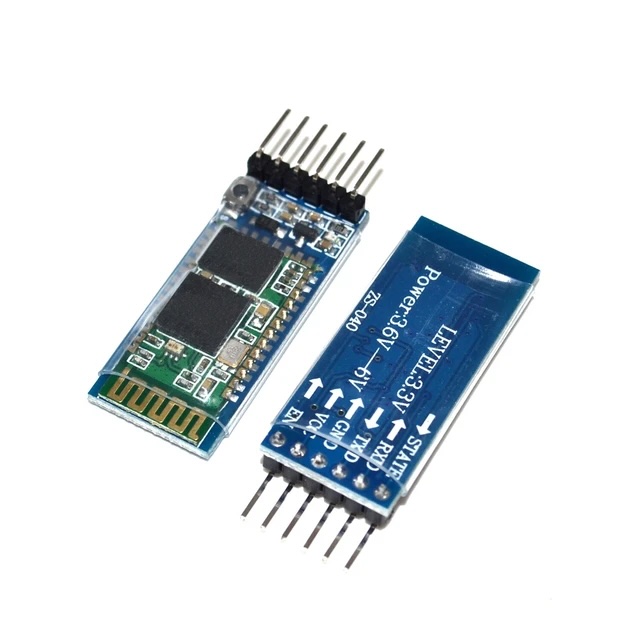
The HC-05 Bluetooth module is a widely used and versatile wireless communication module that enables Bluetooth connectivity using its Serial Port Protocol. Key Features HC-05 Bluetooth Module:
Bluetooth Standard:
The HC-05 Bluetooth module operates on Bluetooth version 2.0 + EDR (Enhanced Data Rate), supporting reliable and efficient wireless communication.
Operating Modes:
The module can operate in both Master and Slave modes. In Slave mode, it can pair with other Bluetooth devices, while in Master mode, it can initiate connections.
Communication Range:
The HC-05 is classified as a Class 2 Bluetooth device, providing a communication range of approximately 10 meters (33 feet). This makes it suitable for short to medium-range applications.
Serial Communication:
It communicates with other devices using a serial communication interface, making it compatible with microcontrollers like Arduino. The module typically supports standard baud rates like 9600 bps.
AT Command Configuration:
The HC-05 Bluetooth module can be configured using AT commands, allowing users to customize various parameters such as the device name, pairing code, and operating mode.
Voltage Compatibility:
The module operates within a voltage range of 3.6V to 6V, making it compatible with a variety of power sources.
Security Features:
The HC-05 supports basic security features, including the ability to set a PIN code for pairing and configuring security modes.
LED Indicator:
Many HC-05 modules have an onboard LED indicator that provides visual feedback on the pairing status and communication activity.
Hardware Design
Connected Vcc, GND, Tx and Rx pins. It requires 3.6-6V for functioning. The Tx and Rx pins are used to transmit and recieve the data to and from the application.
Software Design
o begin using serial transmission, you first need to pair the module to your device. During the pairing process, the password request encountered should be expecting one of the default passwords "1234" or "0000". You can change this password using one of the AT commands. We are calling the bluetooth the recieve and transmit functions periodically to send and recieve data in 10Hz periodic callbacks.
Technical Challenges
When we were powering to 3.3V, the LED on the bluetooth was blinking but it was not listing on the mobile phone when we had to connect it. After careful reading of the datasheet, we figured out that we have to power up with 3.6-6V.
Master Module
https://gitlab.com/Ouriquco/cmpe_243_team_zero/-/tree/DriverNode
The driver node acts as the brain of the entire vehicle, controlling its movements according to the developed algorithm. It receives data from sensors and the geo module, and based on the analyzed data, sends commands to the motor module. The functions of the driver node include:
- Executing obstacle avoidance - Managing CAN bus reception and transmission of data from all nodes - Interacting with sensor data from other nodes and processing relevant data locally
Hardware Design
Software Design
The software workflow is as follows :
PERIODIC CALLBACKS
1) periodic_callbacks__intialize()
Simple intialization of can , and gpio__set methods
void periodic_callbacks__initialize(void) {
  // This method is invoked once when the periodic tasks are created
  can_initialization(can2, 100, 10, 10);
  gpio_set(board_io_get_led0());
  gpio_set(board_io_get_led1());
  gpio_set(board_io_get_led2());
  gpio_set(board_io_get_led3());
}
2) periodic_callbacks__10hz()
run the main function to initiate the driver logic
void periodic_callbacks__10Hz(uint32_t callback_count) {

  msg_bank__handle_msg();
}
Technical Challenges
1) Complicated driver logic
Making the driver logic complicated can make decision making difficult and latent. Keeping the driver logic as simple as possible is better.
2) Diagnostic run
It would always be unclear why the car is behaving the way it is . Is the driver logic or sensor reading or geo algo data so adding leds and analyzing them was a life saver to have. In my code i dedicated led0 to blink if there is any sensor data that is below threshold, led 1 to blink is there any sensor value below the normal threshold for obstacle avoidance and led 2 if the vehicle is following obstacle avoidance.
Mobile Application
MIT App Inventor 2 is a free, open-source web application for creating basic Android mobile applications without needing to code in Java or Kotlin. Instead, it uses block-based coding and a graphical user interface (GUI) similar to the Scratch programming language. Users can drag and drop blocks to design the user interface (UI) and employ functional blocks to develop logic, functions, and control flow.
Originally developed by Google and released in 2010, MIT App Inventor for Android was created by a team led by Hal Abelson and Mark Friedman. In the latter half of 2011, Google released the source code, ceased its server operations, and funded the establishment of The MIT Center for Mobile Learning. This center, led by App Inventor creator Hal Abelson and MIT professors Eric Klopfer and Mitchel Resnick, launched the MIT version of App Inventor in March 2012.
The platform includes the MIT AI Companion app, a mobile application that allows users to download a server-cached version of their app in development. This feature facilitates easy and convenient testing of intermediate functions and bug fixes by enabling real-time observation of changes. Once development is complete, users can build and download a ".apk" file, an installable file for the Android OS that allows them to test their app as a standalone application.
The web app features two key sections for mobile app development: the Designer page and the Blocks page.
Flow
User Interface
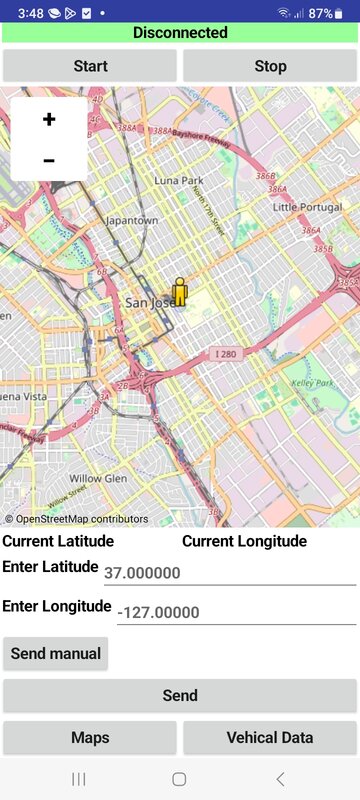
Connects and disconnects the bluetooth and has start and stop buttons. The destination can be given by dropping the pin on the map. It can also be entered manually.
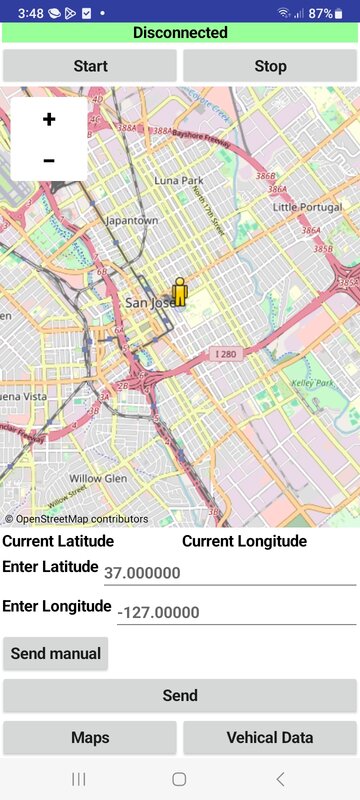
Connects and disconnects the bluetooth. This screen gives the current latitude, longitude, distance to destination, speed of the car and all other details.
Bluetooth Block
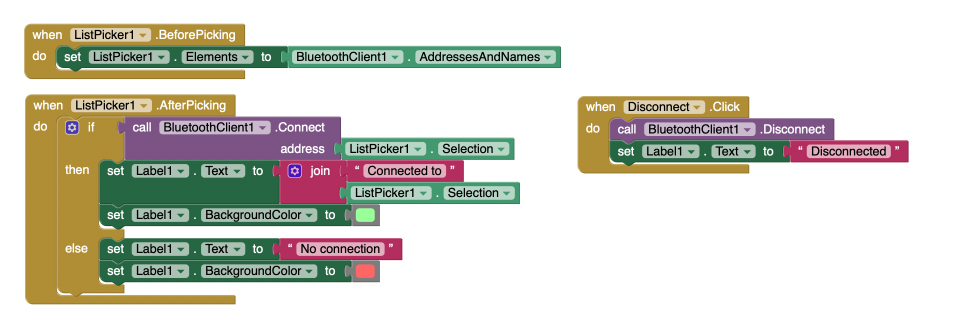
The App uses the bluetooth client block to establish a connection with the HC-05 bluetooth module onboard the car. It is necessary to establish connection and connect to a bluetooth pair to send and receive messages.
Testing and Downloading
MIT App inventor projects can be accessed for testing on the MIT AI companion app or built into a downloadable APK file. It can also be exported as a file to be later imported. The file extension for an app inventor project is “.aia”.
Conclusion
The RC car project provided use with a platform to demonstrate our problem-solving skills and design prowess. It demanded that each team member take charge of their responsibilities to ensure that each controller and modules were operational. Our focus was on crafting clean code, conducting thorough unit testing and building reliable hardware. Together we were able to successfully achieve the main goals from our project and created an autonomous vehicle that can navigate from a starting point to a given destination while avoiding obstacles. Our passion for our commitment to continuous improvement was one of our greatest strengths.
There was many things that we learned during this duration of this project. For example, we learned how to work on a team and manage responsibilities by dividing up work, assigning roles and managing the code repository. Also, having to integrate different hardware components has given us a deeper understanding of the different types of communication that is used in embedded systems such as UART, I2C and CAN. In addition, by creating and utilizing a DBC file, we were able to get a feel for what development may be like in big automotive industries. Another example was during the development of the mobile app we discovered the challenges that are associated with Bluetooth and Wi-Fi connectivity.
Overall this project has been on the most educational and fulfilling experiences for us, offering practical insights which will benefit us in our careers.
Project Video
Link to demo: [27]
Project Source Code
Link to Source Code: [28]
Advise for Future Students
- Start ordering parts as soon as possible. If you wait to order parts it will slow down integration and testing.
- Plan to meet every week for 10+ hours to work on the project with your team.
- Pay attention the power requirements of your sensors and make sure that your prototype board can accommodate them.
- Purchase a CMPS12 compass because it does some of the major calculations on the module itself and will save you time in development.
- Don't take this class if you think it will be easy. It's one of the hardest classes because it is demanding of your time. With that said, it is a very rewarding class which will prepare you for the automotive industry.
Acknowledgement
We give a big shout to Professor Kang for giving us such a rich environment to learn and grow. Also, I will give a shout out to Kyle, our teaching assistant, for always helping us diagnose our problems outside of the classroom especially our CAN bus off problem the day before the demo. Lastly, a shout out to Ninaad, our other teaching assistant for giving us guidance through his own experience as a former CMPE 243 student.
References
Ultrasonic datasheet: [29]
GPS datasheet: [30]
Compass datasheet: [31]
LCD datasheet: [32]
